How to Recover Data from Android Devices with Android Data Recovery
Android, the world's most popular mobile platform, which is used everywhere, by every type of customer. That's why Android phone powers hundreds of millions of users in more than 190 countries around the world. Everyday, we add new data and delete old data on our phone. However, many Android users experience the data loss of Android phone due to various kinds of reasons, like factory reset (Device Reset), system crash, ROM flashing, deleting data accidentally, new system upgrade, stuck in black/white screen of death, locking by forgotten password, and virus attack etc. It's really a disaster that important data lost forever. Is there any way to restore deleted data from Android Phone? The good news is that there is an Android Data Recovery programs specially designed to solve the problem of data loss on Android phone/tablet.
Key Features of Android Data Recovery:
- Support wide variety of Android Phone, like Samsung Galaxy S5, S4, S3, S3 mini, Note 2, Note 3, Note 4, HTC One, LG, Sony, Motorola, ZET, Huawei, etc. Meanwhile, it compatible with all version of Android OS including the latest Android 4.4.4 KitKat.
- Allows you restore various kinds of files, including contacts, photos, text messages, call logs, videos, musics, and other documents.
- Selectively preview and retrieve data from Android. All data found can be restored directly.
- Simple to use and risk-free. You can recover deleted data with a few clicks.
Step By Step Tutorial:
- Step 1.Download and install Android Phone Recovery. An Android Data Recovery program highly recommended here is Jihosoft, which is specially dedicate to android data recovery tools.
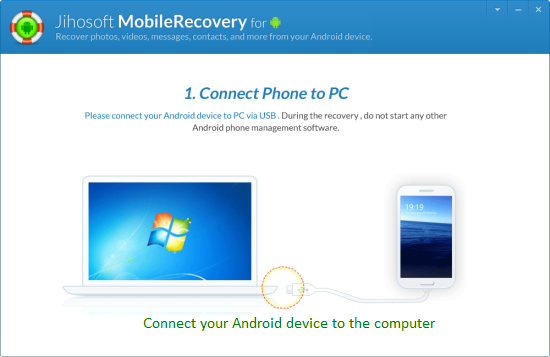
- Step 2.Connect your Android device to computer via USB. Then double click the icon to run Jihosoft Android Phone Recovery. It will automatically detect your device.(keep your device open)
- Step 3.Enable USB debugging on your Android device(optional). If you have already enabled USB debugging, just discard this step.
You may want to learn how to enable USB debugging on your Android device.
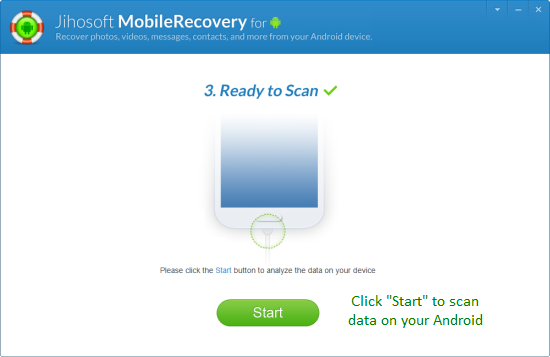
- Step 4.Analyze and scan data on you Android device. After enabling USB debugging, simply hit the button "Opened? Next....", and then tap "Start" to analyze and scan data on your device.
- Step 5.Selectively preview and restore data on Android. In this step, you will see all data found on your device displayed on the scanning result. Click them one by one to choose what you want to retrieve. Finally, hit the button "Recover" to get lost data back. You can save them wherever you want on computer.
More tips and tricks you need to know:
- When you delete data on your Android device, it isn't really erased- it continues existing. That's why we can restore deleted files. Deleting a file's pointer and marking its space as available is an extremely fast operation. In contrast, actually erasing a file by overwriting its data takes significantly longer. For example, if you're deleting a 1 GB file, that would be near-instantaneous. To actually erase the file's contents, it may take several minutes – just as long as if you were writing 1 gigabytes of data to your Android device. In that case, once you accidentally lost files, you'b better stop using your device to avoid overwriting and permanently loss.
- If by any chance that this Android Data Recovery program cannot identify your Android device after enabling USB debugging, reconnect it and try again. Keeping an eye on the screen of your Android device, you'll get a pop-up message. Just click "OK" to allow USB debugging.
- Don't disconnect your device in the process of recovery and you better connect one Android device at a time to avoid the unnecessary connection troubles.
Labels: Android data recovery, Android Phone Recovery, recover data from Android, restore data from Android, retrieve data from Android devices


0 Comments:
Post a Comment
Subscribe to Post Comments [Atom]
<< Home