How to partition myphone rio fun Andorid 4.4.2(Kitkat)
How to partition myphone rio fun Andorid 4.4.2(Kitkat)
Requirements:
1.must be rooted - (if not proceed in this link [ClickHere]
2. sd card 4gb and up
3. usb card reader
4. PC/LAPTOP
3. usb card reader
4. PC/LAPTOP
Download all this:
-Minitool partition Wizard Manager
-Minitool partition Wizard Manager
I am not resposible for any damage or soft/hard brick will happened to your device!
Procedure:
1. First back up all your files to the computer because partitioning will wipe your data.
2. Insert your SD card to a usb card reader and open it on your computer.(not via USB cable)
4. Download Mini Tool and Open it in your PC/LAPTOP. Locate your SD card (be careful in choosing and make sure not to choose the drive of your computer)
5. Right click and choose Delete.
5. Right click and choose Delete.
6. Right click on it again and choose Create New. Create “FAT32″ partition (This is where all your media files will go. Be sure to make it bigger than the 2nd part)
7. Select “Create as: PRIMARY”
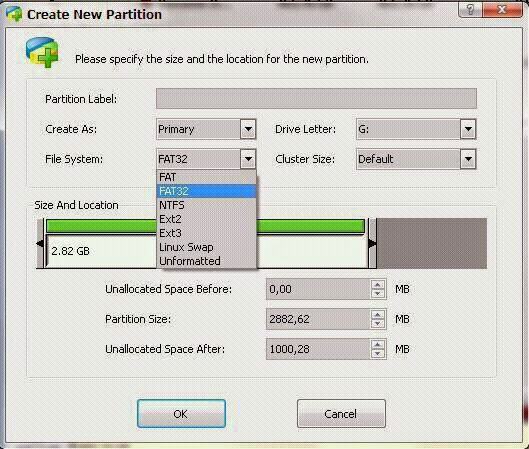
8. Next, create an ext2. I suggest a value of 512Mb would be big enough but its your choice...
9. Select “Create As: PRIMARY” (make sure that it is both set to primary because it will not work if it is not set to primary)
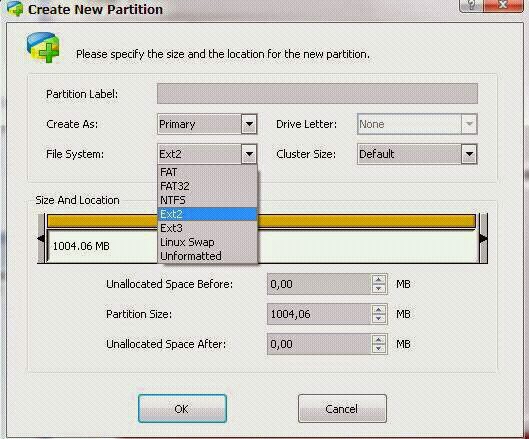
10. Click the “Apply” button on the top left corner and wait for it to finish the process. Done.
11. Put back your SD card to your phone and switch it on.
12. Download and install Link2sd from Google Play Store link given above
13. Download lucky patcher and click menu of patches. Watch the videos below on how to patch using Lucky Patcher.
14. Open Link2sd. You will be prompted to choose between ext2, ext3, ext4 and FAT32. Select ext2.
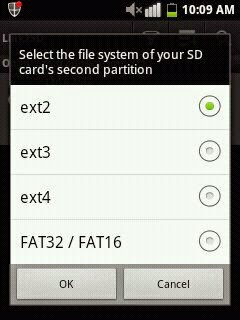
15. It will say mount script created. Reboot your phone now.
16. Open link2sd and if the message doesn’t show up, you succeeded.
17. Go to Link2sd>Settings>check the autolink (to automatically move apps upon installation)
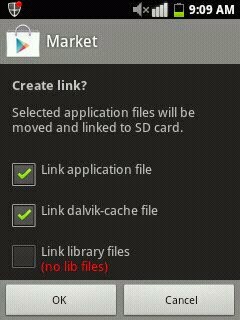
18. If you already have some apps, select “move to phone” then after moving select “Create Link” (be sure to check the three files: app, dalvic-cache and library files)
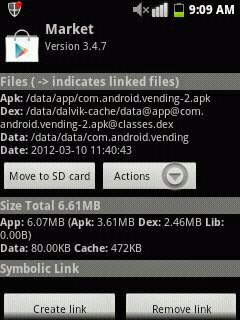
19. To check your memory, select “Storage Info”. This will show you the current state of your internal memory, FAT32, and ext2 partition.
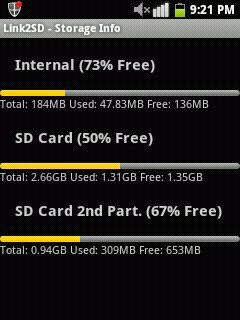
20. Now you’re done.After partitioning and Successful mounting..

20. Now you’re done.After partitioning and Successful mounting..
Next Step on how to unli internal your myphone rio fun
Install Rootexplorer
data/sdext2 check the box of sdext2 change owner/
owner- 1000
group- 1000
Click OK
Then set permission of sdext2
rwxrwx--x
data/sdext2 check the box of sdext2 change owner/
owner- 1000
group- 1000
Click OK
Then set permission of sdext2
rwxrwx--x
Go to root folder/data
COPY this 5 folder
app
app-lib
app-private
dalvik-cache
data
app-private
dalvik-cache
data
PASTE in data/sdext2
Check all this 5 folder click option
LINK TO THIS FOLDER
GO back to DATA or click the back button
Click option CREATE LINK
pop up show OVERWRITE click Yes
Do all this in 5 folder
(app,app-lib,app-private,dalvic cache,data)
Do all this in 5 folder
(app,app-lib,app-private,dalvic cache,data)
now Reboot!
Enjoy you are now unli internal..
Special Credits:
Sanny5 of XDA forum
myphone rio fun techies
myphone rio fun [DEV]
Labels: My Phone Agua Rio Fun, Partition


0 Comments:
Post a Comment
Subscribe to Post Comments [Atom]
<< Home