AndiOS7 - Complete iOS7 theme for Android
Android+iOS = AndiOS; pronounced like Adios, but with a ‘n’ in it.
So, apple finally made the iOS look like Android. It might look as cool as Android, but it still doesn’t have the power Android wields. How? iOS users will get this new look AFTER Apple releases the iOS7 to public later this year. But Android users can get the same look RIGHT NOW. The irony is killing me… :D
Use this theme pack to make your Android device look like iOS7; BEFORE actual iPhone / iPad users can..!! Show it off (or rub it in their faces if you want :P) and enjoy the bragging rights, all thanks to Android’s customization prowess. Change the look of your entire device. Both lockscreen and homescreen. It’s not only icons & wallpapers, like other iOS7 themes floating around.
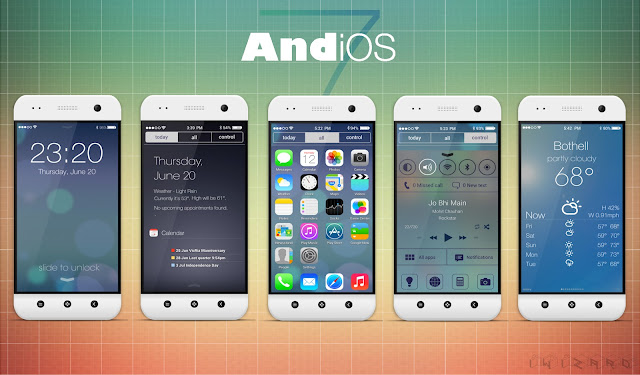
More screen showcases below

FEATURES
Compare screenshots below with actual iOS7 screenshots shown in Apple website and then tell me if this is not the best reproduction of that.
Read Before Buying
This is NOT a ROM theme. And not a stand-alone app. Downloading it won't automatically make your android look like iOS7 and it's not a one tap apply. This pack contains widget skins, wallpapers, icons and other stuff. You have to follow instructions mentioned below to setup the theme. Everything that this theme pack does - is shown in the screenshots.
What this theme doesn't do -
Attention Nexus users (or if your device has on-screen navigation bar) - you must be on a custom ROM like AOKP, Paranoid etc. Or must be rooted to use apps like Hide Softkeys, FullScreen. You'll need to hide the onscreen navigation bar.
If you have any questions, don't hesitate to ask. Leave a comment below or click the "Contact me" button at the top of this post.
Now that these are clear, let's get to theming.
Read Before Buying.
Entire instruction in Video.
Apps you'll need.
Launcher & ROM settings.
Set wallpapers.
Install the uccw theme.
Setup Screen 1.
Setup Screen 2.
Setup Screen 3.
Setup Screen 4.
Setup LockScreen.
Editing and Fine tuning.
Troubleshooting / Tips.
Screenshots.
My other themes.
Video of setup instructions
Easier on Buzz Launcher
Setup Instructions
Apps / Stuff you'll need -
If you bought the app from Amazon App Store; please forward me the purchase receipt that Amazon must have mailed you. I'll mail you other required wallpapers, icons, Widget Locker sliders etc.
Launcher settings -
Giving directions for Nova launcher. The launcher you use must also have similar options, even if in different path.
ROM settings -
If you are not using a Google Nexus device (Galaxy Nexus, Nexus 4 etc) and you don't have onscreen navigation keys (Home, back, recents etc.), you can skip this step.
Giving directions for AOKP ROM. The ROM you use must also have similar options, even if in different path.
Go to android settings > ROM Control > Navigation Bar and set these values -> "Hidden NavBar Enable" - check, Drag handle Opacity - 0%, Drag Handle width - 80% (or whatever you are comfortable with).
If you are not running a custom ROM or if your ROM doesn't have option to hide NavBar, please use apps mentioned before.
Get your screens ready -
Install the AndiOS7 UCCW theme pack -
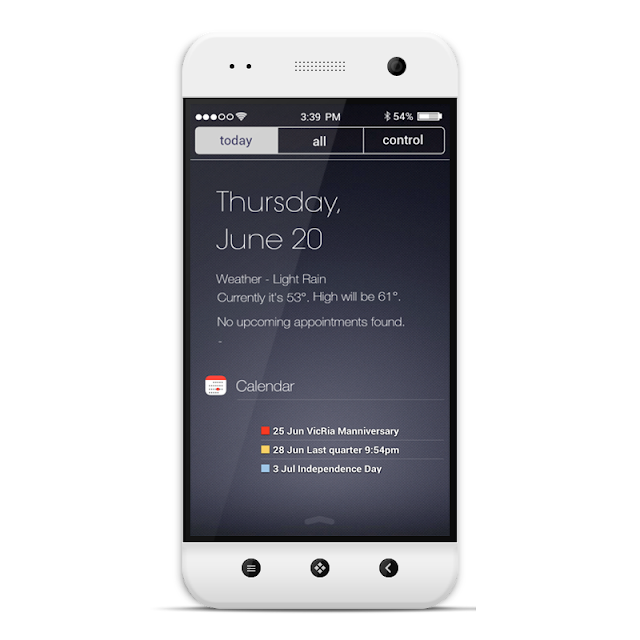
Setup Screen 1 -
.png)
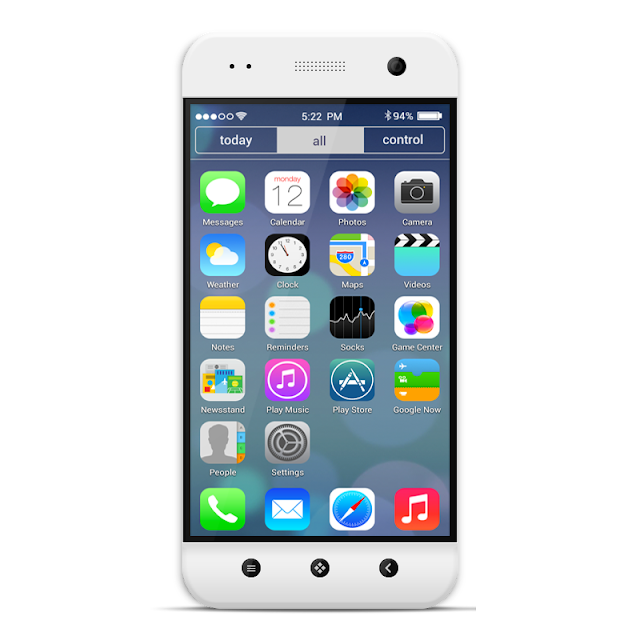
Setup Screen 2 -
.png)
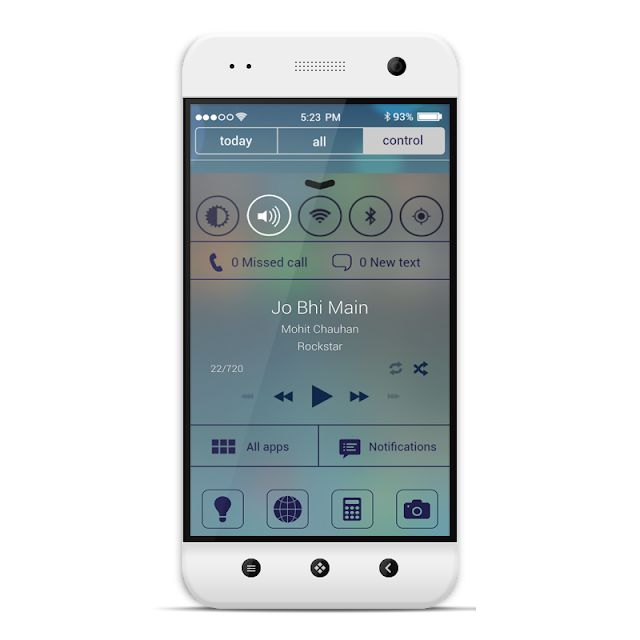
Setup Screen 3 -
.png)
Setup Screen 4 -
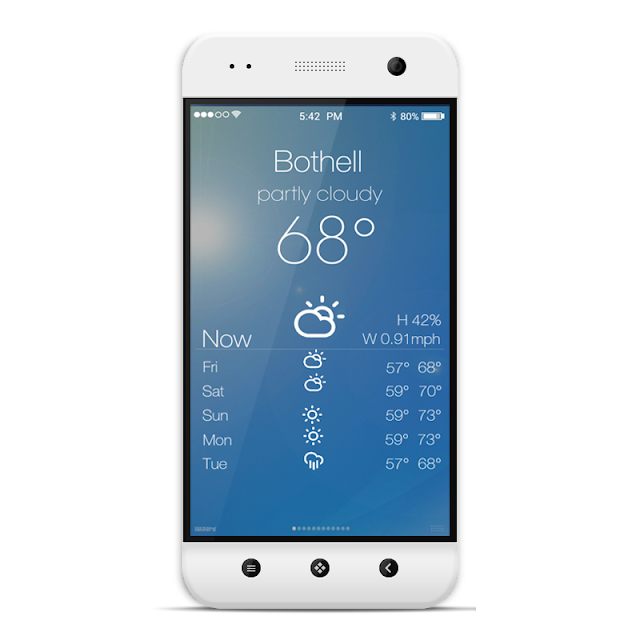.png)
Setup Lockscreen -
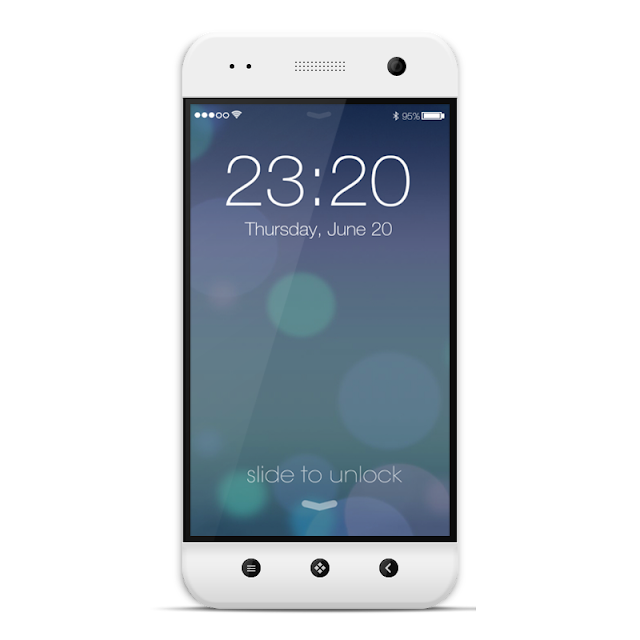.png)
Editing / fine tuning
At this point, all screen look like iOS7 screens. But to make them work fully, you might need to edit apps assigned to uccw widgets' hotspots.
How to edit hotspots in uccw-
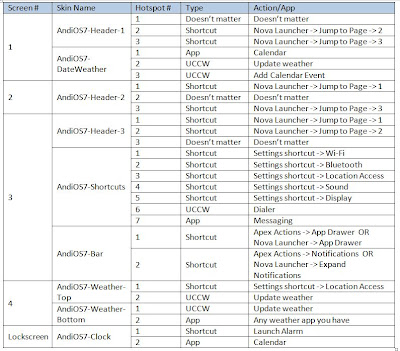
Troubleshooting / Tips
Some of my other works
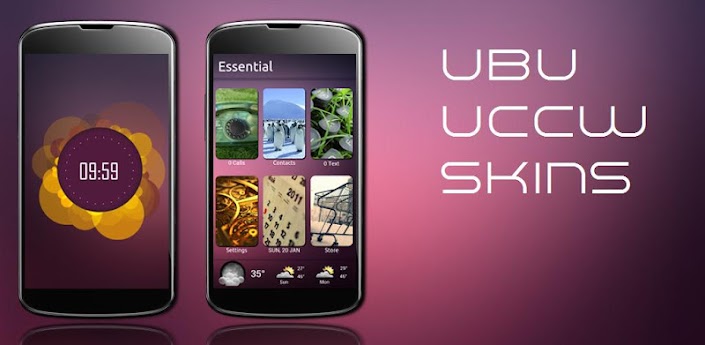
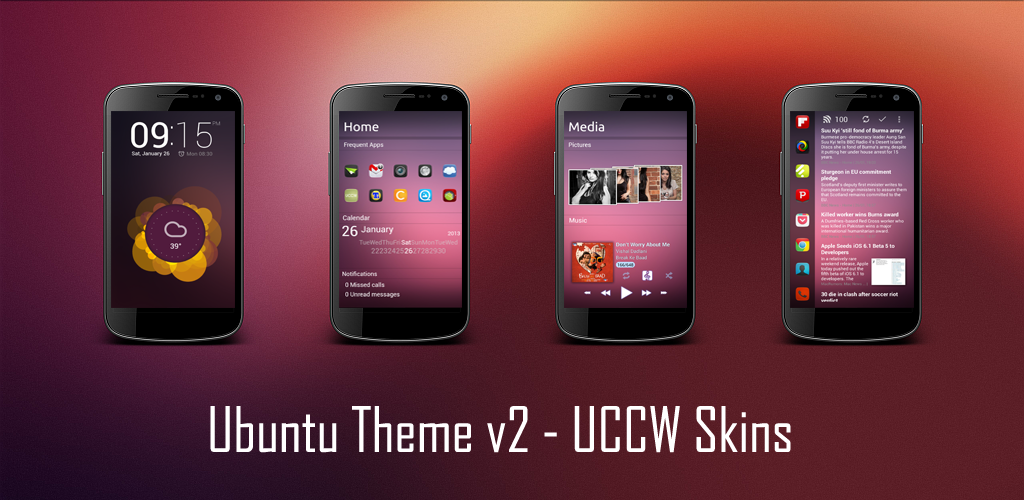

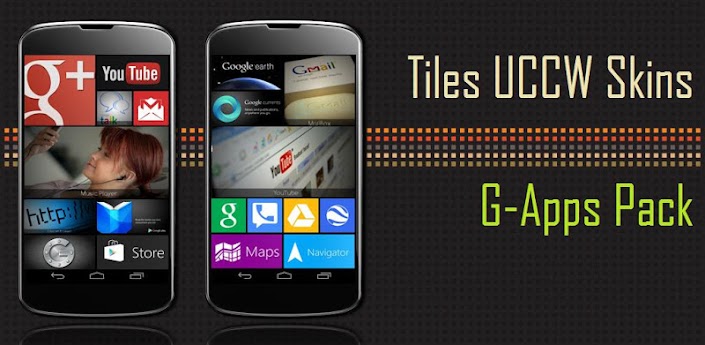

So, apple finally made the iOS look like Android. It might look as cool as Android, but it still doesn’t have the power Android wields. How? iOS users will get this new look AFTER Apple releases the iOS7 to public later this year. But Android users can get the same look RIGHT NOW. The irony is killing me… :D
Use this theme pack to make your Android device look like iOS7; BEFORE actual iPhone / iPad users can..!! Show it off (or rub it in their faces if you want :P) and enjoy the bragging rights, all thanks to Android’s customization prowess. Change the look of your entire device. Both lockscreen and homescreen. It’s not only icons & wallpapers, like other iOS7 themes floating around.


FEATURES
- Get the iOS7 Notification center look on one of your screens.
- Get the iOS7 Control center look on another one of your screens; including widget for power control.
- You can change icons too, to look like those of iOS7.
- Yes, you get custom made HD wallpapers too for all screens.
- iOS7 lockscreen clock and unlock slider.
- A full page weather skin, like the iOS weather app. i.e. an entire homescreen will show weather.
Compare screenshots below with actual iOS7 screenshots shown in Apple website and then tell me if this is not the best reproduction of that.
This is NOT a ROM theme. And not a stand-alone app. Downloading it won't automatically make your android look like iOS7 and it's not a one tap apply. This pack contains widget skins, wallpapers, icons and other stuff. You have to follow instructions mentioned below to setup the theme. Everything that this theme pack does - is shown in the screenshots.
What this theme doesn't do -
- Change the look of your apps. i.e. when you launch any of your installed apps, they won't look like iOS. This theme ONLY changes the look of your homescreen and lockscreen.
- It won't change the look of your notification tray. And you can't '"swipe up from bottom" to get the control center. Both of these are part of your homescreens in this theme. One screen will look like notification center and another screen will look like control center.
- In the statusbar shown in the screenshots - the signal strength, wifi and bluetooth are static images. They are not actual indicators of their status. Only Time and Battery are realtime there.
- The power 'toggle' icons in the control center page are shortcuts and not actual toggles. Tapping on them will take you to their settings page directly and you can turn them on or off from there. Also, these icons' colors don't change depending on your status.
- Lockscreen's "slide to unlock" currently doesn't have a camera shortcut. I might add that in future, if I figure out how.
Attention Nexus users (or if your device has on-screen navigation bar) - you must be on a custom ROM like AOKP, Paranoid etc. Or must be rooted to use apps like Hide Softkeys, FullScreen. You'll need to hide the onscreen navigation bar.
If you have any questions, don't hesitate to ask. Leave a comment below or click the "Contact me" button at the top of this post.
Now that these are clear, let's get to theming.
Read Before Buying.
Entire instruction in Video.
Apps you'll need.
Launcher & ROM settings.
Set wallpapers.
Install the uccw theme.
Setup Screen 1.
Setup Screen 2.
Setup Screen 3.
Setup Screen 4.
Setup LockScreen.
Editing and Fine tuning.
Troubleshooting / Tips.
Screenshots.
My other themes.
Video of setup instructions
Easier on Buzz Launcher
Apps / Stuff you'll need -
- AndiOS7 Theme Pack
- Custom launcher - Nova or Apex launcher.
- Ultimate Custom Widgets (UCCW)
- Transparent Calendar Widget
- PowerAMP for the transparent music widget. Or any other music app that provides transparent widget.
- MultiPicture LWP.
- WidgetLocker lockscreen - if you want to have the lockscreen look. Jelly bean 4.2.2 users can use the lockscreen clock, but not the slider, without WL.
- iOs/iPhone 7 theme OR ios7 HD theme iconpack.
- Nexus users - must be on a custom ROM like AOKP, Paranoid etc. Or must be rooted to use apps like Hide Softkeys, FullScreen. You'll need to hide that navigation bar.
If you bought the app from Amazon App Store; please forward me the purchase receipt that Amazon must have mailed you. I'll mail you other required wallpapers, icons, Widget Locker sliders etc.
Launcher settings -
Giving directions for Nova launcher. The launcher you use must also have similar options, even if in different path.
- Go to Nova Settings > Desktop. Set these values - Desktop Grid = 6x4. Width margin = None. Height Margin = None. Home Screens = 4.
- Go to Nova Settings > Dock. Set these values - Enable Dock, Dock Pages = 4, Dock Icons = 4, Width Margin = None, Dock Height = Large, Uncheck/disable these - Small Icons, Show scroll indicator, Show divider, Dock as overlay.
- Go to Nova Settings > Look and feel. Uncheck/disable "Show notification bar".
ROM settings -
If you are not using a Google Nexus device (Galaxy Nexus, Nexus 4 etc) and you don't have onscreen navigation keys (Home, back, recents etc.), you can skip this step.
Giving directions for AOKP ROM. The ROM you use must also have similar options, even if in different path.
Go to android settings > ROM Control > Navigation Bar and set these values -> "Hidden NavBar Enable" - check, Drag handle Opacity - 0%, Drag Handle width - 80% (or whatever you are comfortable with).
If you are not running a custom ROM or if your ROM doesn't have option to hide NavBar, please use apps mentioned before.
Get your screens ready -
- Take a backup of current homescreens if you want and then remove everything (icons, widgets) from your homescreens and docks.
- Long press on your homescreen > tap "Wallpapers" > tap "Live Wallpapers" > tap "MultiPicture Live Wallpaper" > tap Settings...
- Tap the plus button next to "Add individual settings". You'll get to select screen number here. Select 1 and tap ok.
- Tap "Screen 1 settings" > Picture source > Single Picture. Browse to the location where you had saved the wallpapers and select "AndiOS7-Wall-1.jpg".
- Similarly add "Screen 2 settings" and apply AndiOS7-Wall-2 to it, add "Screen 3 settings" and apply AndiOS7-Wall-3 to it, add "Screen 4 settings" and apply AndiOS7-Wall-4 to it.
- When all 4 are set like this, tap back to reach the screen where you had tapped "Settings...". Tap "Set Wallpaper". All 4 screens will now have required wallpapers.
Install the AndiOS7 UCCW theme pack -
- Download and install the theme pack.
- Installing this won't create an icon in your app drawer. This simply adds a bunch of uccw skins, which will be accessible to you as mentioned below.
Setup Screen 1 -
.png)
- Place a UCCW widget of 4x1 size at the top of the first screen. You can do so by dragging the uccw widget from app drawer or by long pressing homescreen to pull up widget menu and tapping UCCW.
- This will open the skins list. Skins downloaded from play store will show up ONLY HERE.
- Tap on "AndiOS7-Header-1" skin and it'll be applied to the widget.
- Place a UCCW widget of 4x3 size below that and apply "AndiOS7-DateWeather" skin to it.
- Place a UCCW widget of 4x1 size below that and apply "AndiOS7-Calendar" skin to it.
- Place a "Transparent calendar widget" widget below that. It's 3x1 size by default. Long press and drag it to the right side of the screen.
- Screen 1 should use Dock page 1. Since all your dock pages are currently empty, you don't have to do anything to your dock here.
- Screen 1 is now done.
Setup Screen 2 -
.png)
- Place a UCCW widget of 4x1 size at the top of this screen too and apply "AndiOS7-Header-2" skin to it.
- Apply the "iOs/iPhone 7 theme" OR "ios7 HD theme" iconpack through your launcher's theme manager ONLY. DON'T OPEN THE THEME APP ITSELF.
- Go launcher -> Go to home screen > tap menu > themes > Installed > iOs 7 > Apply. (If this changes the wallpapers, re-apply them as before)
- Nova launcher -> Nova settings > "look and feel" > "Icon theme" > "iOs 7
- Apex launcher -> Apex settings > "theme settings" > "iOs 7". Make sure only "icon pack" is checked. Tap apply.
- Drag icons from your app drawer to this screen.
- Swipe to dock page 2. Place 4 app icons here. You can use the same apps as shown in the screenshot above
- All icons on homescreen and dock might not change to this iOS look. Watch the video starting from 10:53 to see how to handle that.
- Screen 2 is now done.
Setup Screen 3 -
.png)
- Place a UCCW widget of 4x1 size at the top of this screen too and apply "AndiOS7-Header-3" skin to it.
- Place a UCCW widget of 4x2 size below that and apply "AndiOS7-Shortcuts" skin to it.
- Place a PowerAmp widget of 4x2 size below that. From the dropdown list at the top, select "Minimalistic 1". Then at the bottom half, swipe from right to left to reach "OTHER" tab, tap "Icons" button to select color and pick a dark blue color. (If you are not sure how to pick color, I will make a video soon).
- Drag the Opacity slider to the right end (i.e. 100%), Tap OK > Done.
- Place a UCCW widget of 4x1 size below the PowerAmp widget and apply "AndiOS7-Bar" skin to it.
- Swipe to dock page 3. Place 4 app icons here. The zip I'll mail you has these 4 icons - Torch, Browser, Calculator, Camera. So, you can place corresponding apps here. If you want some other app, mention that in your mail and I'll see if I can make icons for those.
- You'll need to replace default icons of these 4 apps with the blue icons in the zip. Here's how to do it -
- Long-press the icon and tap 'Edit'.
- On the 'Edit Shortcut' pop-up, tap the icon.
- Nova 2.1 & higher users - swipe to the leftmost page (Tab name - Gallery). Apex launcher users - tap 'Select picture'.
- Tap on your file browser here and browse to the location where you had saved the icons from the zip. Tap on the relevant icon.
- Nova 2.1 & higher users - On "Crop image" window, crop the image appropriately. Default should be fine in most cases. Apex users won't need / get this step.
- You'll be back on the 'Edit Shortcut' pop-up. Apex users tap OK here. Nova users tap the checkmark at the top left corner.
Screen 3 is now done.
Setup Screen 4 -
.png)
- Place a UCCW widget of 4x3 size at the top of this screen and apply "AndiOS7-Weather-Top" skin to it.
- Place another UCCW widget of 4x3 size below that and apply "AndiOS7-Weather-Bottom" skin to it.
- Screen 4 should use Dock page 4. Swipe to dock page 4. It should be left empty.
- Screen 4 is now done.
Setup Lockscreen -
.png)
- Launch WidgetLocker Lockscreen from your app drawer. Remove existing widgets and unlock sliders from the WL screen.
- Tap the settings icon at the top right and then make following settings -
- WidgetLocker Enabled - Checked.
- Go to "Buttons & Inputs" and enable "Allow Interactions".
- Go to "Look & Feel" and enable "Alternative Wallpaper". Tap "Select wallpaper", tap your file browser and browse to the location where you had saved the wallpapers and select "AndiOS7-Wall-Lock.jpg". Select the entire image while cropping.
- Set Background tint to 0. Tap layout and set it to 6x4. Drag the anchor here to the bottom of the example screen shown. Save.
- Hide Notification bar - enabled.
- Now go back to WidgetLocker main window. Long press, tap widgets, tap uccw and place a UCCW widget of 4x3 size at the top of this screen and apply "AndiOS7-Clock" skin to it.
- Long press, tap "Custom Slider", tap the "Theme" dropdown and select AndiOS7 from there. Tap "Done" at the top left corner.
Lockscreen is now done.
- Lock your phone and then press the power button to reach the lockscreen.
- Without unlocking it, swipe from the left edge of the phone to right. Keep doing this till you see a big + button. Tap it.
- Tap UCCW 4x3. Tap on "AndiOS7-Clock". The clock will be placed at the center of the page. You can leave this page here. Next time you reach lockscreen, you can swipe to this page to see this clock. OR..
- Long press this page and drag it to the extreme right side. The clock will be place towards the top half but will be shrunk. And stock android notification bar will still be visible.
Editing / fine tuning
At this point, all screen look like iOS7 screens. But to make them work fully, you might need to edit apps assigned to uccw widgets' hotspots.
How to edit hotspots in uccw-
- After applying the skin as mentioned above, launch UCCW app from app drawer. Tap Menu, tap "hotspot mode" and tap 'OFF'. UCCW will exit.
- Now tap anywhere on the uccw widget. It'll open in uccw edit window.
- Scroll through the components in the bottom half of the screen. You should see "Hotspot 1", "Hotspot 2" etc. depending on how many hotspots that particular skin has.
- Tap on them, tap the relevant hotspot type and then tap whatever you want to assign to that hotspot.
- You can change color, format etc too (optional) in this window.
- When done, simply tap back to exit uccw and your changes will be applied to the skin.
- Tap next skin to open it in uccw window and make similar changes there.
- When all done, tap Menu, tap "hotspot mode" and tap 'ON'. UCCW will exit. And now when you tap on widgets, they'll do the task assigned to them.

Troubleshooting / Tips
- If the "Install" step fails; go to Android settings > Security and make sure "Unknown sources" is enabled. This is required because Jelly bean encryption had broken theme apps download from play store. This is the workaround fix for that. Google "Jellybean encryption issue" to find out more.
- To change temperature unit between Celsius and Fahrenheit -> Launch UCCW app itself. Tap Menu, tap settings. Here, if "Celsius" is marked, temperature will display in Celsius. If unmarked, Fahrenheit.
- If weather info is not displayed/updated, Launch UCCW app itself. Tap Menu, tap settings. Tap "Weather provider" and make sure OpenWeatherMap is selected. Tap Location and make sure "Auto location" is selected.
- If you are loosing too much battery, launch uccw, tap menu > settings > Update interval. Set it to some higher value (2 hour / 3 hour etc instead of 30 minutes). And make sure "Force widget update" is unchecked.
Some of my other works


0 Comments:
Post a Comment
Subscribe to Post Comments [Atom]
<< Home