Monday, September 18, 2017

LeEco Le 2 x620 x620 Pro x625 Pro Unbrick Guide Baseband and imei repair

LeEco Le 2 x620 x620 Pro x625 Pro Unbrick Guide Baseband and imei repairHere we are again, for another unbrick/rescue mission.This time we will unbrick our LeEco Le 2 x620 / x620 Pro / x625 Pro series from so-called �Red light� brick. If you flash a wrong ROM using TWRP, your phone will have no sign of life, only a blinking red light when you plug USB cable and some Mediatek ports under your

Labels: , , , , , , , , , , ,

Sunday, November 13, 2016

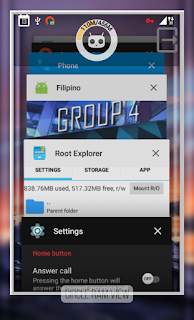
How to add CircleRamView on Recent Panel ? (Modding Tutorial Part 4)

Screenshot:

CircleRamView in Recent Panel Screenshot 1


Requirements:


-Apktool

-Notepad++ / 920 / JOTA
STEP 1
Decompile your SystemUI.apk
Step 2
Download this file
Extract the zip
Step 3
Merge the downloaded files with your decompiled SystemUI
Step 4
Copy This Line
<include android:layout_width="fill_parent" android:layout_height="wrap_content" layout="@layout/circle_ram_view" />
Step 5
Paste it in recents.xml - on top of android:id="@id/nav_bar_scrim"
Step 6
save - recompile - sign - push - reboot
Credits:

Panic Inc. ( Alwiens & Dedy Prayetno )
Team Pussy
You
& Me

Labels: , , , , , , , ,

Tuesday, July 8, 2014

Tasker Profile: On Demand Talking Clock

Most of the days, traffic noise wakes me up early morning. But since the alarm hasn't gone off yet, I don't know what time it is. Who the hell wants to open eyes and look at the blindingly bright phone screen to check the time? I hope my smartphone was smart enough to just TELL me the time, without me having to open my eyes. Well, now it can; thanks to tasker.


If you want to know what tasker is and what can be done with it, check out this beginner's guide.

Easily import Talking clock profile
Download this file to your sdcard. Then open tasker and long press on the "Profile" tab. In the menu that opens, tap "Import". Locate the downloaded xml file and tap it. The Talking Clock profile will be imported and ready to use.

OR Setup Talking clock profile yourself
  1. On the tasker's profiles tab, tap the + button at the bottom right. Give a name to the profile. I gave "Talking Clock".
  2. Next select the trigger event State > Display > Display state. Make sure it says "Is On". Press back.
  3. A task selection list will pop up. Tap "New Task" here. Give it a name. I gave "Announce Time".
  4. In the task edit page, tap + at the bottom center > tap "Audio" > tap "Silent Mode". Set it to off.
  5. Back in the task edit page, tap + at the bottom center > tap "Variables" > tap "Variable Split". Set Name as %TIME and Splitter as .
  6. Back, + to new task > tap "Variables" > tap "Variable set". Set Name as %TIME1 and To as %TIME1 / 1. Enable "Do maths" here.
  7. Back, + to new task > tap "Variables" > tap "Variable set". Set Name as %TIME2 and To as %TIME2 / 1. Enable "Do maths" here.
  8. Back, + to new task > tap "Variables" > tap "Variable set". Set Name as %TIME1 and To as 12. Add If condition %TIME1 = 00.
  9. Back, + to new task > tap "Variables" > tap "Variable subtract". Set Name as %TIME1 and value as 12. Add If condition %TIME1 > 12.
  10. Back, + to new task > tap "Variables" > tap "Variable set". Set Name as %TIME2 and To as O clock. Add If condition %TIME2 = 00.
  11. Back, + to new task > tap "Variables" > tap "Variable set". Set Name as %TIME2 and To as O %TIME2. Add If condition %TIME2 < 10.

  12. Back, + to new task > tap "Alert" > tap "Say". Put this in Text field - %TIME1, %TIME2, %BATT %. Change Pitch and Speed if you want.

  13. Back, + to new task > tap "Audio" > tap "Silent Mode". Set it to on.

  14. Switch to profiles tab of tasker. Tap the "Talking Clock" profile and then long press the "Display State On" trigger. Tap "Add" and then "Time". Set the time duration you want this profile to work. For example, I set it to work between 4 AM and 8 AM; so that it doesn't start vocally announcing time every time I turn the screen on.

You tasker profile is now ready. It will TELL you the time every time you turn on the screen between the set time. You just gotta pick up the phone and press the power button - both of which can be done with your eyes closed. Video Walkthrough

Labels: , ,

Friday, June 27, 2014

Tasker profile: Better Battery Log

Do you ever unlock your phone, look at the battery % and go "Holly hell, 30%...! Was it this low when I locked it last? How much battery did drain since I last used it?" Sadly there's no stock/easy way of knowing for sure. The stock battery usage graph shows battery usage since last full charge, which doesn't help.

I want to check my battery drop since last I used the phone. So, I created a tasker profile that writes the time and remaining battery percentage to a file every time I turn the screen off. This way, when I turn the screen on after some time, I can check how much battery was lost while the phone was idle. If I see any drastic drop, I would know something is going wrong and investigate.


If you want to know what tasker is and what can be done with it, check out this beginner's guide.

Create empty log file
Using any file browser app, create an empty text file on your sdcard. For example, I created /sdcard0/BatteryLog.txt

Easily import Battery Logger profile
Download this file to your sdcard. Then open tasker and long press on the "Profile" tab. In the menu that opens, tap "Import". Locate the downloaded xml file and tap it. The Log Battery profile will be imported and ready to use.

OR Setup Battery Logger profile yourself
  1. On the tasker's profiles tab, tap the + button at the bottom right. Give a name to the profile. I gave "Log Battery".
  2. Next select the trigger event State > Display > Display state. Make sure it says "Is Off". Press back.
  3. A task selection list will pop up. Tap "New Task" here. Give it a name.
  4. In the task edit page, tap + at the bottom center > tap "File" > tap "Delete file".
  5. Tap the search icon at the right end of "File" and browse n select the BatteryLog.txt file.
  6. Tap "If" bar. Set condition %BATT > 98. Press back.
  7. Tap + at the bottom center > tap "Task" > tap "Wait". Set how much time you want to wait before noting down the battery. Then press back.
  8. Tap + at the bottom center > tap "File" > tap "Write file"
  9. Tap the search icon at the right end of "File" and browse n select the BatteryLog.txt file.
  10. Tap on the text field and enter "%DATE - %TIME - %BATT - MEMF" without the quotes. You can also tap the variable selector at the right end of this and enter other variables if you want.
  11. Enable the append and "Add newline" options. Press back.


You tasker profile is now ready. It will note down remaining battery percentage every time you turn off the screen. And every time the phone is fully charged, it will purge the record and start a fresh log.

Video Tutorial


Labels: , , ,

Friday, December 27, 2013

15 must-have apps for Android devices


A lot of "Best apps to download on your new Android devices" posts are doing the rounds right now, hoping that people with new devices will bring traffic to those sites. Some of those are helpful advices; some are just common sense / well known apps. You might have already read some of those posts. So, I won't be bothering you with another one of those lists; telling you what you should install on your device. I'm going to tell you about the apps that are MY daily driver. Apps that I find most useful in my everyday life. If you find any of these useful for yourself, I'll be glad to have introduced that app to you.


Nova Launcher
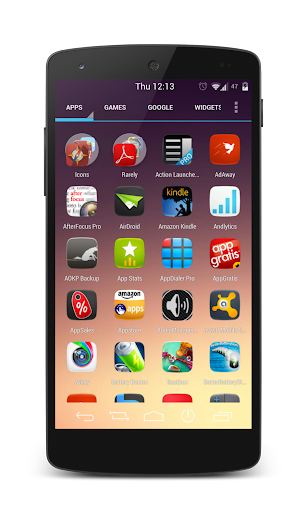
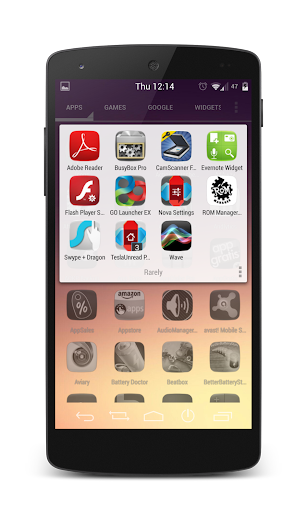
First thing I do after getting a new device or flashing a new ROM - install Nova launcher on it. The stock launcher is very limited for my taste. Nova Launcher gives me the freedom to arrange apps the way I want. I've divided my app drawer into 3 tabs - Games, Google, All Other (+ widget tab which is there by default). The "All" tab has two folders. "Icons" has all the theme related apps in it and "Rarely" has apps that I rarely use. I chose to put them in a folder instead of using "hide apps" feature; so that I have easy access to them when I want to uninstall them. On the homescreens, I have 3 screens. One screen has 16 of my most frequently used app icons. Second screen has a full page Google Keep widget and the third page has a few apps sorted into folders like "Finance", "Entertain", "Photo", "News". I've assigned "Play Store" to the App drawer icon's swipe action. So, when I need to open play store, which is quite often since checking for app updates is my obsession, I just swipe up on the app drawer icon and that opens the play store app. If nothing else, one reason to use a custom launcher - you can apply custom icons.

AppDialer
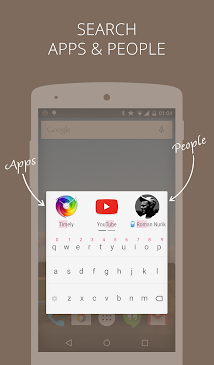
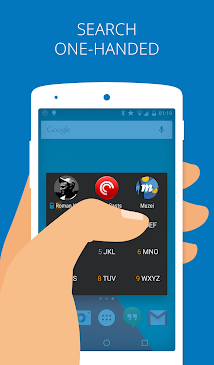
Everyone obviously has their most frequently used apps on their home-screens. But what about apps which didn't make that cut but you still use them now n then? Even though the app drawer is alphabetically sorted, finding that one app in it takes a little time. I use AppDialer to get to that app faster. I've placed AppDialer icon in my dock. One tap on that icon launches the T9 dialer of the app and 2-3 more taps on the characters fetches the app I want. AppDialer has a T9 dialer widget too; which saves you the initial tap to launch the dialer. I wish it provided a floating icon which could be accessed from any screen and floats on top of other apps. Since it currently doesn't, I'm using it in conjunction with Toucher.

Circa
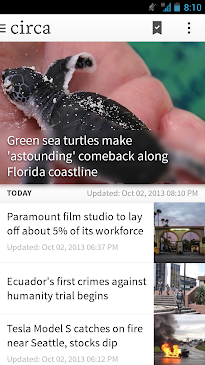
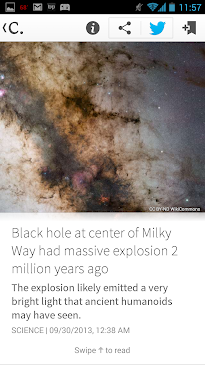
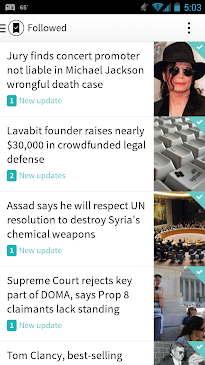
When I have a little free time during lunch break or similar, I like to catch up on some news. I've tried Flipboard and Feedly before and still have them installed on my device. But I like Circa more than those. Because Circa is not just an aggregator of articles from different websites. It has well curated articles in short and precise form. I get important parts of a news presented to me in snippets. Also, no longer I come across same news from different sources over and over; which is a common problem in Flipboard / Feedly (or most other news reader apps). I can even "Follow" a news article to stay updated. Whenever there's a recent development related to that news, Circa updates me. That itself makes it the best news reader app.

Cliffhanger
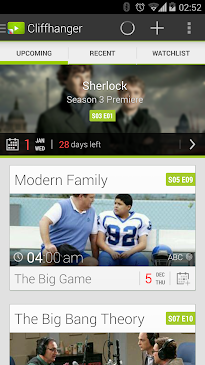
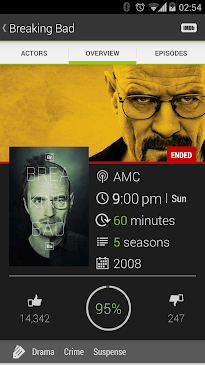
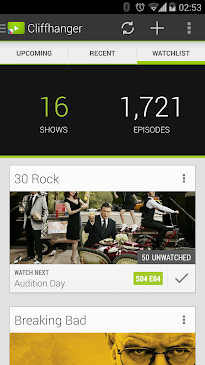
I'm a TV show buff. I have a handful shows that I watch but never on original air date. I use Cliffhanger to keep track of what I've watched and which episodes are pending to be watched. It has very intuitive UI with three tabs - Upcoming, Recent and watchlist. And it shows notifications when a new episode is about to air. I would have liked if I could delay that notification (like, "new episode of HIMYM aired yesterday"); an option which is available in another app called "TV Series". But other than that one shortcoming, Cliffhanger is my Go-to TV show manager app.

FolderSync

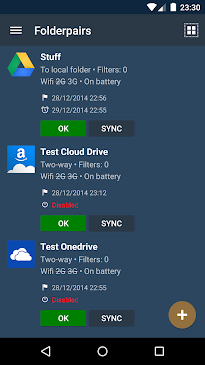
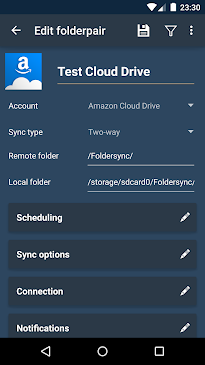
This is one of the "Must MUST have" app on all my devices. Dropbox, Drive, Copy - all these cloud storage apps have one major and shocking shortcoming. None of them sync with your mobile devices' sdcard content; other than syncing photos maybe. I use FolderSync to keep certain content synced across all my devices. On my computer, I have folders for "Mobile Downloads", "Pictures", "Music", "Video", "Ebooks". All of these are synced to "Copy" cloud storage. Now, on my android devices, I have those cloud folders mapped to sync with respective folders on my sdcard; via the FolderSync app. So, whenever I have a new content on any of device (Computer, Galaxy Nexus, Nexus 5), those instantly become available on all other devices. Those who are thinking "Upload it to dropbox and be done with it".... remember that you will need internet connection every time you want to access those content; while Foldersync will download those content to your device so that you have offline access. That's what I want.

Greenify
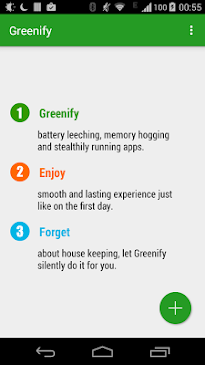
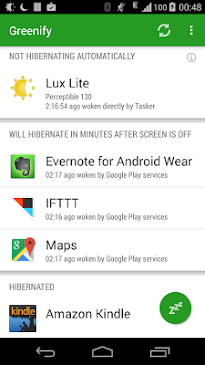
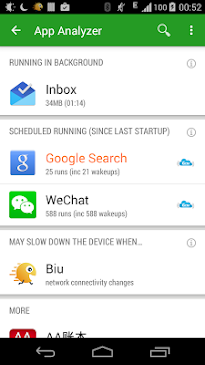
One of the most common gripes of any mobile device users is battery drainage. When you exit out of any app, it might still be running in the background and sipping battery juice. Even if you "Force close" them, rogue apps might start up again without your notice. Greenify helps in that department. It puts apps running in the background into hibernation mode if you ask it to do so; so that they don't startup on their own in the background. It saves me some battery daily.

Moola
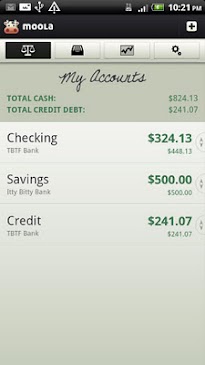
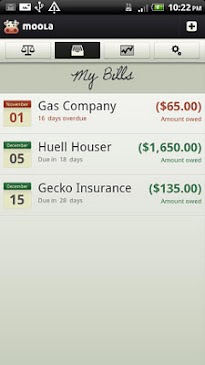
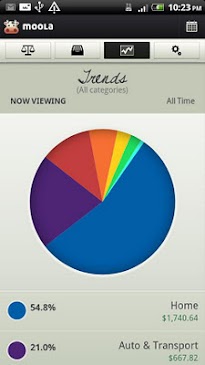
I want to keep track of where my money is going. But I don't want to give some app access to my checkin/credit accounts. I use Moola instead. Yes, I have to manually enter a transaction detail into it every time. But I'll choose that over having to handover my bank account passwords. It has a slightly dated UI, but I'm still using it because I haven't found any other app which supports multiple accounts without requiring passwords. One shortcoming - it doesn't support multiple currency type. Wish they will add that feature and update their UI.

Pocket
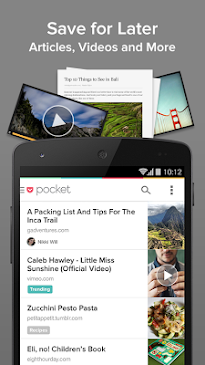
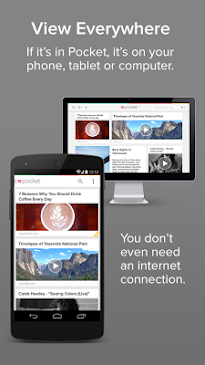
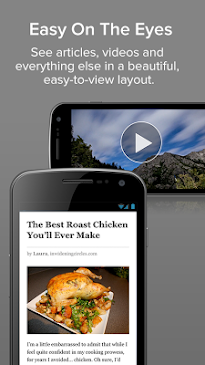
If I come across a short article while browsing through my feedreader on my computer, I save it in Pocket; to read it later on my mobile device. Similarly, if I come across a long article or article with heavy images/video while browsing through my Flipboard/Feedly/reddit etc on my Nexus, I save it in Pocket; to read it later on my computer. Quite handy and indispensable. A lot of people swear by Instapaer. But that is a paid app and Pocket is totally free.

PushBullet
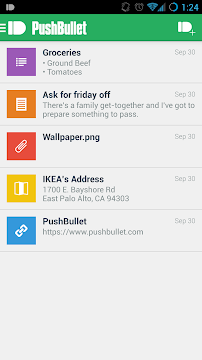
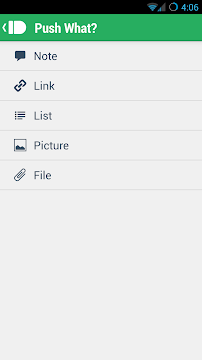
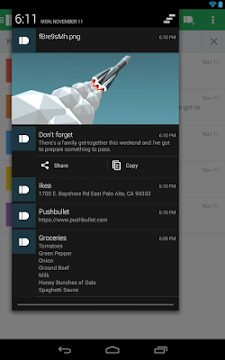
If you need to send something like a url, files or note from your computer to your mobile device or vice versa, the easiest way to do that is PushBullet. It even works for Mobile to mobile transfer. It doesn't get any easier than this. And with recent versions, it also mirrors my phone notifications on my computer; so I instantly know whether I need to unlock the phone and tend to it or it can wait. If only the developer makes an iOS version, using my iPad won't be such a PitA.

Quickpic
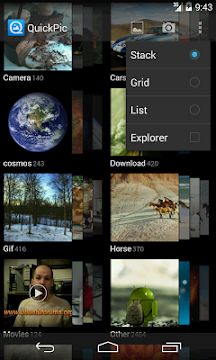
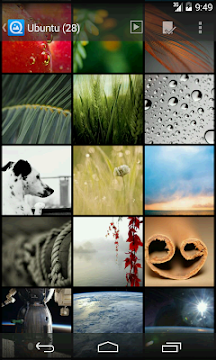
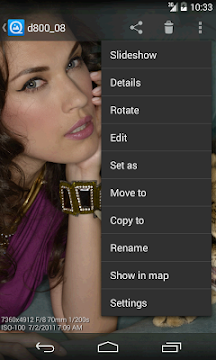
The stock gallery app is garbage. It scans your entire phone and displays every single image file it comes across. Even different png/gif images it finds in different app folders. There's no way to hide any folder/album (.nomedia doesn't always work) and shown albums aren't sorted alphabetically. I just hate it. The best alternative I've found is Quickpick. It allows you to pick which are the folders it should show pictures from. It allows you to pin protect + hide certain albums. And it remembers the last folder you were in or last photo you were viewing.

Solid Explorer
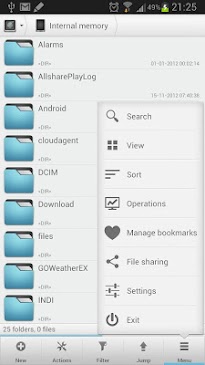
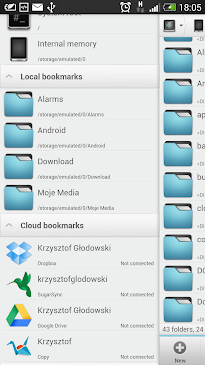
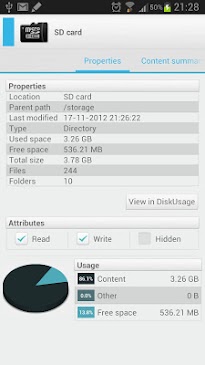
I have no idea why the stock android doesn't come with a file browser app; which is quite essential. So, 2nd thing I do after installing Nova launcher is install Solid Explorer. This file browser has the best UI imo. It has a 2 pane layout, which is quite handy. I keep required sdcard folder open on left pane and my cloud storage folder open in the right pane. It supports Dropbox, Box, Drive, Copy and other cloud storage systems. Hence, I don't need to install any of those apps; solid explorer is enough to upload stuff to them. I've tries ES Explorer quite a few times. But I always come back to Solid.

Titanium Backup
If you are a rooted user, I don't even need to write anything about this. Still, if you want me to - it backs up all the apps and their data and you can either restore them after a system wipe or you can restore them on a totally new / different android device too. i.e. you can transfer saved games from one device to another too. You can uninstall system bloatwares that OEMs force install on your device. You can freeze any app temporarily. You can move apps from internal storage to sdcard. It's got other great features too. Just read them on the app's play store page and download it already.

UCCW
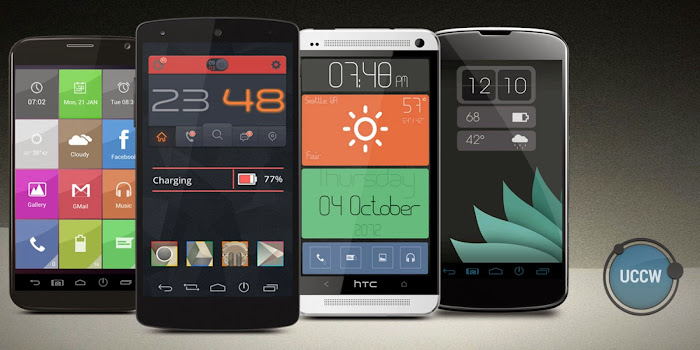
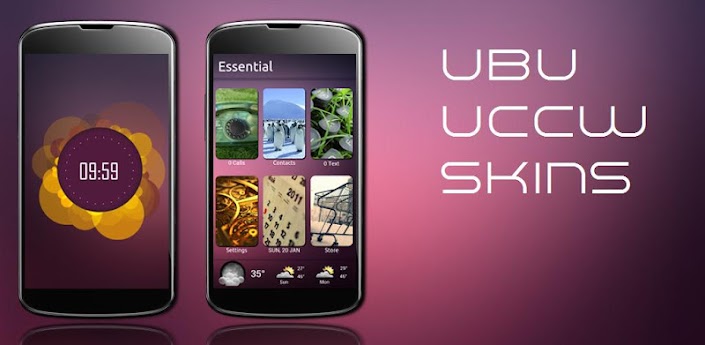
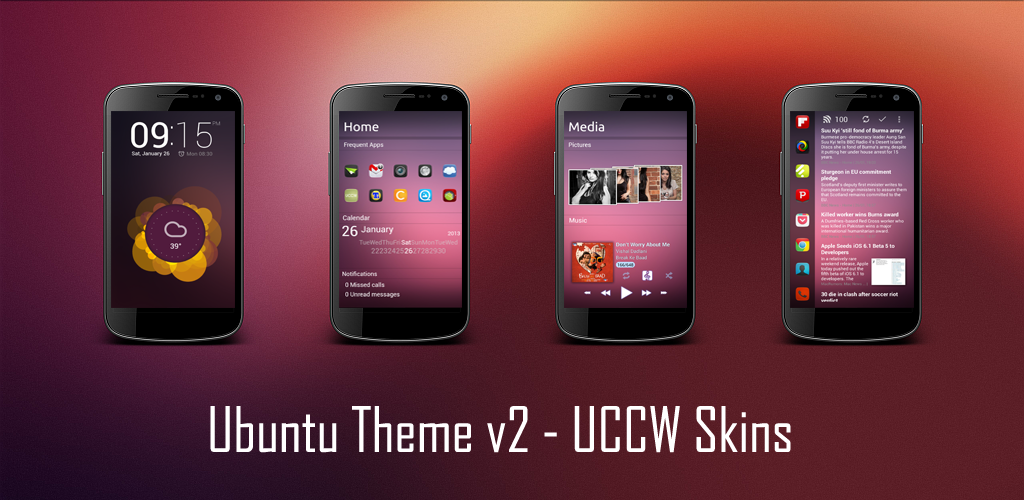
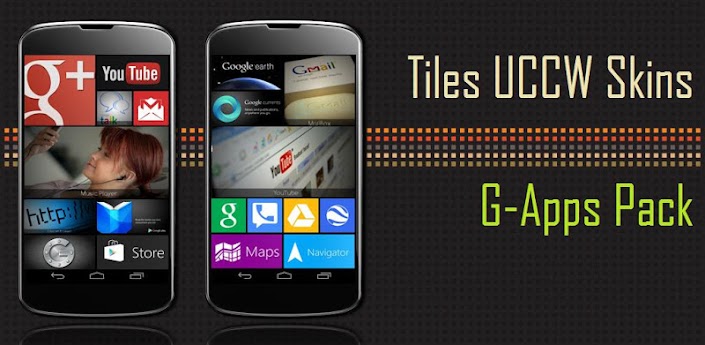
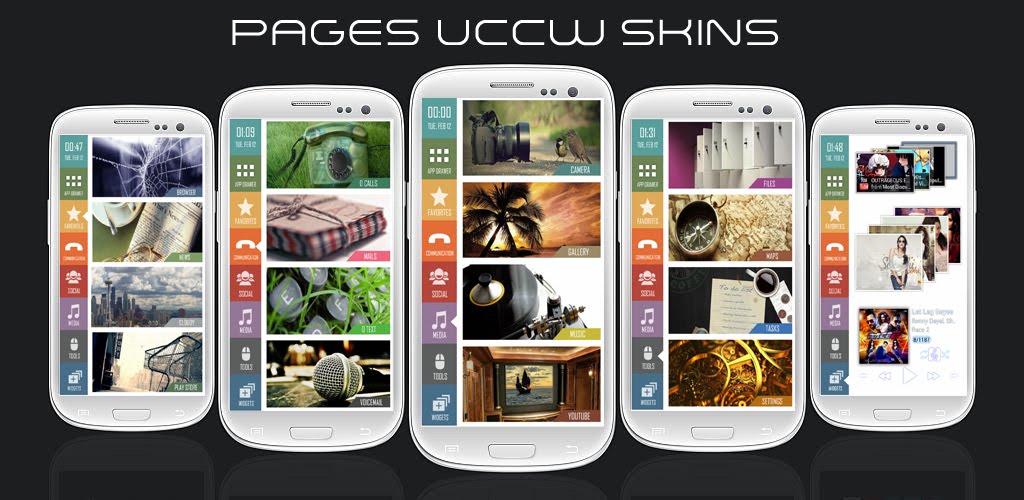
It is primarily a clock widget app with massive amount of support from theme developers. Basically, you install this app and other uccw skin apps that you like. Then you place a uccw widget on your screen and apply any of those skins to this widget. Essentially, you can have a different clock on your screen everyday. Most of these skins are editable too; so that you can change their color to coordinate better with your wallpaper. Apart from clocks, you get date, weather, battery, missed calls & texts etc related info too. And it does much more than that. UCCW widgets have something called hotspots, which act as buttons to launch apps of your choice. You can assign the apps you want to these hotspots. This feature is known to have launched many a theme packs. There are uccw theme packs which can totally change the look of your Android device. You can make your device look like iOS, Windows, Ubuntu or like your favorite apps like Flipboard etc. You can create your own widget skins and themes too. UCCW essentially is the most used app on my phone.

Wally
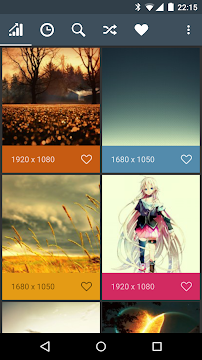
An essential part of theming is using the right wallpaper. Even if you are not changing your homescreen layout every few days, you can just change the wallpaper and make your screen look a little different than yesterday. Wally comes handy there. It has the best wallpapers imo. There are other alternatives like Zedge, 500 Firepaper etc. But I like this one. And the beautiful material animation used in this app are added bonus.

15th App?
If I count correctly, that's 14 apps so far. Where's the 15th Must-Have app??
I'm leaving that up to you. According to you, which is that one more app which should be in this "Must-Have" list? Let me know in the comments. Also, if you have any alternative app which are better than the ones I mentioned above, let me know that too. Happy Holidays from iWizard, friends. :-)

Labels: , ,

Friday, June 21, 2013

AndiOS7 - Complete iOS7 theme for Android

Android+iOS = AndiOS; pronounced like Adios, but with a ‘n’ in it.

So, apple finally made the iOS look like Android. It might look as cool as Android, but it still doesn’t have the power Android wields. How? iOS users will get this new look AFTER Apple releases the iOS7 to public later this year. But Android users can get the same look RIGHT NOW. The irony is killing me… :D

Use this theme pack to make your Android device look like iOS7; BEFORE actual iPhone / iPad users can..!! Show it off (or rub it in their faces if you want :P) and enjoy the bragging rights, all thanks to Android’s customization prowess. Change the look of your entire device. Both lockscreen and homescreen. It’s not only icons & wallpapers, like other iOS7 themes floating around.


More screen showcases below


FEATURES
  • Get the iOS7 Notification center look on one of your screens.
  • Get the iOS7 Control center look on another one of your screens; including widget for power control.
  • You can change icons too, to look like those of iOS7.
  • Yes, you get custom made HD wallpapers too for all screens.
  • iOS7 lockscreen clock and unlock slider.
  • A full page weather skin, like the iOS weather app. i.e. an entire homescreen will show weather.

Compare screenshots below with actual iOS7 screenshots shown in Apple website and then tell me if this is not the best reproduction of that.


Read Before Buying

This is NOT a ROM theme. And not a stand-alone app. Downloading it won't automatically make your android look like iOS7 and it's not a one tap apply. This pack contains widget skins, wallpapers, icons and other stuff. You have to follow instructions mentioned below to setup the theme. Everything that this theme pack does - is shown in the screenshots.

What this theme doesn't do -
  • Change the look of your apps. i.e. when you launch any of your installed apps, they won't look like iOS. This theme ONLY changes the look of your homescreen and lockscreen.
  • It won't change the look of your notification tray. And you can't '"swipe up from bottom" to get the control center. Both of these are part of your homescreens in this theme. One screen will look like notification center and another screen will look like control center.
  • In the statusbar shown in the screenshots - the signal strength, wifi and bluetooth are static images. They are not actual indicators of their status. Only Time and Battery are realtime there.
  • The power 'toggle' icons in the control center page are shortcuts and not actual toggles. Tapping on them will take you to their settings page directly and you can turn them on or off from there. Also, these icons' colors don't change depending on your status.
  • Lockscreen's "slide to unlock" currently doesn't have a camera shortcut. I might add that in future, if I figure out how.

Attention Nexus users (or if your device has on-screen navigation bar) - you must be on a custom ROM like AOKP, Paranoid etc. Or must be rooted to use apps like Hide Softkeys, FullScreen. You'll need to hide the onscreen navigation bar.

If you have any questions, don't hesitate to ask. Leave a comment below or click the "Contact me" button at the top of this post.

Now that these are clear, let's get to theming.

Read Before Buying.
Entire instruction in Video.
Apps you'll need.
Launcher & ROM settings.
Set wallpapers.
Install the uccw theme.
Setup Screen 1.
Setup Screen 2.
Setup Screen 3.
Setup Screen 4.
Setup LockScreen.
Editing and Fine tuning.
Troubleshooting / Tips.
Screenshots.
My other themes.


Video of setup instructions


Easier on Buzz Launcher


Setup Instructions

Apps / Stuff you'll need -

If you bought the app from Amazon App Store; please forward me the purchase receipt that Amazon must have mailed you. I'll mail you other required wallpapers, icons, Widget Locker sliders etc.


Launcher settings -
Giving directions for Nova launcher. The launcher you use must also have similar options, even if in different path.
  • Go to Nova Settings > Desktop. Set these values - Desktop Grid = 6x4. Width margin = None. Height Margin = None. Home Screens = 4.
  • Go to Nova Settings > Dock. Set these values - Enable Dock, Dock Pages = 4, Dock Icons = 4, Width Margin = None, Dock Height = Large, Uncheck/disable these - Small Icons, Show scroll indicator, Show divider, Dock as overlay.
  • Go to Nova Settings > Look and feel. Uncheck/disable "Show notification bar".
If you want the dock pages to be tied to homescreen pages, so that when you swipe homescreen page, their respective dock page stick to them, there's a little different launcher setting. Watch the instruction video, starting from time mark 35:32.

ROM settings -
If you are not using a Google Nexus device (Galaxy Nexus, Nexus 4 etc) and you don't have onscreen navigation keys (Home, back, recents etc.), you can skip this step.

Giving directions for AOKP ROM. The ROM you use must also have similar options, even if in different path.
Go to android settings > ROM Control > Navigation Bar and set these values -> "Hidden NavBar Enable" - check, Drag handle Opacity - 0%, Drag Handle width - 80% (or whatever you are comfortable with).

If you are not running a custom ROM or if your ROM doesn't have option to hide NavBar, please use apps mentioned before.

Get your screens ready -
  • Take a backup of current homescreens if you want and then remove everything (icons, widgets) from your homescreens and docks.
  • Long press on your homescreen > tap "Wallpapers" > tap "Live Wallpapers" > tap "MultiPicture Live Wallpaper" > tap Settings...
  • Tap the plus button next to "Add individual settings". You'll get to select screen number here. Select 1 and tap ok.
  • Tap "Screen 1 settings" > Picture source > Single Picture. Browse to the location where you had saved the wallpapers and select "AndiOS7-Wall-1.jpg".
  • Similarly add "Screen 2 settings" and apply AndiOS7-Wall-2 to it, add "Screen 3 settings" and apply AndiOS7-Wall-3 to it, add "Screen 4 settings" and apply AndiOS7-Wall-4 to it.
  • When all 4 are set like this, tap back to reach the screen where you had tapped "Settings...". Tap "Set Wallpaper". All 4 screens will now have required wallpapers.


Install the AndiOS7 UCCW theme pack -
  • Download and install the theme pack.
  • Installing this won't create an icon in your app drawer. This simply adds a bunch of uccw skins, which will be accessible to you as mentioned below.

Setup Screen 1 -
iOS theme for Android devices

  • Place a UCCW widget of 4x1 size at the top of the first screen. You can do so by dragging the uccw widget from app drawer or by long pressing homescreen to pull up widget menu and tapping UCCW.
  • This will open the skins list. Skins downloaded from play store will show up ONLY HERE.
  • Tap on "AndiOS7-Header-1" skin and it'll be applied to the widget.
  • Place a UCCW widget of 4x3 size below that and apply "AndiOS7-DateWeather" skin to it.
  • Place a UCCW widget of 4x1 size below that and apply "AndiOS7-Calendar" skin to it.
  • Place a "Transparent calendar widget" widget below that. It's 3x1 size by default. Long press and drag it to the right side of the screen.
  • Screen 1 should use Dock page 1. Since all your dock pages are currently empty, you don't have to do anything to your dock here.
  • Screen 1 is now done.


Setup Screen 2 -
iOS theme for Android devices
  • Place a UCCW widget of 4x1 size at the top of this screen too and apply "AndiOS7-Header-2" skin to it.
  • Apply the "iOs/iPhone 7 theme" OR "ios7 HD theme" iconpack through your launcher's theme manager ONLY. DON'T OPEN THE THEME APP ITSELF.
    • Go launcher -> Go to home screen > tap menu > themes > Installed > iOs 7 > Apply. (If this changes the wallpapers, re-apply them as before)
    • Nova launcher -> Nova settings > "look and feel" > "Icon theme" > "iOs 7
    • Apex launcher -> Apex settings > "theme settings" > "iOs 7". Make sure only "icon pack" is checked. Tap apply.
  • Drag icons from your app drawer to this screen.
  • Swipe to dock page 2. Place 4 app icons here. You can use the same apps as shown in the screenshot above
  • All icons on homescreen and dock might not change to this iOS look. Watch the video starting from 10:53 to see how to handle that.
  • Screen 2 is now done.

Setup Screen 3 -
iOS theme for Android devices
  • Place a UCCW widget of 4x1 size at the top of this screen too and apply "AndiOS7-Header-3" skin to it.
  • Place a UCCW widget of 4x2 size below that and apply "AndiOS7-Shortcuts" skin to it.
  • Place a PowerAmp widget of 4x2 size below that. From the dropdown list at the top, select "Minimalistic 1". Then at the bottom half, swipe from right to left to reach "OTHER" tab, tap "Icons" button to select color and pick a dark blue color. (If you are not sure how to pick color, I will make a video soon).
  • Drag the Opacity slider to the right end (i.e. 100%), Tap OK > Done.
  • Place a UCCW widget of 4x1 size below the PowerAmp widget and apply "AndiOS7-Bar" skin to it.
  • Swipe to dock page 3. Place 4 app icons here. The zip I'll mail you has these 4 icons - Torch, Browser, Calculator, Camera. So, you can place corresponding apps here. If you want some other app, mention that in your mail and I'll see if I can make icons for those.
  • You'll need to replace default icons of these 4 apps with the blue icons in the zip. Here's how to do it -
    • Long-press the icon and tap 'Edit'.
    • On the 'Edit Shortcut' pop-up, tap the icon.
    • Nova 2.1 & higher users - swipe to the leftmost page (Tab name - Gallery). Apex launcher users - tap 'Select picture'.
    • Tap on your file browser here and browse to the location where you had saved the icons from the zip. Tap on the relevant icon.
    • Nova 2.1 & higher users - On "Crop image" window, crop the image appropriately. Default should be fine in most cases. Apex users won't need / get this step.
    • You'll be back on the 'Edit Shortcut' pop-up. Apex users tap OK here. Nova users tap the checkmark at the top left corner.
      Screen 3 is now done.

Setup Screen 4 -
iOS theme for Android devices
  • Place a UCCW widget of 4x3 size at the top of this screen and apply "AndiOS7-Weather-Top" skin to it.
  • Place another UCCW widget of 4x3 size below that and apply "AndiOS7-Weather-Bottom" skin to it.
  • Screen 4 should use Dock page 4. Swipe to dock page 4. It should be left empty.
  • Screen 4 is now done.


Setup Lockscreen -
iOS theme for Android devices
  • Launch WidgetLocker Lockscreen from your app drawer. Remove existing widgets and unlock sliders from the WL screen.
  • Tap the settings icon at the top right and then make following settings -
  • WidgetLocker Enabled - Checked.
  • Go to "Buttons & Inputs" and enable "Allow Interactions".
  • Go to "Look & Feel" and enable "Alternative Wallpaper". Tap "Select wallpaper", tap your file browser and browse to the location where you had saved the wallpapers and select "AndiOS7-Wall-Lock.jpg". Select the entire image while cropping.
  • Set Background tint to 0. Tap layout and set it to 6x4. Drag the anchor here to the bottom of the example screen shown. Save.
  • Hide Notification bar - enabled.
  • Now go back to WidgetLocker main window. Long press, tap widgets, tap uccw and place a UCCW widget of 4x3 size at the top of this screen and apply "AndiOS7-Clock" skin to it.
  • Long press, tap "Custom Slider", tap the "Theme" dropdown and select AndiOS7 from there. Tap "Done" at the top left corner.
    Lockscreen is now done.
If you are not using WidgetLocker but you are on a Jelly Bean 4.2.2 device, you can still place the clock widget on your lockscreen. This is not ideal, but here it is -
  • Lock your phone and then press the power button to reach the lockscreen.
  • Without unlocking it, swipe from the left edge of the phone to right. Keep doing this till you see a big + button. Tap it.
  • Tap UCCW 4x3. Tap on "AndiOS7-Clock". The clock will be placed at the center of the page. You can leave this page here. Next time you reach lockscreen, you can swipe to this page to see this clock. OR..
  • Long press this page and drag it to the extreme right side. The clock will be place towards the top half but will be shrunk. And stock android notification bar will still be visible.


Editing / fine tuning

At this point, all screen look like iOS7 screens. But to make them work fully, you might need to edit apps assigned to uccw widgets' hotspots.

How to edit hotspots in uccw-
  • After applying the skin as mentioned above, launch UCCW app from app drawer. Tap Menu, tap "hotspot mode" and tap 'OFF'. UCCW will exit.
  • Now tap anywhere on the uccw widget. It'll open in uccw edit window.
  • Scroll through the components in the bottom half of the screen. You should see "Hotspot 1", "Hotspot 2" etc. depending on how many hotspots that particular skin has.
  • Tap on them, tap the relevant hotspot type and then tap whatever you want to assign to that hotspot.
  • You can change color, format etc too (optional) in this window.
  • When done, simply tap back to exit uccw and your changes will be applied to the skin.
  • Tap next skin to open it in uccw window and make similar changes there.
  • When all done, tap Menu, tap "hotspot mode" and tap 'ON'. UCCW will exit. And now when you tap on widgets, they'll do the task assigned to them.
Hotspot types and actions/apps for them -


Troubleshooting / Tips
  • If the "Install" step fails; go to Android settings > Security and make sure "Unknown sources" is enabled. This is required because Jelly bean encryption had broken theme apps download from play store. This is the workaround fix for that. Google "Jellybean encryption issue" to find out more.
  • To change temperature unit between Celsius and Fahrenheit -> Launch UCCW app itself. Tap Menu, tap settings. Here, if "Celsius" is marked, temperature will display in Celsius. If unmarked, Fahrenheit.
  • If weather info is not displayed/updated, Launch UCCW app itself. Tap Menu, tap settings. Tap "Weather provider" and make sure OpenWeatherMap is selected. Tap Location and make sure "Auto location" is selected.
  • If you are loosing too much battery, launch uccw, tap menu > settings > Update interval. Set it to some higher value (2 hour / 3 hour etc instead of 30 minutes). And make sure "Force widget update" is unchecked.
Mail me if you have ANY issues.


Some of my other works


Labels: , , , , ,