Sunday, November 30, 2014

Lenovo P780 Update to Version ROW_S223 for 4Gb and 8 Gb

Lenovo P780 Update to Version S223 for 4Gb and 8 Gb - This guide is another method from
Update Lenovo P780 8GB with Android KitKat using OTA Method (P780_ROW_S223), but this guide is using PC method or offline update. On this guide also provide the file to update Lenovo P780 4GB and 8Gb version.
This guide is about flashing a new firmware to your device, so it has possibility to brick your device and erase your data on device, so it suggest that you need to do some backup preparations before start to following this guide. If you not sure about what you going to do please do OTA update, because it more safer than this offline update.

Disclaimer :
This guide for educational purpose only, We not responsible if your device bricked after following this tutorial. Even this guide is already tested but it has possibility to brick your phone, (DWYOR)
Lenovo P780 Update to Version ROW_S223 for 4Gb and 8 Gb

ROM Descriptions :
  • Build Number : P780_ROW_S223_140901
  • Date : 01-09-2014
  • OS : Android KitKat 4.4.2
  • Languages : Russian , Ukrainian, English, Arabic, Spanish, French, Chinese, Vietnamese, Indonesian, Malaysian, Thai
  • Google Applications : Yes
  • Root : No
Downloads :
  • P780_ROW_S223_140901 683 Mb, contains all required files to update your device to the version ROW_S223. 4Gb & 8Gb
  • USB VCOM Driver  Install this driver first on your computer, Turn off your device and remove the battery, using USB cable connect your device while look at My Computer  Manage  Device Manager there will be MTK65xx Preloader Devices show up for 5 second than disappeared, before disappeared right click on it and select Update Driver Software point it to USB VCOM Driver extracted folder. When it finish disconnect and connect again there will be Mediatek PreLoader USB VCOM Port on your device manager.
    Lenovo P780 Installing Jelly Bean ROW Version S110_ROW

  • SP Flash Tool v5.3152 use this flash tool version to flashing this firmware to your devices, another version not recommended.
Lenovo P780 Update to Version ROW_S223 for 4Gb and 8 Gb
  1. Download all required files to your computer, because this guide is using flash tool so you must be confirm first that USB VCOM driver is already completely installed on your computer before continued to the next step.
  2. Extract ROM downloaded and the flash tool on then same folder, for easy organize it and flashing it. Go to flash tool extracted folder and run flash_tool.exe. If you are using windows 7 or later please run it using administrator privilege.
  3. On the flash tool, please go to Options ↦ Option ↦ Download please make sure DA DL All with Checksum already checked, click X (Close) to back to Flash Tool, this option is very important so please don't forget it.
    Lenovo P780 Update to Version ROW_S223 for 4Gb and 8 Gb

  4. Once back to flash tool, now please click on the Scatter-Loading button and point it to ROM extracted folder and the select MT6589_Android_scatter_emmc.txt this will automatically loaded all required images file to update your device, Please wait until flash tool finish processing the image files and become stand by.
    Lenovo P780 Update to Version ROW_S223 for 4Gb and 8 Gb

  5. Change Download option from Download Only to Firmware Upgrade mode, now you can press Download button or hit CTRL+D. Flash tool will initialize the files that add to the flash tool and when finish flash tool will ready to make connection with your device.
    Lenovo P780 Update to Version ROW_S223 for 4Gb and 8 Gb

  6. When flash tool already finish and stand by, now please turn off your device and remove the battery. Connect your device to computer using USB cable, flash tool will immediately recognize your device and begin to start flashing process, this process will take 5-6 minutes to finish and when you see GREEN CIRCLE in the middle of flash tool that mean flashing process already finish
    Lenovo P780 Update to Version ROW_S223 for 4Gb and 8 Gb

  7. Done, you have successful update your Lenovo P780 with firmware version ROW_S223, please confirm it with go to System Setting ↦ About Phone and look at the Build Number it must be same with the downloaded ROM.
Done, Congratulation you have successful update your device to the latest official firmware from Lenovo, please leave a comments if you got any problem regarding this guide or any broken link on this guide. Thank you

Labels: , ,

Saturday, November 29, 2014

[Full Firmware] Zenfone 4 A400CG WW v6.5.35 and CHT v6.5.32


How to OTA update ? (Go to settings>About>System Update>Check for Update)
How to update Manual ? Here


ZENFONE 4  firmware: 
WW VERSION
Version V6.5.35(WW)
DescriptionASUS ZenFone4(T00I) software Image: V6.5.35 (Android 4.4) for WW only*
Improvement:

1. Improved the accuracy of battery percentage display

Steps of Update:
1.Check software version of your device**
2.Download device software and Update SOP (From “Manual” Item)
3.Only apply to same SKU update, Example: WW->WW, CN->CN, TW->TW.
4.Software update cannot transfer the software SKU and downgrade the software version.
5.Wrong SKU may cause update failure, please update the same SKU version only.

*How to know the device model?
Path: Settings->About-> Model number
Example: ASUS_T00I
**How to know the device software version?
Path: Settings->About-> software information->Build number
***System upgrade may cause part of data missing, please buckup your important data before system upgrading.
File Size809.09 MBytes                                                                              2014/11/27
Download fromGlobal

ZENFONE 4  firmware: 
CHT VERSION
Version V6.5.32(CHT)
DescriptionASUS ZenFone4(T00I) software Image: V6.5.32 (Android 4.4) for WW SKU only*
Improvement:

1. Improved stability of Audio Wizard feature

Steps of Update:
1.Check software version of your device**
2.Download device software and Update SOP (From “Manual” Item)
3.Only apply to same SKU update, Example: WW->WW, CN->CN, TW->TW.
4.Software update cannot transfer the software SKU and downgrade the software version.
5.Wrong SKU may cause update failure, please update the same SKU version only.

*How to know the device model?
Path: Settings->About-> Model number
Example: ASUS_T00I
**How to know the device software version?
Path: Settings->About-> software information->Build number
***System upgrade may cause part of data missing, please buckup your important data before system upgrading.
File Size803.57 MBytes                                                                                   2014/11/07
Download fromGlobal

Labels: , ,

[ZenUI] How to Block Unknown Calls


When "block unknown calls" is enabled, all unknown calls that are not on contact list will be blocked.

Tap "Block function setting" in "Settings" -> "Call settings".


"Block"here means "the call will be blocked and the phone will not ring".

Enable "Display blocked call notification": A notification will appear on status bar when there is an incoming unknown call.

Disable "Display blocked call notification": No notification will appear on status bar when there is an incoming unknown call.


Block unkown SMS (similar to "Block unknown calls")

Labels: , ,

Friday, November 28, 2014

Download Official Unlock Bootloader tool for Zenfone 4 A400CG


ZENFONE 4 A400CG Unlock Bootloader Tool
Version V1.0


DescriptionUnlock Device App: 
Unlock boot loader Notice: 
1. Update your software image to Android 4.4 
2. Before you download, install, and use the Unlock Device App you acknowledge and assume complete risk to the quality and performance of this App, including but not limited to the following: once you activate the App you will not be able to recover your ASUS product (“Original Product”) back to original locked conditions;the Original Product with the activated App will not be deemed the Original Product; the Revised Product will no longer be covered under the warranty of the Original Product; the software of Revised Product will no longer be deemed the software of the Original Product and can no longer receive ASUS software updates; your purchased digital content may also be affected.  You also acknowledge ASUS does not guarantee service satisfaction to any Revised Product, including events involving paid service requested by you to be performed to the Revised Product. Furthermore, such repaired Revised Product will not be covered under the warranty of the Original Product; the software of the repaired Revised Product will not be deemed the software of the Original Product and will not receive ASUS software updates. It is strongly advised that you avoid activating this App unless you fully understand and accept the risks that may arise.

File Size360,27 KBytes                                                                            update 2014/11/27
Download fromGlobal

Labels: ,

Extinderea rețelei este mai simplă decât pare


Extinderea rețelei de internet într-un imobil poate fi o operațiune costisitoare dacă nu sunt alese cele mai bune soluții. Montarea cablurilor de internet, găurirea pereților uneori cu afectarea finisajelor nu ar trebui să intre în calcul odată ce există și alte posibilități. 

Alegerea unui router wireless ASUS și a unei plăci de rețea este o soluție ideală pentru un apartament sau o casă obișnuită. Acest lucru nu implică montarea cablurilor și nici apelarea la un special, instalarea routerului și a plăcii de rețea wireless fiind foarte simplă. 

ASUS RT-AC87U este cel mai puternic router din lume destinat utilizatorilor casnici, având capacitatea teoretică de a transporta până la 2400Mbps. Specificațiile tehnice ale routerului RT-AC87U pot fi gasite aici.
Verifica aici pretul online. 

Dacă se dorește instalarea unei rețele într-o casă cu pereți groși, care afectează propagarea undelor radio de înaltă frecvență, se poate apela la un adaptor care folosește rețeaua electrică pentru a distribui internet. Un exemplu în acest sens este PL-X51P/PL-X52P. În acest caz este necesară introducerea adaptorului într-o priză și conectarea cablului la calculator.  


Labels:

Jocuri și divertisment cu notebook-ul N751


Notebook-urile ASUS depășesc limitele tehnologice considerate de netrecut de alți producători. Dimensiunile compacte ale notebook-urilor de gaming vin în totală contradicție cu emisiile de căldură ale plăcii video, sistemul de răcire fiind supus unui test foarte dur. Mai mult, căldura generată de componente trebuie dirijată departe de mâinile utilizatorului, astfel încât acesta să nu simtă niciun fel de disconfort atunci când folosește intens laptopul. 

ASUS N751 este motorizat de a patra generație de procesoare Intel Core i7 pentru multitasking facil, cuplat cu grafica de jocuri NVIDIA GeForce GTX 800 pentru o redare video fluidă și jocuri dinamice. Un sistem de răcire avansat garantează faptul că N751 va avea maximum de stabilitate și performanță tot timpul, chiar și atunci când sunt rulate cele mai pretențioase aplicații.

Tehnologia Instant-on permite ieșirea din standby în numai două secunde. Pentru liniștea utilizatorilor, datele sunt automat salvate pe hard disk, atunci când nivelul baterie scade sub 5%.

ASUS N751 este echipat cu un ecran IPS Full HD (1920 x 1080) cu diagonala de 17.3 inci, cu unghiuri de vizualizare de 178 de grade (orizontal și vertical). Tehnologia ASUS Splendid reproduce cu acuratețe culorile și detaliile vibrante, laptopurile din seria N oferind experiențe vizuale uimitoare pentru fotografii, filme și jocuri. Pentru o experiență și mai bună, noua serie ASUS N utilizează panouri LCD anti-glare ce reduc oboseala ochilor cauzată de reflecțiile inerente în mediile puternic iluminate. 

ASUS N751 este disponibil în România la prețuri ce pornesc de la 4099 lei (inclusiv TVA), în funcție de configurație.

Labels: , ,

Thursday, November 27, 2014

How to root Myphone Rio Craze

My Phone Rio Craze Picture


Hey guys here's the flashable and easiest way to root myphone rio craze.


Download Link:
1.KingRoot3.4.7.apk

Flash this using custom recovery for pro version of SuperSU
2.SuperSu.2.01.zip

Labels: ,

Wednesday, November 26, 2014

Fii pe faza! Prinde reducerea de 100% de la DigiMobil!


Fii pe faza! Prinde reducerea de 100%!
Compania RCS-RDS a creat o pagina specială pentru Black Friday 2014, in care anunta o reducere de 100%, fie la un serviciu Digi Mobil, fie la un produs (telefon, tableta).

Astazi compania va afisa astazi pe site-ul dedicat conditiile ofertei, urmand ca aceasta sa fie valabila fie imediat, fie incepand de vineri - 28 noiembrie 2014, cand are loc in mod traditional adevaratul 'Black Friday' (in ultima zi de vineri din luna noiembrie). Sper sa fie o oferta valabila atat pentru clientii actuali, cat si pentru cei noi, nu doar pentru categoria din urma.

Vom afla in curand despre ce este vorba cu adevarat, preconizez o noua miscare de succes din partea echipei RCS-RDS!


[Update]

Iata ca s-a elucidat misterul! Se refera la portarea numarului in DigiMobil.


Porteaza-ti numarul in reteaua Digi Mobil in perioada 27.11 - 01.12.2014 si beneficiezi de reducere 100% timp de 6 luni* pentru abonamentul Optim Nelimitat. Pentru a beneficia de oferta, vino in magazinele Digi.

Avantajele Optim Nelimitat:
- NELIMITAT in ORICE retea nationala si in retele internationale
- NELIMITAT internet mobil (viteze de pana la 21,6 Mbps pentru traficul pana la 5 GB)

Tarife dupa consumarea minutelor incluse:
    - 0,06 eurocenti/minut - catre national fix
    - 1,24 eurocenti/minut - catre national mobil

Primesti totul la cel mai mic tarif lunar: de la 4 euro (cu TVA)! Optim Nelimitat este tarifat lunar diferentiat, in functie de in functie de serviciile Digi la care mai esti abonat:

- 5 euro, daca esti abonat la TV + net fix; 4 euro, daca optezi si pentru al doilea abonament
- 7 euro, daca esti abonat la TV sau net fix; 5 euro daca optezi si pentru al doilea abonament
- 10 euro daca nu esti abobat Digi

Vezi telefoane disponibile cu abonamentul Optim Nelimitat redus cu 100%. 

Reducerea de 100% se aplica acestor tarife lunare. 
* Reducerile se aplica in lunile de abonament 1-3 si 7-9.

Labels: , ,

Myphone Rio Fun v2 Kitkat android 4.4.2 Stock Rom

Here's my stock rom in myphone rio fun V2 Kitkat Android 4.4.2.v1.09
This is updated version of rio fun Kitkat V2. Sorry for the inconveniece of ads considering this only for your donations just to keep my blog alive. After you click skip ads the download link will appear. And you can download now for free. Enjoy and keep up sharing everyone!

My Phone rio fun picture


Download here:
1. myphoneRioFunV2Kitkat.zip
2. My_Phone_Agua_Rio_Fun_v2.zip

3. Fulldump_mpriofun_v1.09_kitkat

How to flash please proceed this [ClickHere]

Please do not reupload or share it with my blog. Thank you!

Labels: ,

ZenWatch "Find My Phone" Function


Find My Phone helps users find their phone when it is misplaced by ringing it remotely. Alternatively, ASUS ZenWatch Manager on the smartphone can be used to find a misplaced ZenWatch by making it vibrate and flash.

1. First, double-click on the watch to wake ZenWatch. 

 
2. Click twice and then enter the function menu of the "Start" 

 
3. Select "Find my phone" function and click enter. 

 
3. Just go to this picture "Swipe to dismiss" has been turned on behalf of it! 

 
4. In the "Swipe to dismiss" the time displayed on the screen phone will beep sound,
The screen will appear "slide to close." 

 
5. The end of the phone or ZenWatch just slip your mobile phone to release the sound to find function.

When using this function should note that both sides should watch phone with a Bluetooth connection in the state's only looking to get over Bluetooth transmission range, then this feature will not be able to use !

Labels:

Tuesday, November 25, 2014

How to Un-Brick Zenfone 4 A400CG

If you can't enter Recovery at USB mode, you can try this Method:
Zenfone Brick USB Mode

Resources to Download:
  1. Intel USB Driver (Download HERE)
  2. Asus USB Driver (Download HERE
  3. iSocUSB-Driver-Setup-1.0.4.exe (Download HERE)
  4. xfstk-downloader-setup-1.5.1.exe (Download HERE)
  5. IntelAndroidDrvSetup1.5.0.exe (Download HERE)
  6. ADB Fastboot (Flashtool.zip) (Download HERE)
  7. FW DnX, IFWI, OS DnX, OS Image files (Download For Zenfone 4 )
  8. Update Splashscreen.bat (Download HERE)
  9. Download Zenfone 4 RAW Firmware ( JellyBean , KitKat
Instructions:
  1. Download All Resources above and Place it to one Folder, and Install Intel USB Driver& ASUS Zenfone USB Driver.
  2. The first step is to install iSocUSB-Driver-Setup-1.0.4.exe, when your phone is on USB pattern appears when connected to the computer should be two new devices, both at Intel Soc classification: CloverviewPlus Device and Intel Soc USB Driver.
    unbrick-zenfone-device manager
    unbrick-zenfone-device manager
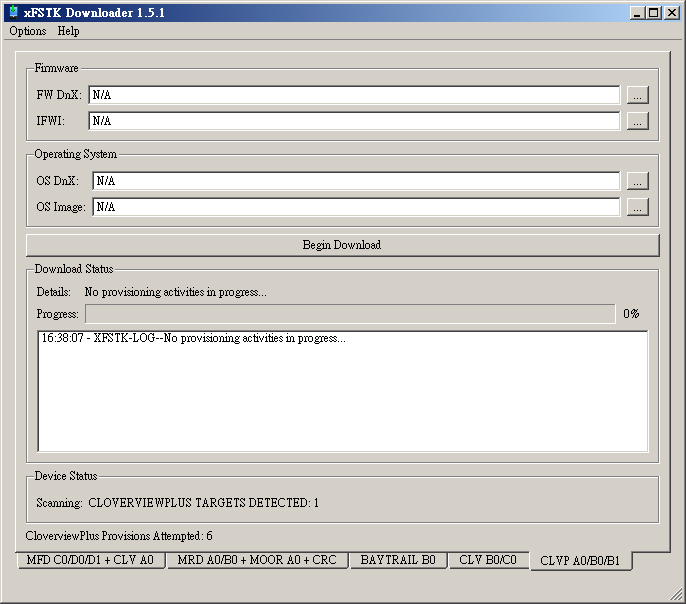
  3.  The second step is to install xfstk-downloader-setup-1.5.1.exe and switch to the CLVP A0/B0/B1 Tab, and Make sure Device status column which shows the Scanning: CLOVERVIEWPLUS TARGETS DETECTED: 1, if the final surface is displayed as 0, check again Device Manager and make sure Zenfone is detected.
     xfstk-downloader zenfone
    xfstk-downloader zenfone
    Detected Device: 
    CLOVERVIEWPLUS TARGETS DETECTED: 1
    CLOVERVIEWPLUS TARGETS DETECTED: 1
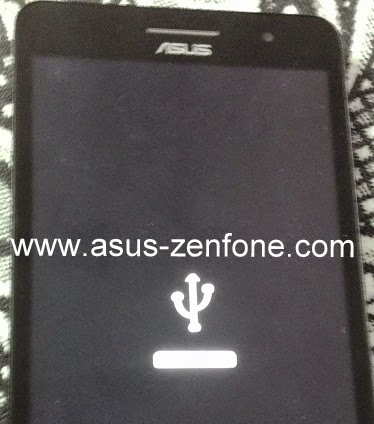
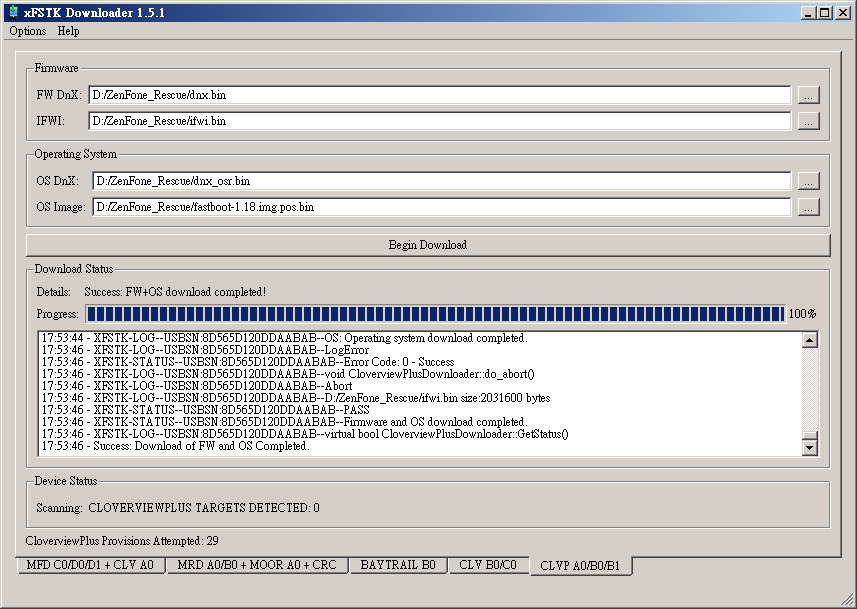
  4. The next thing is very simple, sequentially select FW DnX, IFWI, OS DnX, OS Image files that you have downloaded earlier.and Click Begin Download, then USB pattern on the phone will have a progress bar display (red) 
    Unbrick Zenfone xSTFK Downloader Progress
    Unbrick Zenfone xSTFK Downloader Progress
  5. Upon completion of the phone will automatically reboot
  6. Flash RAW Firmware via Droidboot if Necessary (Tutorial Here)

Labels: ,

How to Fix Bootloop on Zenfone 4 A400CG


Today I will share some methods How to Fix Bootloop on Zenfone 4. Bootloop means your phone doesn't boot up right, it's just starting and starting and nothing happens, or it's starting and shutting down and starting again. It just means your phone makes a loop while booting

Method 1

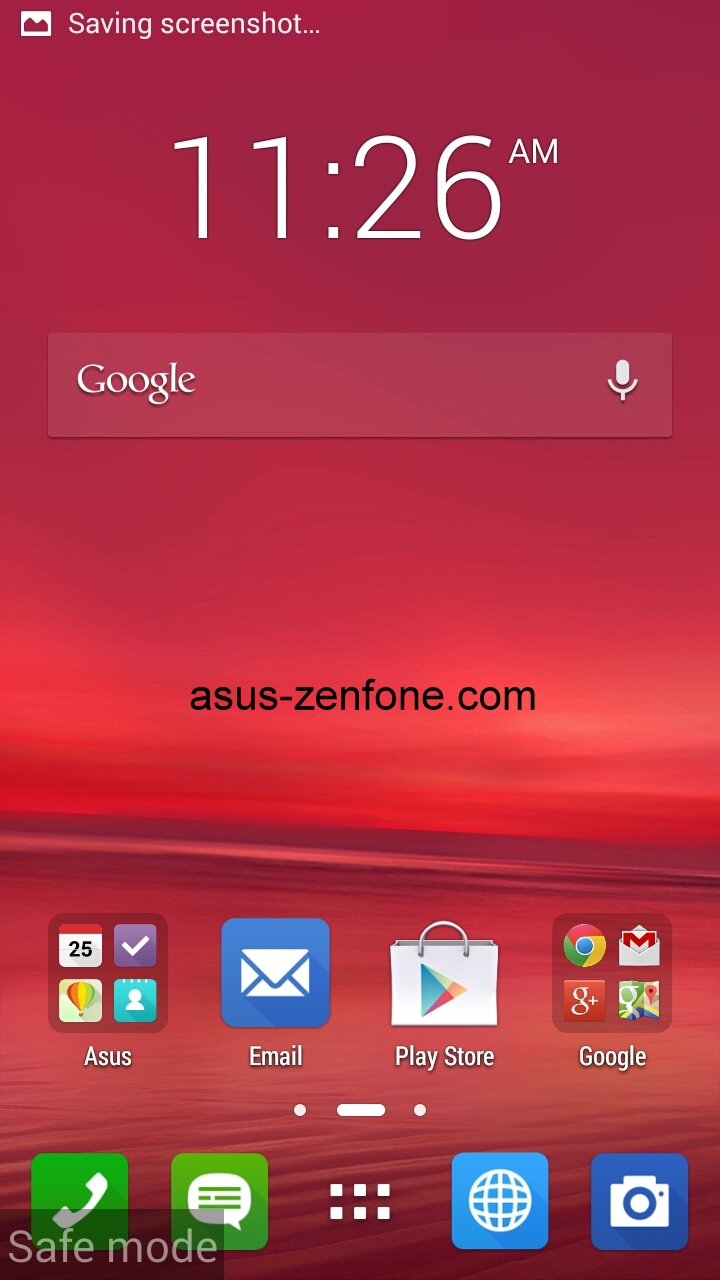
First Method you can enter Safe Mode if it's possible. But you must know the cause of bootloop, for example My Zenfone Bootloop because accidentally install bad apps/apk. This Method will not erase your data.

  1. Turn Off Zenfone
  2. Turn On Zenfone and When it Show Asus Logo Quickly Press Volume Down Until Enter Safe Mode
  3. Fix the Problem by deleting the cause of Bootloop
  4. Restart your Zenfone, and see your bootloop is fixed or not.
Detailed Instructions about Safe Mode can you see Here : http://www.asus-zenfone.com/2014/09/zenfone-how-to-enter-safe-mode.html

Method 2

Second Method Can be applied if your Zenfone 4 can enter droidboot. This Method will erase your data (data loss).
  1. Turn Off Zenfone 4 and Remove the battery
  2. Plug in the battery again.
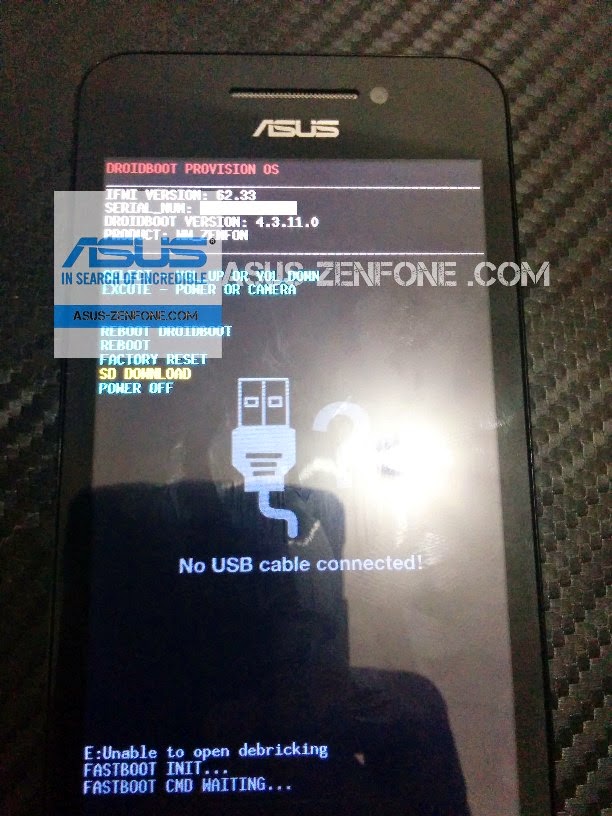
  3. Enter Droidboot mode by Pressing Volume up + Power
    Zenfone 4 Droidboot Mode - www.asus-zenfone.com
    Zenfone 4 Droidboot Mode - www.asus-zenfone.com
  4. Choose "Factory Reset"
  5. Reboot and See if your Bootloop has been resolved or not.

Method 3

The Third Method requires RAW firmware for Zenfone 4, and a Micro SD Installed on your Zenfone 4. This Method completely erase all of your data and root.
  1. Download Raw Firmware for Zenfone 4 ( JellyBean , KitKat
  2. Place RAW file inside SD Card
  3. Turn Off Zenfone 4 and Enter Droidboot by pressing Volume up + Power Button
  4. Choose "SD Download"
  5. Wait Until Finish and Reboot

Labels: ,

Download Z Launcher 1.0.4-Beta By Nokia Apps LLC


From Nokia, a re-imagined way to use your Android. Adapts to you. Launches anything in one second.
Throughout the day, Nokia Z Launcher is learning how you use your phone and promoting your favorite apps so you can get to them faster. The more you use it, the better it gets.
IT’S SO SIMPLE
*Scribble – Scribble a letter to find what you want
*Launch – Apps, contacts, or websites
*Adapt – It learns to promote the right stuff at the right time
WHAT PEOPLE ARE SAYING ABOUT Z LAUNCHER
“Nokia just made the smartest Android launcher around” – Slashgear
“Wonderfully simple and shockingly innovative” – BGR

http://adf.ly/udbKM
Download

http://adf.ly/udbBG
Mirror

Labels: ,

How to fix Bootloop on Zenfone 5 and Zenfone 6


Today I will share some methods How to Fix Bootloop on Zenfone 5 or Zenfone 6. Bootloop means your phone doesn't boot up right, it's just starting and starting and nothing happens, or it's starting and shutting down and starting again. It just means your phone makes a loop while booting

Method 1

First Method you can enter Safe Mode if it's possible. But you must know the cause of bootloop, for example My Zenfone Bootloop because accidentally install bad apps/apk. This Method will not erase your data.

  1. Turn Off Zenfone
  2. Turn On Zenfone and When it Show Asus Logo Quickly Press Volume Down Until Enter Safe Mode
  3. Fix the Problem by deleting the cause of Bootloop
  4. Restart your Zenfone, and see your bootloop is fixed or not.
Detailed Instructions about Safe Mode can you see Here : http://www.asus-zenfone.com/2014/09/zenfone-how-to-enter-safe-mode.html

Method 2

Second Method Can be applied if your Zenfone 5/6 can  enter droidboot. This Method can erase your data (data loss).
  1. Turn Off Zenfone and wait for a minute.
  2. Enter Droidboot by Pressing Volume up + Power button
    Droidboot Mode Zenfone-www.asus-zenfone.com
    Droidboot Mode Zenfone-www.asus-zenfone.com
  3. If success enter Droidboot, choose "Last Successful Flash Log" (navigate with volume up/down  and power button to choose)
  4. Then choose "Reboot" if you can enter Homescreen, job is done :)
  5. If "Last Successful Flash Log" doesn't work well or still bootloop, Enter Droidboot again and Choose Factory Reset (Warning: This will erase all data)
  6. Then Choose "reboot" again.


Method 3

The Third Method requires Droidboot mode and Recovery Mode. This Method completely erase your data and root.
  1. Turn Off Zenfone and wait for a minute.
  2. Enter Droidboot mode by Pressing Volume Up + Power Button
    Droidboot Mode Zenfone-www.asus-zenfone.com
    Droidboot Mode Zenfone-www.asus-zenfone.com
  3. Choose Recovery Mode
  4. When "No command" appear, Press Volume down+Volume Up then your zenfone will enter recovery (wait patiently).
    Recovery Mode Zenfone - www.asus-zenfone.com
    Recovery Mode Zenfone - www.asus-zenfone.com
  5. When You enter recovery but "Red Dead android Robot" appear, it means your zenfone recovery was disappear/missing. The Solution is Flash Recovery, Detailed Tutorial can you read Here: http://www.asus-zenfone.com/2014/08/zenfone-original-recovery-image-zenfone.html Make sure you flash your current Zenfone version/lower recovery. (If you can enter recovery Skip this step)
  6. Choose "Wipe Data/Factory Reset" and Wait until Complete.
  7. Choose "Wipe cache Partition" and Wait until Complete.
  8. Back to Recovery and Choose "apply update from ADB" Detailed tutorial about flashing via ADB can you read Here: http://www.asus-zenfone.com/2014/05/flash-tutorial-via-adb-sideload.html

Labels: , ,

Myphone Rio Craze Stock rom

My friend of mine share this myphone rio craze stockrom so guys I want to share this esp. for those have bootloop issue and don't need to go in service center to pay and also save your time and money.
I never tried this but do it at your own risk.
My Phone Rio Craze Picture


MyPhone RIO CRAZE Specs
Android 4.4.2 KitKat
4″ WVGA Capacitive Touchscreen
1.3 GHz MT 6571 Dual Core processor
256 MB RAM, 512 MB Internal Storage
Expandable up to 32 GB
1300 mAh battery
VGA Front Camera, 1.3 MP Back Camera
DUAL SIM
Motion Sensor


Myphone Rio Craze Stock rom
Stock Rom: RIOCRAZE_STOCKROM.zip  (268mb)

Labels: ,

ZenWatch Heart rate Measurements

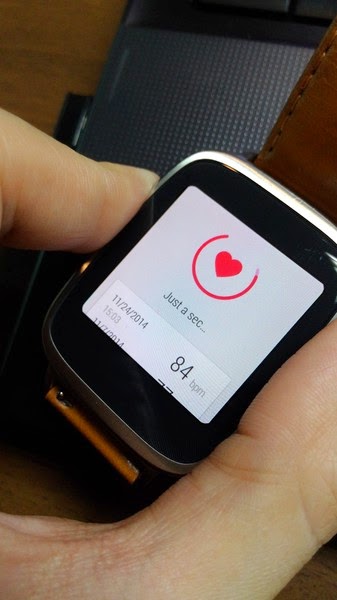
ZenWatch quite rich biological sensor detection, Today and tell you how to use ZenWatch measure heart rate.
No matter which can be used anytime, anywhere!

1. First, double-click on the watch to wake ZenWatch.


2. Click twice and then enter the function menu of "Show me my heart rate"


3. Action relaxed mood before the heartbeat, the two-finger touch ZenWatch border.


4. put up like this ~ ~ ~ ~
Waiting for him a few seconds to let love turn around.


5. heartbeat complete !


6. You can see the top ten times sliding heartbeat record date and time measurement of both.


Aerobic exercise heart rate up to par with ZenWatch whether there can be easily measured,
Enjoy with your ZenWatch movement recording it!

Labels:

Monday, November 24, 2014

V1 Viper 16 GB trece la Android 4.4 Kit Kat


Iata ca si smartphone-ul V1 Viper 16 GB beneficiaza de update la KitKat. Astfel, utilizatorii acestui telefon vor putea sa isi descarce ultima versiune de Android valabila pentru V1 Viper 16 GB de aici sau de aici

Avantajele actualizarii sistemului de operare Android de la 4.2.2 Jelly Bean la 4.4.2 Kit Kat sunt imbunatatirea vitezei de procesare si a widget-ului pentru optimizarea memoriei RAM, interfata meniului mai prietenoasa si adaugarea unor aplicatii noi ca: Screen Off and Lock, System Manager, Compass, Weather etc. sau aplicatia pentru gestionarea eficienta a resurselor.

Arhiva:  Update_V1Viper_16GB_KitKat fw
Fisier actualizare: Update_V1Viper_16GB_KitKat_17.11.2014.zip
Dimensiune arhiva: 563 MB
Build number: gionee89_wet_kk-user 4.4.2 KOT49H eng.android.1415906305 test-keys


Atentie!
- Telefonul trebuie sa fie incarcat complet in momentul initializarii procedurii.
- Sub nicio forma sa nu intrerupeti operatiunea de actualizare. 
- Actualizarea de soft este o operatiune care se realizeaza pe propria raspundere urmand cu exactitate pasii prezentati mai jos. 
- Acesta procedura se aplica pentru ambele versiuni de soft Android 4.2: V1_Viper_0102_V6132 si V1_Viper_0102_V6681. 
- Recomandam Factory Reset dupa actualizare, pentru a evita aparatia unor erori.
- Resetarea telefonului la parametrii de fabrica duce la stergerea completa a informatiilor personale si a aplicatiilor instalate in telefon. 

Pentru a actualiza versiunea software a smartphone-ului Allview V1 Viper 16GB este necesar sa realizati urmatorii pasi:

1. Se descarca arhiva “Update_V1Viper_16GB_KitKat_17.11.2014.zip” pe un desktop PC sau laptop.
2. Se copiaza arhiva “Update_V1Viper_16GB_KitKat_17.11.2014.zip” in memoria interna sau pe un card microSD.
3. Se porneste telefonul si se deschide aplicatia Sistem Update din meniul de aplicatii.
4. Se apasa meniu. Se bifeaza optiunea “Selectare actualizare din memoria interna”.
5. Se selecteaza fiserul de update din memoria interna sau SD card astfel: FISER -> Memorie interna/ SD Card ->“Update_V1Viper_16GB_KitKat_17.11.2014.zip”.
6. Pe ecranul telefonului va aparea un mesaj care va informeaza despre acesta actulizare. 
7. Selectam actualizare. Telefonul se va restarta si va incepe in mod automat procedura de update.  
8. Dupa finalizarea procesului de actualizare, telefonul se va restarta.
9. Pe ecranul telefonului va aparea mesajul: “ Android trece la o vers. superioara”.
Fiserul de update Update_V1Viper_16GB_KitKat_17.11.2014.zip din memoria interna/ card microSD se va sterge automat dupa finalizarea procesului de actualizare. 


Labels: , , ,