Saturday, January 31, 2015

PF500KL Padfone S New Version will be launch in February (3GB RAM/64GB)


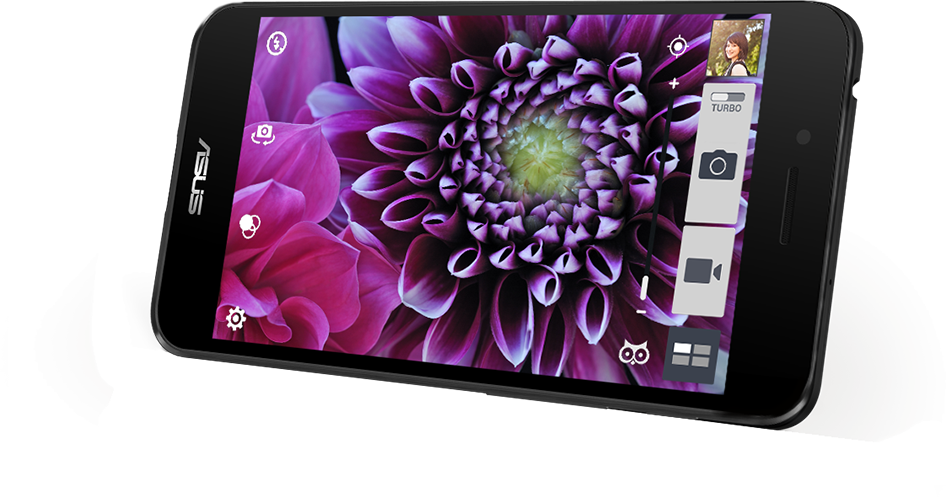
Besides of Zenfone Series, Padfone S become high success too. A powerful & enhanced mobile experience–Meet the PadFone S, the unique ASUS innovation that combines the best of the smartphone and tablet.

PadFone S perfectly demonstrates ASUS’s unique and innovative design philosophy. It is an effortless convergent device that combines technology and style. With PadFone S, you can enjoy the options of different screen sizes that are optimized for different user scenarios.

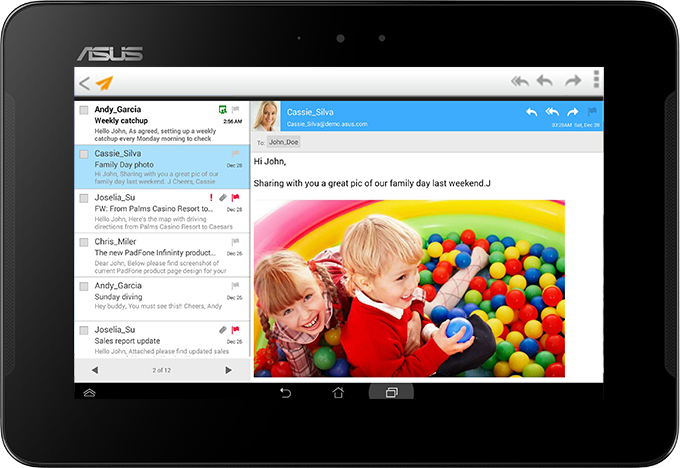
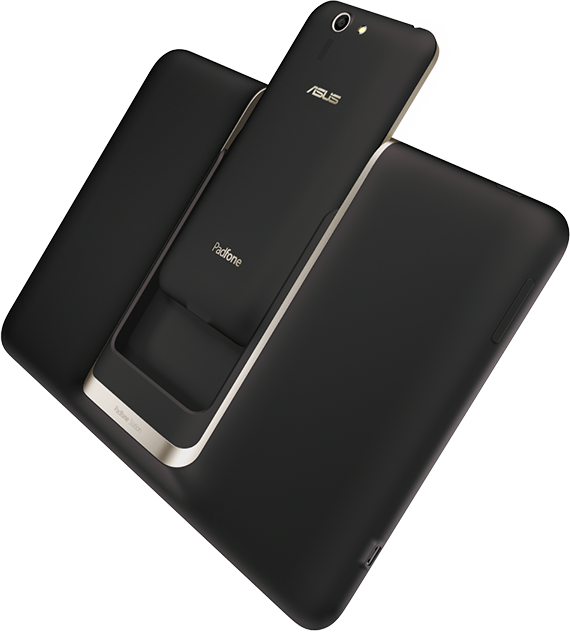
The PadFone S is a premium LTE smartphone with a 5-inch Full HD display that becomes an 8.9-inch Full HD tablet when docked into its companion PadFone S Station. It removes the redundant data syncing and duplication of data plans, providing users with an incredibly light and uncompromised premium experience. App layouts are optimized to fit the two different displays, ensuring you get the best possible experience in each mode.

According to my internal source and ASUS Taiwan Official Website, They will be launch new type of Padfone S which have 3GB RAM and 64GB Internal Storage. But the main Processor will be same as the old one, Qualcomm Snapdragon 801 MSM8974AB (Quad Core @ 2.3GHz)
Here is the Full Specifications of ASUS Padfone S:

ASUS Padfone S PF500KL
Platform Android 4.4 (KitKat) equipped ZenUI
Color Ceramic White / Obsidian Red
Product Size
PadFone deformation phone 143.93 x 72.46 x 9.98 ~ cm (width x length x height) PadFone tablet dock 250.4 x 172.25 x 11.63 ~ cm (width x length x height)
Weight 150 g (with battery) PadFone tablet base 514 g
CPU Qualcomm Snapdragon 801 MSM8974AB (Quad Core @ 2.3GHz)
Memory 2 GB / 3 GB RAM
Data storage applications 16GB / 64GB built-in storage space **

5GB lifelong ASUS Webstorage
Memory Slot Micro-SD card (up to 64 GB)
Link Technology WLAN 802.11a / b / g / N / ac

USB 2.0

Bluetooth V4.0

NFC
single SIM card slot Micro SIM
Internet technical standards LTE / WCDMA

DC-HSPA + download speed: 42 Mbps / upload speed: 5.76 Mbps

LTE: the maximum download speed 150 Mbps / upload speed: 50 Mbps 3G: WCDMA: 900/1900/2100 2G: GSM: 850/900/1800/1900

4G: FDD-LTE: 700/900/1800/1900/2100/2600 * 2
Other features
Support GPS A-GPS
Battery 2300 mAh lithium battery PadFone tablet dock 4990 mAh lithium battery
Standby time 417/528 hours (2G / 3G)

Talk time

30/22 hours (2G / 3G)
Camera front camera 2 million pixel

camera on the back of 13 million pixels

PixelMaster

PadFone tablet dock front lens 1 million pixels
Video features
Video playback: up to 1080p MPEG4

MPEG4

H.264

AVC H.264

H.263

H.264 1080pHD

3GP

Ogg

Audio Recording:

H264 AVC

MPEG-4 SP

MPEG-4 ASP

VP8

VP9

MPEG4 up to 1080p @ 30fps

MPEG4 up to 1080p @ 30fps

H.263

H.264

H.263 VGA @ 24fps

H.263 VGA @ 30fps

H.263 QVGA @ 15fps

@ 720p H.264 Video Encode Decode @ 1080p

H.264HD 1080p

H.264 1080p @ 30fps Video Encode and Decode

3GP
Gravity sensor / electronic compass / proximity sensor / ambient light sensor

ASUS TAIWAN

Labels: ,

Sacred Odyssey 3D HVGA For Android


Sacred Odyssey 3D  HVGA For Android


ตัวเกม + ไฟล์เกม

Sacred Odyssey 3D For Android

DATA ลงใน  Sdcard\gameloft\


Labels:

Tap Titans MOD (Unlimited Money) For Android

Tap Titans MOD  (Unlimited Money) For Android


ตัวเกม 

Tap Titans MOD  (Unlimited Money) For Android

Labels: ,

Friday, January 30, 2015

GBBM v1.30 - Una versión modificada de BBM con características semejantes a las de WhatsApp Plus [Actualizado] [En Español]

Requiere Android 2.3 o superior.

¿Qué es GBBM?

Es un MOD de la aplicación oficial de BBM desarrollado por algunos de los chicos de XDA, al cual se le han añadido muchas características adicionales, que en cierto sentido lo hacen semejante al Whatsapp Plus.

¿Qué características adicionales tiene GBBM?

-GBBM te da la posibilidad de programar una copia de seguridad de tus chats, para restaurarlos después.

-Puedes ocultar estado leído "R" y se puede cambiar la forma de la pantalla conversación.

-Puedes cambiar el color de los iconos de aviso, puedes cambiar los fondos de galería, cambiar los colores y tamaños de texto, puede copiar el estado y el nombre de los contactos.

-Entre muchas cosas más.

Link para que te lo descargues:  ARCHIVO APK

Labels:

LG G3 Cons and Problems

Lg G3


  This are the cons and the problems I hate about the lg g3 which are just my personal  opinion, I do not actually dislike the LG G3 I like the phone but there are just some cons and disadvantages I think I dislike about it.
Read more »

Labels: , , , , ,

Thursday, January 29, 2015

Update OTA for Lenovo P780 International Version Firmware S228_ROW

Update OTA for Lenovo P780 International Version Firmware S228_ROW - Update for Lenovo P780 is out with build number P780_S228_ROW_150112, this update will fix any bugs on the previous version.
This update can be obtain with OTA only and can be install only if your previous system have build number S227_ROW_141219 without any modification on system, it means you can only install this update package with Lenovo standard recovery. You can check this update on your system update and obtain the file with your device, but if you feel harder then you can follow this guide to update your device.
If you device already rooted, after this update you need to root your device again because this update will remove the binary Su and root application, this method not harm to try so don't required to backup your data or backup your ROM but it good if you have backup for your data and your ROM.

Disclaimer :
This guide for educational purpose only, We not responsible if your device bricked after following this tutorial. Even this guide is already tested but it has possibility to brick your phone, (DWYOR)


Update OTA for Lenovo P780 International Version Firmware S228_ROW

ROM Description :
  • Build Number : P780_S228_ROW_150112
  • Date : 12.01.2015
  • OS : Android KitKat 4.4.2
  • Languages : Russia, Ukraine, Kazakhstan, Belarus (formerly CIS), is not intended to Malaysia, Vietnam, Turkey and so on - they have different firmware and it is not ready yet
  • Google Applications : Include
  • Root : No
Requirements :
  • Current firmware installed on your device must be P780_S227_ROW_141219
  • Still using Lenovo standard recovery, If you already change it then you can follow to this guide Restoring Standard Recovery
  • Sometime after update firmware your device become bootloop, so it need to do data backup before update your system.
Downloads :
  • P780_S228_ROW_150112 10 Mb, this update package contains require files to update your firmware to the latest version.
Update OTA for Lenovo P780 International Version Firmware S228_ROW
  1. Download update package to your pc, extract the archive and you will get file named update.zip 
  2. Move update.zip to your external SD card, don't put inside the folder place it on the root of your SD card, don't extract the update.zip leave it like this.
  3. Reboot your phone to recovery mode, you can do it with press and hold Power button + Volume Up + Volume Down button
  4. Installation will begin automatically once you log to recovery mode, wait until finish and the reboot your device.
  5. If you got bootloop when try to turn on your device (Stuck on Lenovo Logo), then you need to do factory reset. Press red button on the back case or go to recovery mode and select Factory Reset / Wipe Data
    Update OTA for Lenovo P780 International Version Firmware S228_ROW

  6. Reboot and success
Easy way to update Lenovo P780 to the latest International firmware version, this can also do without computer. Once finish and success please go to About System ↦ Software Information ↦ Build Number make sure you have the same with the downloaded ROM. 
Leave any comments if you found any problem or broken links regarding this guide, and thank you for visit

Labels: , ,

Lg G2 cons and problems

This are the cons and the problems I face while using the Lg G2, That I don’t really like about the phone.  This are only my personal Opinion and experience, plus the disadvantages of the phone  other users may have different issues/experiences.

Speaker volume/ media playback is too low:


One of the Lg G2 major problem is that the speaker volume for media playback is low, it is really low compared to other phones.

The speaker for media is way too low and Bluetooth lags for video streaming. Also some media apps like my local cable app optimum and ABC go are not supported on this phone which is a shame since the phone have such a beautiful screen.


Photo edit in gallery:

Any edits you do to photos in the gallery will automatically compress it down to 400kb or so, which makes the photos useless and loses quality.


Phone getting Hot while browsing:

Also on A&t the battery drain from android system is a pain. I Hate that the back of the phone gets really hot close to the power button and This has typically been under light web browsing on 4g.

Back/Gorilla Glass:

The Back of the phone is still really slippery. Gorilla glass 2 is also terrible as I have gotten some fine scratches on the front that has forced me to  use of a screen protector.

Ui isn’t Impressive:

I Hate the Lg G2  UI it Cant be compared to  the  Lg g3 now in which I love the UI.

The old optimums UI on my  G2 is really cluttered and annoying.


The Button Arrangement:


   At first I thought my main issue would be the slippery back, but that hasn't really been a problem after having the phone for 3 months. The main issue I have is that I frequently press home by accident when I 'm trying to press something else, such as putting the

cursor in the text input line of a text message. My previous phone had soft-keys too, but I didn't have that problem. Must have something to do with how the size of my hands aligns with the size of the phone.


   Overall the Lg  g2 is a very great phone with brilliant performers and great spec too. But I guess there is no perfect phone, each device have but their Pros and Cons. Users experiences are always very different when it comes to using a phone, as we all use our phone in different ways.

Labels: , , , , ,

How to downgrade Your Blackberry 10 devices using autoloader

    You can simply use autoloader to go back to the official OS. If you are using the Z10 or any other BB 10 devices, turn off your phone and remove the battery first, then run the autoloader and connect your phone. When the autoloader process begins, insert the battery back.

Read more »

Labels: ,

Htc one m8 cons and problems ( why I hate the M8)


   This are the cons and the problems I face while using the Htc one M8, That really makes me Hate this phone.  This are only my personal reasons and disadvantages,although other user may have different experience. I had a One M8 for a short time but returned it for this reasons:
Read more »

Labels: ,

Tuesday, January 27, 2015

How to Correctly Enter Recovery Mode on Android Tablet/Phones

You may have many kinds of reasons to enter android recovery mode if you have the special demand of android device. Recovery mode allows you to do lots of tasks on your rooted android device, such as reset your device and erase cache files from partitions, install system upgrades and custom ROMs, etc. Actually, there are a slew of different options to enter in the Recovery Mode on each android mobiles and tablets. Here I list two ways to enter the Recovery Mode on Android devices.


Way 1. Directly Enter Recovery Mode on Android


The most convenient way to enter recovery mode is Power Down your device and after that boot up your phone while holding volume + and-buttons + power button. You should know that this method just work well with some of mobiles. Follow the detailed steps:

Step 1. Turn OFF your android device.
Step 2. Press volume down and volume up at same time.(don NOT let go)
Step 3. While holding down volume up and volume down, press and hold power button. Hold the three buttons and do NOT let go of anything.
Step 4. Phone will start, you will see the white Vibrant logo. Keep holding on the three buttons.
Step 5. Whit vibrant logo disappears, still keep holding.
Step 6. When the white Vibrant logo re-appears for the second time, let the power button go, but keep pressing volume down and volume up.
Step 7. Phone begins to enter recovery mode, you can let them go finally.
Step 8. To exit recovery mode, you can select "reboot system now" and use power button to select.


Way 2. Boot into Recovery Mode with ADB


If you don’t know the direct key combination, using ADB will make it more easier to enter the recovery mode on android
Step 1. Set up ADB and Fastboot with Android SDK and make sure it is configured on your computer. Since ADB and fastboot helps install a custom recovery.
Step 2. If needed, you should connect android device to computer via USB cable and install ADB drivers.
Step 3. Go to android-sdk-windows platform- tools directory and open Command Prompt(Shift + Right-click anywhere in the folder > Open Command Prompt).
Step 4. Type in the command “adb reboot recovery” and press Enter.
Step 5. Turn OFF your android device and then boot into the recovery mode.

Note: Navigate up and down using the volume keys.


Warming Tips:

- If you are tired of setting configurations and key combinations, you can also try boot apps to enter recovery mode.
- Back up data on your android device before entering recovery mode.
- Factory reset your android device and all data lost without backup? Click here to get solution to recover data after factory reset Android.

Labels: , , ,

¿Cómo saber qué tipo de GPU tiene mi Android?

Buenas noches, chicos.

En este tutorial, les vengo a enseñar cómo saber qué GPU tiene nuestro dispositivo Android, para asi poder descargar el APK correcto en determinados juegos que cuentan con varias versiones según el procesador gráfico que tengamos.

Esto de verdad es muy sencillo.

Les explico:

Para saber qué GPU tenemos, sólo hay que instalar la APP ‘CPU-Z‘.

Iniciamos la aplicación y en el apartado donde dice GPU Renderer, te muestra qué GPU tiene tu dispositivo.

Pues fácil, ¿no? Aquí les dejo un screenshot (de referencia):

Labels:

Lenovo S960, Re Flashing with Android Jelly Bean Row Version ROW_S128

Lenovo S960, Re Flashing with Android Jelly Bean Row Version - Today guide is about to flashing old firmware for Lenovo S960 or known as Vibe X, On this guide i would like to share how to flashing an Android Jelly Bean 4.2.2 on your device, the reason is why would back to Android 4.2.2 ? because when installing Android 4.4.2 or Android KitKat your device not as fast as using Android Jelly Bean 4.2.2.
This guide is using flash tool method, common method for Lenovo devices. This method will erase all data, and system on device so better do backup first before following this guide, and this flash tool method also have possibility to brick your device and remove your IMEI so consider it.

Disclaimer :
This guide for educational purpose only, We not responsible if your device bricked after following this tutorial. (DWYOR)
Lenovo S960, Re Flashing with Android Jelly Bean Row Version ROW_S128

ROM Descriptions :
  • Build Number : S960_ROW_S128_140127
  • Date : 27-01-2014
  • OS : Android Jelly Bean 4.2.2
  • Languages :  Russian , Ukrainian, English, Arabic, Spanish, French, Chinese, Vietnamese, Indonesian, Malaysian, Thai
  • Google Applications : Include
  • Root : No
Downloads :
  • S960_ROW_S128_140127 1.2 Gb, contains all required images files to flashing your device to Android Jelly Bean.
  • USB VCOM Driver  Install this driver first on your computer, Turn off your device and remove the battery, using USB cable connect your device while look at My Computer  Manage  Device Manager there will be MTK65xx Preloader Devices show up for 5 second than disappeared, before disappeared right click on it and select Update Driver Software point it to USB VCOM Driver extracted folder. When it finish disconnect and connect again there will be Mediatek PreLoader USB VCOM Port on your device manager.
    Lenovo S960, Re Flashing with Android Jelly Bean Row Version ROW_S128

  • SP Flash Tool v3.1320 Flash tool that needed to flash the ROM to your device, recommended to use only this version. 
Lenovo S960, Re Flashing with Android Jelly Bean Row Version ROW_S128
  1. Download add required files need to do this guide. It recommended to place all files on the one folder for easy organize it, because this guide using flash tool so first think you must to do is make sure that USB VCOM driver is installed properly on your computer.
  2. Extract all, ROM files and flash tool. Go to flash tool extracted folder and then run flash_tool.exe, if you are using windows 7 or later please make sure that you run it using administrator privilege to avoid any permission error.
  3. On the flash tool, check DA DL All with Checksum option and then click on Scatter-Loading button browse it to ROM extracted folder target_bin and the select MT6589_Android_scatter_emmc.txt. When you select android scatter file and load it to flash tool it also will automatically load another image files to flash tool.
    Lenovo S960, Re Flashing with Android Jelly Bean Row Version ROW_S128

  4. Now press Download button on the flash tool or your can hit F9 on your keyboard. This make flash tool begin to initialize ROM file and after few minutes it will become stand by and ready to make connection with your device. (When you got flash tool error 8038 when connect your device, then please try click firmwareupgrade button)
  5. Next step is turn off your device, because Lenovo S960 using non removable battery so you must make sure that your device is completely turn off. Then just connect your device to your computer.
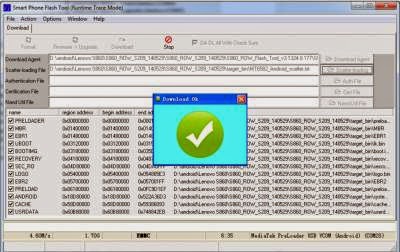
  6. Flash tool will recognize your device and begin to start flashing process, then process will take 5-6 minutes to finish, GREEN CIRCLE will pop up on the middle on flash tool when it already finish.
    Lenovo S960, Re Flashing with Android Jelly Bean Row Version ROW_S128

  7. Done, now you can disconnect your device, turn your device on. First time boot will take longer usually take 4-5 minutes so please be patient. Go to dialer and dial ####8888#, this is will do factory reset on your device. (will remove all data on device, built in storage)
  8. Done, Just boot to your home screen and confirm firmware Build Number and make sure is same as ROM downloaded S960_ROW_S128_140127.
Congratulations, successful flashing Lenovo S960 with Android Jelly Bean 4.2.2, for china device please don't forget to change modem firmware after finish flashing. Leave any comments if you found problem or broken link regarding this guide. Thank You

Labels: , ,

Sunday, January 25, 2015

FINAL FANTASY VI 2.0.5 (NO ROOT) For android

FINAL FANTASY VI 2.0.5 (NO ROOT) For android


ตัวเกม + ไฟล์เกม  


DATA ลงใน   SDCard/Android/Obb/

Labels: ,

Saturday, January 24, 2015

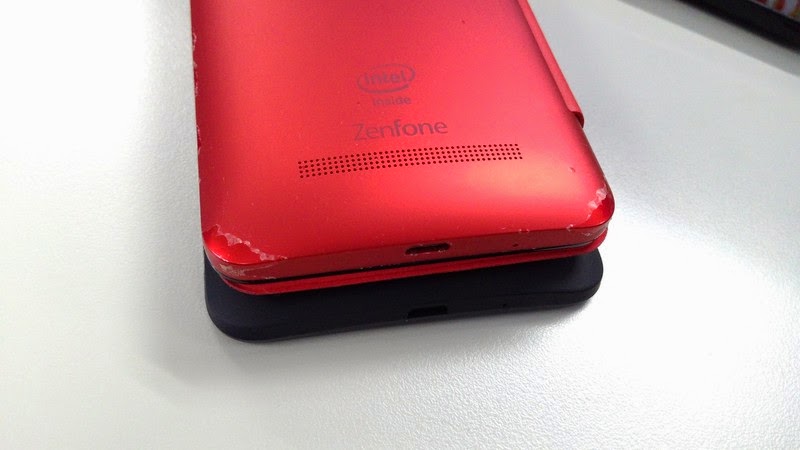
Asus Zenfone 2 Hands-on Review


Today Asus Zenfone Blog will Leaks some Photos and Add Fast Review About Zenfone 2. At CES 2015 ASUS unveiled ZenFone 2, the flagship smartphone in the new-generation ZenFone family. With a gorgeous all-new ergonomic design, a 5.5-inch Full HD IPS display, 13MP/5MP PixelMaster cameras, a 2.3GHz 64-bit Intel Atom processor with 2GB/4GB RAM and 4G/LTE connectivity, ZenFone 2 delivers powerful all-round performance.

Zenfone 2 | www.asus-zenfone.com
From Left to Right: Zenfone 5 LTE, Zenfone 2, Zenfone 6, Zenfone 2

Zenfone 2 | www.asus-zenfone.com
Zenfone 2 Upper Bezel is reduce, compared with zenfone 5LTE

Zenfone 2 | www.asus-zenfone.com
Brand New ZenUI

Zenfone 2 | www.asus-zenfone.com
Zenfone icon, Brushed Metal

Zenfone 2 | www.asus-zenfone.com
Zenfone 2: Volume Button on The Back

Zenfone 2 | www.asus-zenfone.com
Port Charger, Zenfone 2 Support Fast Charging

Zenfone 2 | www.asus-zenfone.com
Zenfone 2 Power Button On Top

Zenfone 2 | www.asus-zenfone.com
Side View

Zenfone 2 | www.asus-zenfone.com

 Overall:
  1. Better Performance + Power Consumption
  2. Better Speaker and Loud, Compared to Zenfone First Generation
  3. Bright LED Notifications
  4. Better Grip
  5. Better Display Quality
  6. NFC
  7. Support Fast Charging

Labels: ,

Thursday, January 22, 2015

Asus Zenfone 2 Spotted on Indonesian POSTEL


At CES 2015 ASUS unveiled ZenFone 2, the flagship smartphone in the new-generation ZenFone family. With a gorgeous all-new ergonomic design, a 5.5-inch Full HD IPS display, 13MP/5MP PixelMaster cameras, a 2.3GHz 64-bit Intel Atom processor with 2GB/4GB RAM and 4G/LTE connectivity, ZenFone 2 delivers powerful all-round performance.

ASUS Zenfone 2 Spotted on Postel with Status "Testing"


Zenfone 2 (ASUS - ASUS_Z00AD) has appeared on the Indonesian Postel Telecoms regulatory site. The Postel site has a strong track record of revealing new model numbers before the phones are announced. POSTEL is the authority in Indonesia that equivalent to the FCC in the United States. All the new devices that set to launch in Indonesia need to approve/certify by POSTEL. Zenfone 2 could be sell in Indonesia after the certificate from POSTEL is publish. And make Indonesia the first country to Sell Zenfone 2 ? Let's wait and see.

ASUS_Z00AD is Zenfone 2 With 1.8 GHZ Z3560 and 2 GB RAM, and ASUS_Z008D Could be Zenfone with Z3580 2.3 GHz and 4 GB RAM?

www.asus-zenfone.com
ASUS Zenfone 5 vs Zenfone 2

Source: Postel

Labels: ,

Lenovo Phones, How to Restore Lenovo Standard Recovery

Lenovo Phones, How to Restore Lenovo Standard Recovery - Changing custom recovery is always done by android user because it give lot advantage, but sometime we need to restore back to standard recovery because we wanna to do OTA update. And sometime we not save or backup our original recovery file before modified or changing to custom recovery.
Today in this guide i will give you a guide on how to restore Lenovo Standard Recovery files from the ROM files that you have, this guide is using flash tool method to flash the recovery file and also be done with MobileUncle but for MobileUncle you need your phone to be Rooted. Do this guide with your own risk, this guide can possibility make your device bootloop so please consider it before following this guide.

Disclaimer :
This guide for educational purpose only, We not responsible if your device bricked after following this tutorial.  (DWYOR)


Lenovo Phones, How to Restore Lenovo Standard Recovery

Requirements :
  • This guide is using flash tool, so please make sure that USB VCOM driver is installed completely on your computer, to do it just follow this  USB VCOM Driver  Turn off your device and remove the battery, using USB cable connect your device while look at My Computer  Manage  Device Manager there will be MTK65xx Preloader Devices show up for 5 second than disappeared, before disappeared right click on it and select Update Driver Software point it to USB VCOM Driver extracted folder. When it finish disconnect and connect again there will be Mediatek PreLoader USB VCOM Port on your device manager.
    Lenovo Phones, How to Restore Lenovo Standard Recovery

  • Full ROM your device, ROM that can be flash using flash tool recommended that you have the same version with your current running ROM. In this guide i am using S850_ROW_S214_150109 for example.
  • SP Flash Tool that fit with your device, for S850 i am using v3.1324 but you can use your own, usually full ROM download include with flash tool.
Lenovo Phones, How to Restore Lenovo Standard Recovery
  1. First think to do is make sure that USB VCOM driver is installed on your computer completely without this flash tool will not recognize your device and the status bar only on 0%
  2. Open and run flash_tool.exe, if you are using windows 7 or later please run it using administrator privilege to avoid any permission error.
  3. On the flash tool, check DA DL All with Checksum option, every time flashing using flash tool this option must be checked. Click on Scatter-Loading button, browse it to ROM folder and then select scatter file inside target_bin. In this guide my scatter file is MT6582_Android_scatter.txt this action will automatically load all required images to flash tool.
  4. All images will be checked automatically also, to flashing only recovery image remove all check list except on recovery image (3). Finally press Download button, this will give information warning, just confirm it with pressing Yes button.
    Lenovo Phones, How to Restore Lenovo Standard Recovery

  5. Now you ready to flash only recovery image to your device. Turn off your device, if your device use removable battery you must remove the battery and if not using removable battery you must make sure that your device is completely turn off before connect to computer.
  6. Connect your device, and flash tool will recognize your device and begin to start flashing process. This will only take 5-10 second and when it finish it will show GREEN CIRCLE in the middle of flash tool.
    Lenovo Phones, How to Restore Lenovo Standard Recovery

  7. Done, Confirm it with boot to recovery mode, most Lenovo device use combination Power button + Volume Up + Volume Down button to boot to recovery mode.
Congratulations, You already successful restore Lenovo Standard Recovery to your devices. I hope this guide can give you more lesson and can help you fix your problems. Please leave any comments if you got problem regarding this guide. Thank You

Labels: , ,

Wednesday, January 21, 2015

Lenovo S850, Installing Modified China Firmware version Vibe UI 2.0 1443

Lenovo S850, Installing Modified China Firmware version Vibe UI 2.0 1443 - This is Vibe UI 2.0 firmware for Lenovo S850 that already been modified by javum developer from russian, firmware can be installed using flash tool or from custom recovery also but to be able to install using custom recovery your previous firmware must be china version.
Today guide will use flash tool to install firmware to your device, before following this guide please do full backup ROM and backup IMEI. This guide is also have possibility to brick your device so please very consider it before starting following this guide.

Disclaimer :
This guide for educational purpose only, We not responsible if your device bricked after following this tutorial. Even this guide is already tested but it has possibility to brick your phone, (DWYOR)
Lenovo S850, Installing China Firmware version Vibe UI 2.0 1443

ROM Descriptions :
  • Build Number : VIBEUI_V2.0_1443_7.3.1_ST_S850
  • Date : ??-09-2014
  • OS : Android 4.4.2 KitKat
  • Languages : English and China
  • Google Applications : Include
  • Root : Yes (KingUser)
What has been modified ?
  • Clean all unwanted china applications - Chinese AppStore left for applications updates
  • Added Google services and Google Play
  • The weather widget can be used outside china country
  • Update all applications.
  • Installed root KingRoot 3.4.0
  • Root shell in the nucleus
  • Installed BusyBox v1.22.1-Stericson (2014-01-25 17:27:18 CET)
  • Many of the system apps moved to the vendor folder (it is no problem to remove, but after a wipe they will recover)
  • Fixed expanded font
  • TWRP Recovery 2.7.1.0


Downloads :
  • VIBEUI_V2.0_1443_7.3.1_ST_S850 493M, contains all images that required you to update your device to Vibe UI 2.0 
  • USB VCOM Driver  Install this driver first on your computer, Turn off your device and remove the battery, using USB cable connect your device while look at My Computer  Manage  Device Manager there will be MTK65xx Preloader Devices show up for 5 second than disappeared, before disappeared right click on it and select Update Driver Software point it to USB VCOM Driver extracted folder. When it finish disconnect and connect again there will be Mediatek PreLoader USB VCOM Port on your device manager.
    Lenovo S850, Installing China Firmware version Vibe UI 2.0 1443

  • SP Flash Tool v3.1324 ↦ this flash tool is optional download, you already got this flash tool on ROM download but it very recommended to use only this version.
Lenovo S850, Installing Modified China Firmware version Vibe UI 2.0 1443
  1. Download all required files on your computer, this guide is using flash tool method so it need you to install USB VCOM driver so flash tool can recognize your device, on the ROM download there is USB VCOM auto installer so if you difficulty to install manual just use it.
  2. Extract the ROM download and go to folder flash tool, run flash_tool.exe. If you are using windows 7 or later please run it using administrator privilege to avoid any permission error.
  3. On the flash tool, please check DA DL All with Checksum option then click on Scatter-Loading button browse on target_bin folder and then select MT6582_Android_scatter.txt, this action will automatically load all images to flash tool.
    Lenovo S850, Installing Modified China Firmware version Vibe UI 2.0 1443

  4. Now you can press Download button or hit F9, flash tool will become stale condition and waiting your device to me connected, When Download button produce error 8032 then you can try using Firmware ↦ Upgrade button.
  5. Turn off your device, because Lenovo S850 using non removable battery you must make sure that your device is completely turn off. Connect your device to flash tool using USB cable and flash tool will recognize your device and begin to start flashing process, it will take 5-6 minutes to finish and will be mark with GREEN CIRCLE in the middle of flash tool.
    Lenovo S850, Installing Modified China Firmware version Vibe UI 2.0 1443

  6. Done, now you can disconnect your device. Try to turn it on and do normal boot, first booting will take around 5 minutes so please be patient. Go to dialer and dial ####777# it will do factory reset on your device. Reboot again and your device ready to use.
Congratulations, Your Lenovo S850 update to modified china firmware Vibe UI 2.0 confirm and make sure that build number on about phone is same as downloaded ROM. Please leave any comments when you found problems or broken links regarding this guide. Thank You

Labels: , , ,