Saturday, November 25, 2017

How To Easily Root Samsung Galaxy S8 Plus| for stock rom go to rompure.com

The Easiest, Safest way to root any Samsung Galaxy S8 Plus is via the use of your PC.
By following the instructions given here, you will be able to root your Samsung Galaxy S8 Plus successfully. Once you have gained root privileges in your device, you will be able to install custom recovery images, flash custom ROM firmware files, make nandroid backup, etc.. Ensure to follow each steps carefully

Before we begin, ensure your device driver is properly installed to your PC to enable your phone interact properly with your PC. Download and install Pdanet.exe to your PC and follow the onscreen setup to install your Samsung galaxy S8 plus drivers to PC


1) To get started, download SRS Root and extract the zip package to your computer. Once done, click "SRSRoot-Setup.exe" to launch its installation wizard.

2) Now choose the “Destination Location” for installing the software and click "Next".

3) Next, choose “Start Menu Folder” name and click on “Install” to install the program on your computer.

4) Once installed, click on "SRSRoot for Android" to launch its Window.

5) Now connect your smartphone to your computer using the original USB data cable. Once done, click on “Root Device (All Methods)” to launch the rooting process. If it doesn’t work, click on "Root Device (SmartRoot)" to root your device.


6) It will take a minute or two for SRSRoot tool to root your device, and once it does, you will get a “Success” message.


That’s it. Now you have successfully finished rooting your Samsung Galaxy S8 Plus Android smartphone. For confirmation, install “Root Checker for Android” app and confirm your device’s root privileges.

If you would like to unroot Samsung Galaxy S8 Plus, go to SRS One Click Root window and click on "UnRoot Device".

Labels: , ,

Wednesday, November 22, 2017

How To Root Tecno Camon CX and Install TWRP| for stock rom go to rompure.com

Root Tecno Camon CX via Twrp recovery is now available. If you are a Tecno Camon CX user then this post is specially made for you to root your device without any problem and worries follow the guide in this post. This device is a 5.5-inch with 2GB RAM and 16GB Internal Storage, which is powered by 1.5GHz octa-core Mediatek MT6755 CPU Processor running on Android 7.0.
Root Tecno Camon CX

To Root Tecno Camon CX we are going to using theTWRP Recovery method via Flash Tool Mode. It will be wise you read the post very well before flashing the recovery to avoid any errors or brick of the device. I believe many using this device have googled on how to root their device without getting any good result worry not with this ported recovery you can now root your device in a minute and get the freedom you need to explore your device the way you like it. Read the tutorial below to the end so that you can root your Tecno Camon CX
Things You Need
  1. PC
  2. VComm Drivers Window 7  Go Here
  3. VComm Drivers Window 8/10 Go Here
  4. Sp Flash Tool Download

Feature Of The TWRP Recovery

1. NVRAM backup
2. boot.img backup
3. Recovery.img backup
4. Uboot backup
5. Emmc repair
6. Recovery.img and boot.img install/flash
7.more features now working.
8.Most features are working
9. TWRP features working correctly…
Disclaimer
We are not responsible if you brick your phone at the process of flashing the recovery

 Install Recovery On Tecno Camon CX

  1. Connect your device to your PC
  2. Send the SuperSu to your external memory card
  3. Discount and put your Phone off
  4. The Tecno Camon CX TWRP Recovery you downloaded unzip it on your desktop
  5. Launch your Sp Flash Tools
  6. Click load the scatter file from the Sp Flash Tools
  7. Navigate and select the Android_scatter.txt file in the unzip TWRP folder
  8. Then tick just recovery in the Sp flash tools
  9. In the select option on Sp flash tools putDownload  only
  10. Click Download
  11. After doing the above Connect your switched off device (with battery inside) to the PC via USB cord
  12. A progress bar should start running
  13. Wait till you get a Success message (green circle with OK), do not interrupt before then
Vola you have successfully flash recovery on your device so next thing to do is to Root Tecno Camon CX, please use the SuperSu provided in this post other versions of SuperSu may not work for you.

How To Root Tecno Camon CX

Immediately after flashing your recovery
  1. Boot to recovery mode (power off your device then Hold power button and Volume Key same for five Sec.)
  2. In the TWRP mode, it may ask you to swipe to allow modification of System partition, tap Read Only.
  3. If it offer to root the phone, select No
  4. Click install on your recovery then navigate to the storage you have your Magisk  SuperSu.zip select it to root your device
  5. After Flashing navigate back and reboot
Download Link

Congratulation your are rooted
Now Enjoy Your Rooted Device
Are You lost? Ask your Questions.
Share Post to your Friends

Credit
Xclusivetek

Labels: ,

Friday, November 3, 2017

How To Root Moto G5 and Moto G5 Plus Without PC| for stock rom go to rompure.com

Moto G5 Plus is one of the latest release from moto devices launched & available as at April 2017.

You may have seen so many tutorial about how to root Moto G5 Plus but most of them are quite trickish which normal people could not understand. Rooting Moto G5 and G5 plus has been made easy without using a PC with the aid of your smartphone. 
root moto g5


DISCLAIMER 
Rooting your android device may void warranty and can cause issues during OTA updates. So do it on your own risk. we're not responsible should any go wrong

How To Root Your Motor G5 and G5 Plus Without PC


KingRoot is an application that lets you root your Android device in a matter of seconds, as long as you have an Android operating system. This means that this app lets you do the same thing as the classic Towelroot, but you can use it even if you have Lollipop.

It's important to know that KingRoot doesn't work with all type devices. On Moto G, for instance, it usually has some trouble. With Nexus, though, it usually works perfectly.

KingRoot is an excellent way to root your Android device and we will be using it to gain root access in our Motor G5 and G5 plus device. That said, rooting a device is always a delicate process, so do it with care and be conscious of the risks involved. Using kingroot app to root your phone is pretty simple and it goes as follows:

1. Enable "Unknown Sources" from Settings → Security → Unknown Sources.

2. Download & Install latest version Kingoroot App.

3. Turn-on your internet data and goto your app menu and launch kingroot app

4. Wait and allow kingroot to verify your device.

5. Now hit "ROOT Button" after root exploit have been found and then sitback and relax while your kingroot help you root your device

NOTE: Your device might auto-reboot during rooting process or as soon as process gets completed, do not panic.

6. After kingroot have rooted your device, download root checker app from play store to verify root access.

That's it you've successfully rooted your device and can now tweak and enjoy full benefit of a rooted android. 

Labels: , ,

Monday, October 31, 2016

How To Root Infinix Hot 4 Using TWRP Recovery Mode In SP Flash Tools

As I use to say that sweet Android phone without root access and custom recovery installed is not yet a complete Android device for those who knows and enjoy the benefit of rooted and installed custom recovery mode but its unfortunate kingroot one click apk app is unable to get Hot 4 rooted but all hopes shouldnt be lost because in this article, I'll be showing us how to Root and also install TWRP Recovery on Infinix Hot 4 Android using Sp flash tools, so ensure you follow each steps carefully to root your Infinix Hot 4 using TWRP recovery.

NOTE:We will be installing TWRP Recovery for Infinix Hot 4 and then use it to root Infinix Hot 4 afterwards. Lets Start...

REQUIREMENTS
  • PC/Laptop Running Windows.
  • Working USB Cable
  • SP Flash Tool. Download Here.
  • ADB VCOM Drivers (normally I use PDAnet). Go here to learn how to install Mediatek Vcom Drivers to your PC
  • Infinix Hot 4 TWRP Recovery image. Download Here
  • SuperUser v2.66.zip. Download Here
HOW TO INSTALL TWRP RECOVERY ON INFINIX HOT 4
Step 1: First download twrp recovery zip file for Infinix Hot 4 from given link, and then extract the “Recovery.img MT6580_Android_Scatter.txt” file to another folder in your PC desktop screen
how to root infinix hot 4

Step 2: Now, power off your Infinix Hot 4, its time to install TWRP recovery for Infinix Hot 4
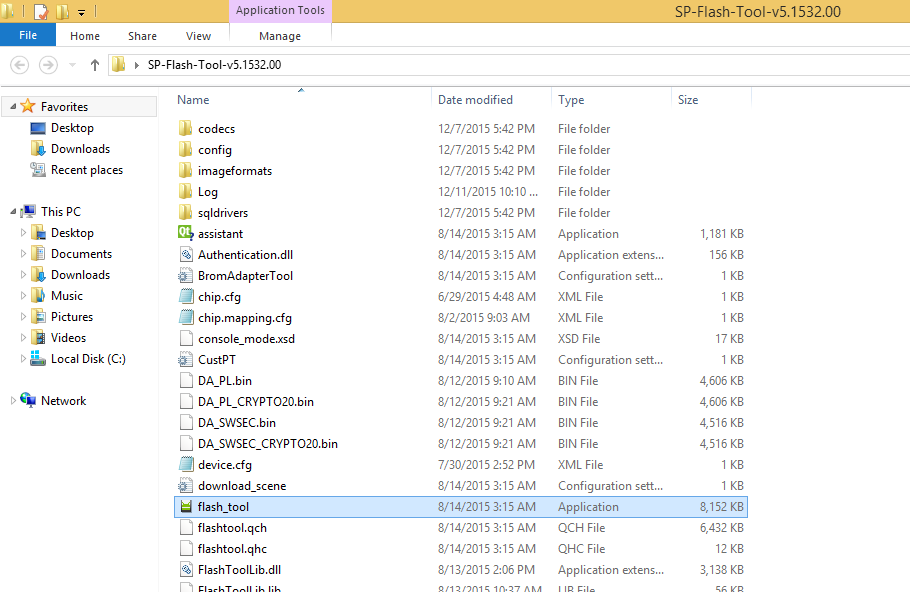
Step 3: Next, download the SP Flash tool, and extract its files to another folder your computer. You should get the following files as seen below, after extraction.
twrp recovery for infinix hot 4
Step 4: From the extracted files, open "Flash_tool.exe"
Step 5: Once the flash tool is launched, then click on the download/upgrade tab and click on scatter loading button.
Step 6: Now, locate the “MT6580_Android_Scatter.txt” file, which is on your desktop.
Step 7: After that, click download to begin flashing process.
Step 8: Immediately, connect your switched-off Infinix Hot 4  to your computer via USB cable
Step 9: The Flashing process would be in progress, and a Green button would appear once the process is completed.

That’s it. TWRP Recovery is now succesfully installed on your Infinix Hot 4.
To boot to recovery mode, simply press and hold Volume up button + press Power button. Now let's move to the next phase on how to root Infinix Hot 4

HOW TO ROOT Infinix Hot 4 x557
Granted you have successfully installed TWRP Recovery after going through the detailed instruction on how to install Recovery image via Sp flashtools to your Infinix Hot 4, now do the following:
  1. Boot your Infinix Hot 4 phone into TWRP recovery mode (by Holding the Vol. Up + Power button at the same time for 5 seconds).
  2. In TWRP recovery mode, Choose "Install zip". 
  3. Then navigate to the location you placed SuperUser v2.66.zip file and proceed to install
  4. After installing SuperUser.zip, reboot your phone

That's it, you have successfully rooted your Infinix Hot 4 Android smartphone. To verify if its properly rooted, goto Google playstore and download "Root Checker.apk" to verify.

Labels: , ,

Sunday, October 30, 2016

How To Root Any Android Device Without Internet Connection Using VRoot

Welcome to 24wikis today we are going to discusse about rooting android phone without internetion connetion, everyone, we all know that there are so many methods to root Android phones within a minutes.


So today, i will show you how to root your Android phone without an internet connection, the easiest way using an improved PC software (vROOT) that makes the rooting of any android phone and devices seem so easy and effortless. I have personally tried it on several android operating System (OS) including;

==============================
  • 2.2 (Froyo)
  • 2.3 (Gingerbread)
  • 4.0 (Ice Cream Sandwich) and
  • 4.2 (Jelly Bean)
  • MTK Devices
So far, the devices i have used this method to root at ease without the need of internet connection includes:

==============================
  • HTC
  • Samsung Galaxy Note 10.1 (GT-N8000)
  • Gionee Pioneer P1
  • Huawei U8180
  • Sony Ericsson Xperia Active ST17i
  • Tecno Tab and
  • Samsung Galaxy Note 3
==============================
HOW TO ROOT USING VOOT METHOD
==============================
WHAT IS NEEDED?
  1. A working Windows PC
  2. Working USB cable
  3. USB drivers of your phone or device installed on the pc. In case you don't have your phone drivers, you can get it from below.
  4. Your phone battery should be atleast 50% - 100%
==============================
PROCEDURES:
==============================
  1. Download and install the VRoot software (English Version)
  2. Enable USB debugging by going to ==> Settings ==>Developer options.
  3. Launch the vROOT software from your start menu or desktop
  4. Connect your phone or device to the computer using the USB cable that came with it. (Drivers must be properly installed for your phone to be detected)
  5. Allow vROOT to detect and display the model of your phone  (accept any USB debugging prompt)
  6. Tap the green “Root” button to root your phone or device
  7. The device will be rebooted and confirmed rooted by the vroot software.
==============================
USB DRIVERS FOR DIFFERENT DEVICE
==============================
  • For Samsung USB drivers here or install Kies instead
  • For HTC USB drivers here
  • For Gionee USB drivers here
  • For Huawei USB drivers here
  • For ZTE USB drivers here
  • For Infinix USB drivers here or use the adbdriver.com to detect automatically
  • For LG Android USB drivers here
  • For Tecno Android USB drivers use same as Gionee above or here to download a universal one.
==============================
Please If This Was Helpful To You, Don't Forget To Hit The Share Button. Aslo If You Have Any Qestion, Ask Via The Comment Box Below. ThanKs...

Labels: ,

Thursday, October 27, 2016

[Root] How to root your Gionee M3 mini android smartphone easy ways

Here Is The Best Easly Way To Root Your Gionee m3 mini, All Thanks to team Hovatek for providing the TWRP recovery for download.
FILES Needed...

* SP FLASH TOOLS
* MTK VCOMM DRIVERS
* SUPERSU ZIP
* TWRP RECOVERY FOR GIONEE M3 MINI Download and extract the various separate files below.
TWRP RECOVERY FOR GIONEE M3 MINI


METHOD STEPPS
*Ensure the Vcomm drivers are already
installed on your Pc.
 
*Have sp flash tools installed on the PC 

*Download the TWRP recovery image
provided by hovatek for your Gionee m3 smartphone. 

*Download the Supersu Zip file also provided..

Flashing TWRP..
*Unzip the TWRP zip file which is just about 12mb although all that's needed is the less than 1kb scatter file.. 

*Open sp flash tools and click on scatter loading to load the scatter file that comes with the TWRP recovery zip.

*locate where the scatter file is on your Pc and click on it to load the recovery image.

*Ensure your phone is switched off and
battery removed from it.. Connect the USB cable to link the phone and the pc. 

*click on the DOWNLOAD option on the top of the sp flash tools and wait till you see a download complete or OK sign in seconds.. 

*Disconnect the Cable and insert battery back into the phone.

*Simultaneously long press the Volume Up and the power button together for about 7 seconds to get into twrp recovery mode... 

*tap on the install option and load the
Supersu zip file from wherever it's saved on the phone or SD card. 

*click on install till successful option is shown.. 

*Reboot phone and congrats cos your phone is rooted.. 

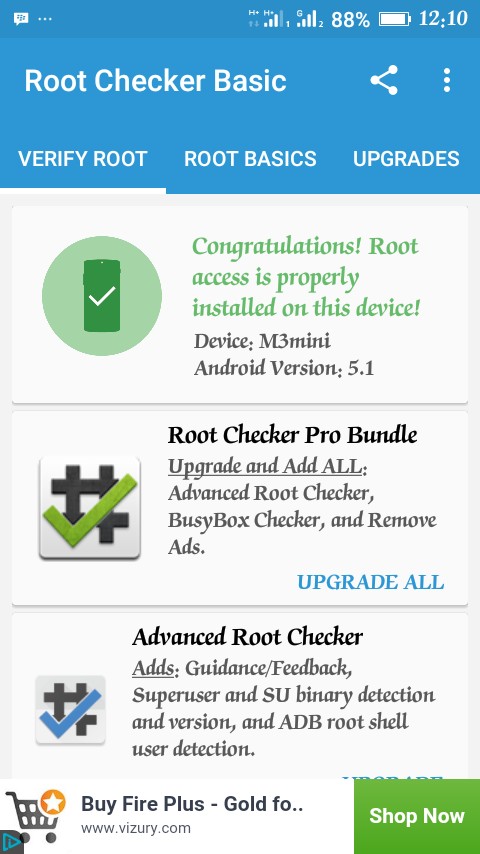
*U can verify your root privilege by using the root checker app to check.

Labels:

Wednesday, October 12, 2016

How to root Cherry Mobile Flare S4 Max and install twrp recovery

Due to the request for custom recovery I made this thread.
This steps or procedure for installing twrp recovery and rooting for Cherry Mobile Flare S4 max 

Cherry Mobile Flare S4 Max Root and TWRP Guide


Requirements:

1. Desktop with Windows OS
2. USB Cable
3. [ADB Tool and driver ##download##]
4. [Cherry Mobile Flare S4 Max TWRP Recovery ##download##]

Steps / Procedure
Before you proceed:

First backup your files including contacts, messaging, apps and put in your SDCARD.


1. Turn off your Flare S4 Max
Boot into recovery, by pressing volume up and power button.
2. Use volume up to navigate and choose Recovery mode.
3. Do a Factory data reset including cache.
Make sure to place the files you’ve downloaded in one folder. You might want to create a folder in your desktop to make it easier to access. The first thing we are going to do is to setup the ADB driver in Windows operating system.

" Setting up the ADB and Fastboot in Windows "

4. Right click adb-setup.exe and choose “run as Adminstrator”.
This is recommended for newer Windows operating system especially Windows 10.
-> Press “Y” to install ADB and Fastboot then hit enter.
-> Press “Y” to install ADB system-wide.
-> Press “Y” to install Drivers.
Wait for the driver installation to finish.
You’re done.
-> Next you’re going to activate Developer mode.


5. "OEM Unlock and Developer Option"

-> Go to Settings
-> About Phone.
-> Find the Build number and tap several times to unlock Developer option.
-> Press back and open Developer option.
-> Activate OEM unlocking and USB debugging.
-> You’re done.

6. " Installing TWRP for Cherry Mobile Flare S4 Max "

-> Extract the TWRP Recovery.
Copy the recovery.img and paste it inside adb folder, it is located in C:\adb
-> Hold shift then right click somewhere inside the adb folder and “choose open window command here”.
-> Do not right click any item, you won’t be able to see the option.
-> Now turn off your Android phone.
Boot into Fastboot mode by pressing and holding Volume up and Power button.
-> When the options appeared, use the volume up to choose Fastboot mode.
-> Plug your device into the computer and go back to the command window.
-> Type fastboot oem unlock then press enter.
-> Check your phone and choose “Yes” by pressing volume down.
-> Now type fastboot flash recovery recovery.img in the command window.
-> When the process is finished, type fastboot reboot.
-> Now you have TWRP installed, let’s start rooting your Android device.

If your Flare S4 Max boot into TWRP by itself and it turn on and off simultaneously.

Please do the step below.

-> Remove the battery, sim card and memory (if you have one).
-> Place the battery again but do not include the memory and sim card.
-> Press and hold volume up and power button until you see the options,
-> press volume up and choose recovery mode by pressing volume down.
-> Tap Wipe and Format Data then Swipe.
-> Press the back button until you got into main menu.
-> Tap Backup then swipe.
-> Go back to the main menu again.
-> Now tap Restore and find the Backup file located into the phone storage.
->Reboot your phone.


" How to Root Cherry Mobile Flare S4 Max "

-> Download SuperSu and place it into the root folder of your SDcard.
-> Turn off your Android phone.
-> Now boot into recovery mode. You already know how to do it.
-> In the TWRP recovery,
-> Tap Install and select [UPDATE-SuperSU-v2.78-20160905010000.zip ##download##].
-> Reboot your device.


Credits:
Cherry Mobile Flare S4 Max United™ PH (Official Support Group)
Thefirmwarehub

Labels: , ,

Thursday, October 6, 2016

2016 Universal Method To Root Any Samsung Galaxy Nexus Android smartphones

This is the best or universal method to root any firmware version that is runnig on the Galaxy Nexus smartphones models, which means that this methord supports the International Sprint, GSM and Verizon editions.

Those of you who managed to update their Android devices using the new Android firmware files that were launched not so long ago can easily apply the root on their devices regardless of the phone’s model number. This means that root you’ll find in this post will work with all Galaxy Nexus editions like the Sprint, Verizon or the Europe/ Asia/ USA GSM editions. Remember that by rooting your phone, you will void its warranty as the phone’s boot loader will need to be unlocked. However, if you wish to reclaim the warranty then you will have to re-lock the bootloader and unroot the phone.


This tutorial methord will work with Windows, Mac OS X and Linux computers.

Before we can start rooting your phone, you will need to read the preparation guide listed below and learn how to properly prepare your device for the changes we’re about to apply over its firmware files. After you’ve successfully rooted your Galaxy Nexus you will be able to install new custom ROMs and enhance your Ice Cream Sandwich experience. Here’s what you need to know and what to take into consideration before applying the changes to your phone:

  • make sure that your phone is charged and that the battery level says that it has more than 75% power left before switching off.
  • enable the USB debugging mode. Open Settings, then swipe your screen until you find the Developer options. Open it and then tick the option that says USB Debugging.
  • during the rooting process, some data might be lost and you should backup your most important files just to be sure. You can move the data on your phone’s internal/ external SDcard.
  • Save the internet and MMS settings just in case something goes wrong and you won’t be able to browse the internet after the root is complete.

  • we will unlock your phone’s bootloader which means that you will eventually be forced to create backups of all the files currently stored on your device.

  • ClockworkMod or the TWRP Recovery tools need to be installed on your device.  These files can be found in the zip file at step 1.

Since you’ve read the above info you can now move to the how-to guide and learn how to properly root your smartphone. In case you can’t complete any of the actions below then you should ask for help by posting in the comments section.

How to successfully root the Samsung Galaxy Nexus running on any firmware version:

STEP1. Download the Galaxy Nexus root zip file from here and save it on your computer desktop.

STEP2. Extract the zip contents in a folder called ‘GalaxyNexusRootNew’ and then move the folder on your computer’s C drive, then USERS and then select your current user profile name folder and create in it a new folder called ‘Downloads’. Place the file there.

STEP3. Now we need to put your phone into fastboot mode and this can be done by taking the back cover OFF, then remove the battery and place it back in.

STEP4. With the phone now powered off you need to press and hold the volume up and volume down buttons simultaneously and while doing that you need to press and hold the Power button. A vibration bleep should be heard and fastboot mode will load.

STEP5. When in fastboot mode, you will need to connect your Gnex to your PC, Mac OS X or Linux computer using the USB connection cable. Please note that in fastboot mode you should see that the ‘LOCK STATE’ is currently set to ‘LOCKED’.

  • please note that Windows users need to have the USB drivers by Samsung installed. If not, then download them from here.

STEP6. Now, open the command prompt or a terminal window, it depends on your computer’s version, in the downloads folder you created at step 2. Enter the following commands:

  • cd GalaxyNexusRootNew
  • fastboot oem unlock
  • please note that if you’re using a MAC then you should change ‘fastboot’ with ‘./fastboot-mac‘ while the Linux users should enter this: ‘ ./fastboot-linux‘.

STEP7. Now your Galaxy Nexus should display a confirmation message for unlocking the bootloader. Select YES and press POWER. Leave the command prompt opened on your PC and wait until the bootloader is successfully unlocked.

STEP8. Now we need to flash and install the ClockworkMod Recovery for the International GSM / Verizon model or the TWRP Recovery for the Sprint edition. Here’s how to do it:

For the International GSM Gnex edition you will need to enter this line in the command prompt:

  • fastboot flash recovery optimus_prime-touch-v5.5.0.4-6-GSM.img

For the Verizon Gnex edition you need to enter this command line:

  • fastboot flash recovery optimus_prime-touch-v5.5.0.4-6-toro-VERIZON.img

For the Sprint Gnex edition you will need to enter this command line:

  • fastboot flash recovery twrp-toroplus-2.1.2-SPRINT.img

Again, Mac users need to replace the ‘fastboot’ with /fastboot-mac and the Linux users should enter instead this: /fastboot-linux.

STEP9. Now you need to restart your Galaxy Nexus and after it loads the main screen you will need to take the ‘CWM-SuperSU-vo.87.zip’ file and place it on your phone’s internal SDcard storage drive. When this is complete you will need to power off the device as we will need to enter Clockworkmod recovery.

STEP10. When the Gnex is off you need to press and hold Volume Up and Down buttons and after that press and hold Power also. Fastboot mode should appear and now the ‘LOCK STATE’ should say ‘UNLOCKED’.

STEP11. Now use the volume buttons to navigate through the fastboot menu and select ‘Recovery mode’. Press Power to launch it. Wait until the CWM / TWRP is fully loaded.

STEP12. Now we will split the guide in two parts as we need to install the SuperSU tool:

  • The International GSM and Verizon Galaxy Nexus users should select the option ‘install zip from sdcard’. Select the ‘choose zip from sdcard’ and select the file you moved at step 9 on your phone’s SDcard. It should be the “CWM-SuperSU-vo.87.zip”. Confirm the installation and wait until it completes.
  • The Sprint Gnex users need to tap ‘Install’ and then select the ‘CWM-SuperSU-vo.87.zip’ file for installation. Swipe to confirm the flashing of the new SuperSU tool and wait until this completes.

As the SuperSU utility has been successfully installed on your Samsung Galaxy Nexus it means that your device has been finally rooted.

Restart the device from the recovery menu and then wait until it performs its first boot. Now you will be able to install any custom ROM firmware you wish and use the Wi-Fi tethering function or any other feature that was limited when your phone’s bootloader was blocked and the root access wasn’t allowed. Also, now you can install ROM Manager and flash new custom ROMs right from your phone’s Android menu.It can be installed using Google Play Store.

In case something went wrong during the rooting process of the Galaxy Nexus you will need to read again all the instructions above and then re-apply all the steps listed under the tutorial guide. Also, use the comments section to ask for help in case you can’t root your device.

Labels: ,

Wednesday, October 5, 2016

How To Root Latest Infinix Hot S X521 And Flash TWRP Recovery Image.

How To Root Infinix Hot S X521 And Flash TWRP Recovery Image.


Infinix Hot S was recently launched by Infinix mobility, it rocks some awesome spectacle and features which include full metal body, Android Marshmallow 6.0 out of the box, Full HD display, 13MP rear camera with finger print scanner close to it.
In this article, you will learn how to
Root Infinix Hot S X521 and install/port/flash twrp recovery image.

Requirements.

Since Kingroot and other easy to use rooting apps can’t root Hot S, you will be needing the following things.
  1. Download TWRP Recovery for Infinix Hot S X521 (http://goo.gl/TGhWZf). Credit goes to Hovatek Team.
  2. (Download Latest 2016 SP Flashing Tools).
  3. (Download and Install Vcom Drivers).
  4. Fully charged Windows PC.
  5. SuperSU.Zip (http://goo.gl/0gPpde) and move it to the root of your phone memory.
  6. USB Cable.

Guide to Install or Flash TWRP Recovery on Infinix Hot S X521.

You need to first install MTK Vcom driver on your Pc and turn On USB debugging on your device. You can check the guide above to download and install USB Vcom driver and follow the step below to Turn On USB debugging.
To enable Debugging, you need to be a developer first, so navigating to Settings >> About Phone >> Build number >> Tap on Build number 5-8 times depending on your phone manufacturer until you see notification that you are now a developer.
Now Go back to Enable USB debugging on your Android device. Go to Settings >> Developer Options and check the box behind USB Debugging.
You need to first port the twrp image before you can root infinix Hot S.
  • Extract Hot S TWRP recovery compressed folder you earlier downloaded to your desktop.
  • Also extract/Un-Zip the SP flash tool to your desktop, open the extracted folder and run the flash_tool.exe as administrator.
  • Click on scatter-loading at top the right corner of SP flash, navigate to infinix Hot S twrp recovery image folder and select the scatter.txt.
  • Tick only Recovery option on SP Flash tool and leave the remaining unchecked.
  • Switch off your Infinix Hot S, click on Download at the top left corner of SP flash tool and connect it to your Pc with USB cable.
  • The porting or installation of TWRP recovery on infinix Hot S will start, and a Green button will appear once the process is completed.
  • Disconnect your phone from Pc and terminate SP Flash tool.
That’s all with flashing of TWRP recovery image for Your Infinix Hot S X521 Android Phone. Now let’s root infinix X521.

How to Root Infinix Hot S X521.

  1. Place/Move the SuperSu.Zip file to the root of your phone memory. Meaning it shouldn’t be inside any folder.
  2. Boot your device into recovery mode by pressing Volume Up and Power button together.
  3. From the available options, select install.
  4. Look for SuperSu.Zip and select it.
  5. Wait for the flashing/installation to complete and boot up your phone.
  6. You can confirm your device is rooted by navigating to Play Store and install Root checker.
That’s all on how to root infinix hot S and flash/install/port twrp recovery image.You can also check our previous articles on how to root infinix hot 4 and infinix note 3 (pro).

Labels:

How to Root Infinix Note 3 Pro X537/Note 3 X601 and Port TWRP Recovery Image

How to Root Infinix Note 3 Pro X537/Note 3 X601 and Port TWRP Recovery Image.


Infinix Note 3 and its Pro version are the latest phones from Infinix mobility, though the pro version is not yet available in Nigeria. This article will guide you on how to easily install/port twrp recovery and root infinix Note 3 X601 and Note 3 X537.

Requirements.

  1. Download TWRP Recovery for Infinix Note 3 (http://goo.gl/DXseMl).
  2. Download Infinix Note 3 Pro TWRP Recovery (http://goo.gl/CAuRQf).
  3. Download SP Flash Tool (Download Latest 2016 SP Flashing Tools.
  4. Download and Install Vcom Drivers (https://goo.gl/AnOl3J).
  5. Windows Computer and USB Cable.

How to Flash or Install TWRP Recovery on Infinix Note 3 X601 and X537.

I will assume you have successfully installed Mediatek Vcom driver on your Windows Pc. Activate developer options on your phone by navigating to Settings >> About Phone >> Build number >> Tap on Build number 5-8 times depending on your phone manufacturer until you see notification that you are now a developer.
You need to first port the twrp image before you can root infinix note 3 (Pro).
  • Extract the downloaded TWRP recovery file for your own device (note 3 or its Pro version) to desktop.
  • Extract the SP flash tool to your desktop, open the extracted folder and run the flash_tool.exe as administrator.
  • Click on scatter-loading at top the right corner of SP flash, go to infinix note 3 (pro) twrp recovery image folder and select the scatter.txt.
  • Untick all other options on SP flash tool except Recovery.
  • Enable USB debugging on your Android device. Go to Settings >> Developer Options and check the box behind USB Debugging.
  • Switch off your Infinix note 3 or note 3 pro, click on Download at the top left corner of SP flash tool and quickly connect the device to your Pc with USB cable.
  • The porting or installation of TWRP recovery on infinix note 3 (pro) will start, and a Green button will appear once the process is completed.
  • Unplug your phone from Pc and close SP Flash tool.
Yeah, you are done with flashing of TWRP recovery image for Note 3 X601 and X537. Now it is time to root the device.

Root Infinix Note 3 X601 and Note 3 Pro X537.

  1. Place/Move the SuperSu.Zip file to the root of your phone/internal memory. Meaning it shouldn’t be inside any folder.
  2. Boot your device into recovery mode by pressing Volume Up and Power button together.
  3. From the available options, select install zip from sdcard. Use the volume buttons to move up and down and the power button to select an option.
  4. Look for SuperSu.Zip and select it to flash it and root your phone. Once the flashing/installation is completed, boot up your phone using the power button.
  5. You can confirm your device is rooted by navigating to Play Store and install Root checker.
That’s all folks on how to root infinix note 3 (Pro) and flash/install/port twrp recovery image on it. Kindly make use of the comment box and social sharing buttons below.

Labels:

Saturday, October 1, 2016

7 Important Questions And Answers About Rooting Your Android Mobile Phone


Learn How To Root Your Android Phone

What Is Root?
Root Is Having The Privileged Control Of Mobile Phone System After Rooting Your Android Device, You Can Conduct A Comprehensive Management And Optimization On Your Phone Such As Removing Pre-Installed System Apps, Disabling Startup Apps And Replacing The System Font, Etc.
Why Is Important To Manage Root Permission?
After Getting Root Permission, App Can Access To All Device And System Functions Which May Put Your Phone At Risk Authorization Management Can Affectively Monitor App Behavior And Manage Root Permission.
It Help Prevent The Abuse Of Highest Privileges And Keep Your Phone Safe From Vulnerabilities.
We Recommend To Deny Root Apply From Unknown Apps, You Also Can View Record Of Root Authorization Through Log Function.
How To Uninstall And Unroot System?kingroot
In Order To Ensure Stability And Integrity Of Root Access, KingoRoot Will Be Deployed Into Devive System. Of Couse, You Still Can Uninstall kingroot Through General Setting-Remove KingoRoot Menu.
However Root Access Will Lost After Removing. If Removing Failed, You Can Try Reboot Your Device, Fix Root Environment And Remove Again.
Does Rooting Void Your Warranty?
After Un-Root Operation Be Done To Remove The Root (Settings-Root Authorization Setting-Remove Root Permission). Most Of The Manufacturers Will Still Provide Warranty Service, But Some Of The Manufacturers May Void Its Warranty. Please Consult Your Device's Manufacturer For Details.
How To Remove The Apps Pre-Installed?
The Phone Usually Pre-Installed Many Apps In The Very Beginning Which Resulting In High Consumption Of System Resources. After Obtaining Root Permission You Can Uninstall Those Apps, Free Up Storage Space And Keep Your Phone Clean And Fast.
Why Is Important To Disable Auto Startup Apps?
Apps Startup In The Background Is The Main Reason That Causing Your Phone Running Slow, Running Out Of Battery Easily. become Too Hot To Hold And Using Up Data Easily. After Obtaining Root Permission You Can Disable Apps Auto-Startup, Increase The Phone's Standby Time And Run Your Phone More Efficiently Through Auto-Start Manage.
What Is Purify?
Enable This Mode Will Make Your Device Running Like A Champ, It Can Auto-Recycle Useless Apps Which Keep Running In Background And Make Them Never Auto-start, Archive All Notification Together And Let Your Notification Bar Have A New Look.

Ask Any Question About Rooting Insha Allah We Are Ready To Give An Answer

Labels:

Steps By Steps On How To Root All Tecno Android Phones Without Or With Computer.


STEPS BY STEPS ON HOW TO ROOT ALL THIS LISTED TECNO PHONES..
Here Is The Steps To Root All Tecno Android Device Without Computer Or With Computer, In Just A Few Seconds. Follow The All Procedures I've Mention Bellow An Get Your Phone Rooted.

(1) ROOT Tecno D5, Q1, P5, S3, S5, P9 (4.2), M7, D7 and M3 (4.2) Q1, N7, D1, D5, M5 (4.2),

Procedure:
1. Download Framaroot 1.6.0 to your device
2. Launch and Install Framaroot
3. Click on Install Supersu
4. Click on Boromir
5. You are rooted.

(2) ROOT Tecno F6, P6, H3, H6, L7, L6, P9(4.4), M6, P5 Plus (4.4), M3 (4.4), Phantom Z (A7), J7, Y6, Y3

PROCEDURE:
1. Download kingroot
2. Install the app on the phone
3. Ensure you have an internet connection on the phone then launch the app
4. Wait for all checks to be complete
5. Click the center button (with Root and some Chinese texts inscribed on it) to begin rooting
6. Wait for rooting to complete
7. You should see a green tick to confirm that rooting was successfull.

(3) How to root Tecno R7, H5, H7

PROCEDURE:
1. Download Framaroot 1.9.0 to your device
2. Launch and Install Framaroot
3. Click on Install Supersu
4. Click on Barahir
5. You are rooted.

(4) How to root Tecno M9 (A3) , F5

PROCEDURE:
1. Download Vroot
2. Enable USB Debugging on the phone (Settings > Developer OR Settings > About > Keep clicking Build Number > Back to Settings > Developer)2b. Install PdaNet on the PC with phone connected to PC via USB fellow instrution & install the driver
3. Install Vroot on the PC
4. Launch Vroot and ensure you have an internet connection
5. Ensure the phone is still connected to the PC
6. Wait for Vroot to detect the phone
7. Click the Root button to begin the rooting process
8. The phone will be rebooted once rooting is complete
9. Done.

(5) How to root Tecno N3 and P3

PROCEDURE:
1. Download POOT
2. Go to settings on the phone > Application: check unknown source > tap preferred install location> select internal device storage > tap development > check USB debugging > Allow mock locations Internet access on the phone.
3. Now you are ready for the main rooting. To root your Tecno phone
4. Go to file explorer on your phone
5. Locate the poot application you downloaded above,
6. Click on it and install it to phone memory.
7. After installing open the installed poot application from your menu icon
8. It will request to download ministro services
9. Download and install Ministro II library from Google play store.
10. Now go back to open the poot application again 11. It will ask to update QT libraries, do that and your phone should restart automatically
12. If it doesn't, restart it yourself.
13. Now remove your memory card and boot the phone without a memory card.
14. Immediately the phone gets to home-screen quickly go tap on the poot application and tap on 'press here to poot'
15. After the above step your phone should shut down automatically (if it doesn't, restart your phone and repeat from step 5).
16. After the phone goes off, it should come back, but if it does not you have to remove the battery and put it back, then start it.
17. Now again quickly tap on the poot aplication immediately your phone gets to the home-screen
18. If every thing goes well then you should see an option to download super user and root checker
16. If not try the steps again till you see this two options.
17. Now download and install the super user and root checker from the link on poot.18. Open up root checker and click verify to check the status of your phone.
19. You should see 'congratulation your phone has root access'
20. If you get demon materialized while pooting, simply restart and keep trying.21. If you're still having issues with poot then use Kingo Root.

(6) How to root Tecno D9, Phantom pad II (G9)


PROCEDURE:
1. Download Root Master
2. Install it on the phone
3. Ensure you have an active internet connection then launch it
4. Click the Root button
5. Give it a few seconds and your phone should now be rooted.

(7) How to root tecno L3

PROCEDURE: To root your Tecno L3, you'll need:
1. A Computer and USB debugging enabled on your L3
2. A USB cable to connect the Tecno L3 to the computer
3. Download SHUAME
4. Internet connection
Follow these steps carefully. After the download of shuame on your PC, install it - Connect your TECNO L3 and Launch SHUAME allow the shuame load the phone name and build etc. now click on what is circled in the picture below.

Note: if you see the red alert on the -~# Root it simply means you have not been rooted and also that you can root the phone using the software. but if not either you have been rooted or you can't root your device with the software. After few minutes you should get this screen After rooting you should have Congrats, your L3 is rooted.

(7) How to root Tecno Phantom A, A , A2, Bt3, N9, S7, S9 and D3

PROCEDURE:
* Download Eroot
* Download PdaNet
* Enable USB debugging on the phone (Settings > Developer > Tick USB Debugging)
* Connect the phone to the PC then install PdaNet, you should get a "Drivers successfully installed" message at the end of installation * Launch Eroot
* A root button will appear. If it doesn't, close
the PdaNet running from your system tray.
* Click on the root button and your phone will be.
( Thanks To Cybersadik )
Like And Share It To Your Friends

Labels:

Tuesday, September 27, 2016

How to root Cherry Mobile Touch XL2 and flash TWRP recovery


CM Touch XL2 Root and TWRP

 This tutorial teach you on how to root Touch XL2 and flash TWRP recovery. 
Note: Do it in your own risk.. Where not reliable for any damage on your device..
  • Requirements:
1. Download sp flash tool (MTK6580 )...include scatter file inside. -> HERE
2. Download TWRP , here
3. If you want to download separate scatter file link: here
4. Download latest BETA SUPERSU.. here
5. Download driver for touch xl2 .. here
  • Instructions:
  1. Pag na download na lahat, extract nyo ung sp flash tool.zip, pagka extract, hanapin nyo ung flash.exe at open nyu..
  2. click nyu ung download agent sa right side,browse nyo yung sp flash folder at hanapin yung MTK_Allinone_DA.bin,click open
  3. Click nyo yung scatter loading sa baba ng download agent at browse nyo din yung sp flash folder, hanapin ung scatter file o kaya pwede nyo gamitin yung nadownload nyo na scatter file (skin kc ginamit ko yung nsa loob ng sp flash folder) then click open
  4. Lalabas ung mga words sa baba,pero lahat yung naka uncheck, check nyu lang yung recovery tpos click nyo ung blank space sa dulo nya, papasok ulit kayo sa browsing ng file,hanapin ung twrp na nirename nyo sa recovery.img then click ok
  5. Make sure na ung drop down box sa taas ng mga words ay download only nakalagay
  6. Then turn of mo touch xl2 mu.
  7. Click mo yung download na kulay green sa taas Note: bago mu saksak yung usb cord sa phone,kelangan na click mu na ung download na icon sa taas..
  8. Wait for few seconds then mag prompt na yung ok na may icon na check..ibig sabihin success ang installation mo..
  9. Then unplug mo USB sa phone mu,press mo yung power at volume up, mag open cp mo na may tatlong option sa kaliwang side,volume up ang pagpili,volume down ang pag select..select mo yung recovery mode( nasa una) hanggang sa magboot siya sa twrp recovery mode
  10. Then install yung beta supersu na zip..wait mo ulit pag done na,reboot to system..
  11. Pag open ng fone mu,may super su na icon na sa fone mu,click mu ung, punta ka settings,browse browse konti then exit..
  12. Tapos download kn root checker pro para matest mu na kung rooted na cp mu...Tested ko na po xa..pero konting ingat din kc di ko npo kasalanan pag na bootloop kayu,tanung lang po kung need help...Salamat..goodluck! Hindi po ako developer,explorer lang po...
You can watch Video Tutorial HERE


Credits:
Jeffrey Joma
Nerwin Nacar
NAyeem Khan for Youtube Tutorial 
Cherry Mobile Touch XL 2 PH [Support]

Labels: , , ,

Tuesday, July 26, 2016

How to root Meizu Mx4 and flash custom recovery

How to root Meizu Mx4 and flash custom recovery


 Meizu Mx4 Screenshots 


Requirements:


UNLOCKING PROCESS:
Flash clean stock firmware, do this only on android version: 4.4.2 firmware on MX4 (4.2.8.2A) 
************************************************** ************** (Android 5.0/5.1 firmwares uboot not patch) 

Get ROOT by standard method (flyme account). SuperSu NO NEEDED
Unpack on your disc (on PC) archive with firmware which you used to flash on your MX4 (4.2.8.2A) / M1 Note (4.2.0.5A) VERY IMPORTANT!!!
Place in a folder with unpacked archive (p.3) file "Meizu_Patch.exe" from folder "patcher" of your downloaded archive and open this with administrator rights.
-Theoretically, antiviruses can alarm to packer which patcher was compilated (but Dr.Web is fine) / but antiviruses recommended to be closed.
-If you are afraid about viruses and trojans, skip this step....and all the following.
If all goes well - we see a flashing green "SusseccFully Patched" in the patcher round window - continue.
If no and you see inscription "Patching Failed!", RED - STOP - something goes wrong and if you continue - BRICK!!!

Delete from this folder 2 files: "Meizu_Patch.exe" and "uboot.img.bak".
Create a folder with name "UNLOCK" in phone root directory (SD card)(DCIM folders, Picture, Music, data etc.) and copy in already patched loader file "uboot.img" from firmware folder from PC (where we started our patching (unpacked firmware)).
Pack this firmware (on PC) back in archive (using 7-zip/winrar) with name "update.zip" (default flyme firmwares) - could be useful.

Copy a folder "gscript" together with the contents in phone root directory (SD card).
Install "terminal emulator" on your phone from "gscript" folder.
Open terminal and write
su 
sh /sdcard/gscript/unlock.sh 
*Important!!* Wait 3 minutes for script action
Reboot your phone by command reboot . If it succesfully boot - congratulations, all right.


Further:

*WARNING!!!* All operations of modules flashing (recovery.img, boot.img etc.) doing ONLY BY STANDARD METHODS, by FASTBOOT command "fastboot flash"!! NOTHING ELSE!!
You can flash modified stock recovery from folder "patched-recovery" for MX4/M1 Note (your needs) by command: "fastboot flash recovery patched_recovery.img" and restrict the international version of firmware (in update.zip you can do all changes you want - signature will not check).
*CARE!!* If you flash index I firmware with patched recovery, USE Titanium or others to delete/freeze "System Update" from firmware. OTA UPDATE WILL BRICK YOUR DEVICE!!!
*CARE!!* Patched recovery will be rewritten on the usual stock recovery by first full android load, then after command "fastboot flash patched_recovery.img" turn off your phone and hold button "volume up" (+) and "power" before the phone starts (or delete "recovery-from-boot" as alternative).
You can flash custom recovery - and use it for your needs.
*CARE!!* DON'T try to flash stock meizu firmwares from any custom recovery, we have patched stock recovery for that.
ALWAYS DO A BACKUP!!


VERY IMPORTANT Notes: 
Not allowed "strange" combinations (for example flashing not patched loader and custom recovery). If system goes to bootloop - exit from "half-brick" could be very hard, if it all possible.
Loader patch and reverse packing stock firmwares should be done everywhere - it will save your time and nerves. You should avoid version mismatch of preloader - uboot - boot.img in smartphone firmware. Effects, bugs, lags can be very different.
*IMPORTANT!!* Then, if we flash "custom firmware", it should NOT CONTAINS "uboot.img" and "preloader.bin". All this can be flashed only in stock (modified) firmware, ONLY FROM STOCK or PATCHED STOCK recovery.
"uboot.img" CAN'T BE flashed by fastboot!! Also not allowed doing experiments with "preloader.bin". BRICK probability is very high!!


Labels: , ,

Sunday, July 24, 2016

Tutorial on How to root Cherrymobile FLare XL and flash TWRP recovery

Tutorial on How to root Cherrymobile FLare XL plus and flash TWRP recovery
Hello fellas, I just wonder some of you want to know how to root your New bought Flare XL plus
I assure you can root it easily in just one click using Kingroot or Kingoroot. But this time I prefer to use Kingroot.
FLARE XL PLUS ROOT


Warning: Rooting can void your warranty!

Requirements:
Kingroot4.1.zip (download and extract via Z-archiever)
Flare XL Plus

1. Make sure you have enough battery atleast 30% and data/wifi internet connection.
2. Download and install Kingroot once extracted.
3. Open Kingroot then tap OPTIMIZE NOW. Wait until finish!
KINGROOT OPTIMIZE

4. You will notice you have Kinguser in your app menu.
5. Then restart or reboot your phone!
6. Download Rootchecker in Playstore and verified if rooted!. Enjoy!
FLARE XL PLUS ROOTED


HOW TO FLASH TWRP RECOVERY....UPCOMING...


Labels: , , , ,

Thursday, July 21, 2016

How to root Cherrymobile Cubix Cube 3 and flash TWRP recovery

How to root Cherrymobile Cubix Cube 3 and flash TWRP recovery
This time I will teach you on how to root Cherrymobile Cubix Cube 3 using
Kingroot one of the popular tools for rooting. Make sure you have enough battery and maximum internet speed either data or wifi connection.

Cubix Cube 3 Rooting via Kingroot


Warning: Rooting can void your warranty!

Requirements:
Kingroot4.1.zip (download and extract)
Cubix Cube 3

1. Make sure you have atleast 30% remaining battery and have good internet connection.
2. Download and install Kingroot
3. Open Kingroot then Click OPTIMIZE NOW. Then wait.

KINGROOT OPTIMIZE

4. You will notice you have 3 installed apps. You can delete all except Kinguser.
5. Then reboot your phone!
6. Download Rootchecker in playstore and verified if rooted!. Enjoy!

Rootchecker Verified

HOW TO FLASH TWRP RECOVERY....UPCOMING...


Labels: , , ,

Saturday, July 16, 2016

How to Root Asus Zenfone 2 Laser ZE550KL/ZE551KL?

Hello Zenfone laser  ZE550KL/ZE551KL users around the globe!

Asus Zenfone 2 Laser ZE550KL/ZE551KL Screenshots 

We have gain root access to new version.

In order to gain root access for this version, We unlock bootloader with official release of ze551kl unlock toolkit.

Since we have unlock bootloader, so we do not need to patch system file in order to gain root access.

xposed framework version78 patched released by
@Shakalaka working well, xposed modules were not working properly in previous version.
How to root Zenfone 2 Laser


Follow these steps In order to gain root access:

1st: Update your firmware to latest version,
Firmware Update

2nd: Unlock your bootloader by using any official unlock bootloader
Bootload Unlock

3rd: Download attached file
Attached File

4th: Connect your phone as usual, run commands to get in fastboot mode

then use command
Code:
fastboot boot boot_200007.img 
Let process complete & phone will restart automatically.

Congrats! Now you have working root for this version.


Credits :
Xda-Developers
Shakalaka


Labels: , ,