Monday, November 27, 2017

DOWNLOAD ANDROID 6.0 STOCK ROM FOR GIONEE P5W| for stock rom go to rompure.com

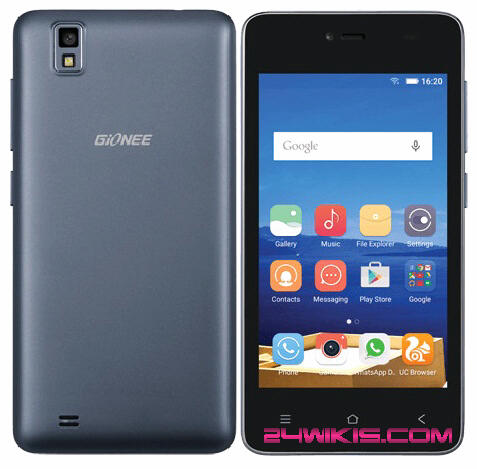
Gionee P5W users running  OS 5.1.1 lollipop can now upgrade their device to Android 6.0 Mashmallow. Users can also use this ROM to unbrick their bricked device. For users who do not know how to unbrick a bricked device, you can refer to an earlier article I wrote on how to unbrick your phone using SPFlash tools
DOWNLOAD ANDROID 6.0 STOCK ROM FOR GIONEE P5W

Gionee P5W is a 5.0-inch display with a resolution of 720 x 1280 pixels (~294 ppi pixel density), and the device is powered by Quad-core 1.3 GHz Cortex-A53, MediaTek MT6735 processor with 1GB of RAM and 16GB of internal (Expandable upto 32GB). Gionee P5W now runs on Android 6.0 Marshmallow.

The GIONEE P5W stock ROM on this page will allow you to restore your bricked Gionee device's to it original factory state, and you can also use the file to upgrade your phone to the latest version for those still running Android 5.1.1. This file will come handy whenever you mess up with your device and you’re not sure how to fix it, you can just restore it back to its factory state.


Disclaimer: This site or its Authors will not be held responsible if you damage your device. Ensure you backup all your files, pictures, vidoes, contacts before flashing the ROM

If you encounter any error while flashing your device, please let us know in the comments
Report if you cannot download any of these files.

DOWNLOAD GIONEE P5W STOCK ROM

Labels: ,

Saturday, November 25, 2017

Tecno Camon CX Stock Rom Firmware Download| for stock rom go to rompure.com

In the means of try to root your Tecno Camon Cx or installing custom Roms, you might accidently got your Smartphone bricked. Then the need arise to unbrick the phone using the Stock Rom.
Tecno Camon CX 

READ ALSO

How To Root Tecno Camon CX And Install TWRP Recovery


Tecno Camon CX (Tecno Camon C10) is the 2017 top of the line member of Tecno’s Camon CSeries family of camera-focused phones. It is a direct successor of the Tecno Camon C9 and offers a stripped down and sleeker variant called the Camon CX Air. Tecno Camon CX is a 64bit 4G LTE smartphone which runs on Android 7.0 Hios v2.0 and is powered by a MediaTek MT6755T, 1.5GHz octa-core chipset with 2GB ram. In terms of storage, the device comes with a 16GB internal storage with support of 128GB SD Card. Tecno Camon CX sports an equally impressive 16 megapixels camera with dual-LED flash on the front. This means both cameras are bound to be great for photography and selfie enthusiasts. The rear camera features a quad-LED Ring flash. Camon CX boast of 3200mAH Li-ion non removable battery which can last up to two days without heavy usage.

Tecno Camon CX sports a 5.5-inch display with 1080 x 1920 pixels resolution. This puts it at the same size and pixel density as its predecessor. Camon CX has a fast fingerprint sensor that unlocks your phone in as little as 0.1 second. Tecno Camon CX supports 4G LTE on all LTE networks in Nigeria including Glo, MTN, NTel, Etisalat, Smile, and InterC. 
Download Link

Labels: ,

Friday, December 2, 2016

How to Flash Stock Rom in your Lenovo A369i

Lenovo A369i Image 1 Front and Back View


Video tutorial: WATCH

This is a tutorial on how to install stock ROM using SP Flash tool. It can be used to fix your device usually when the phone won't boot properly or when you want to upgrade/downgrade your firmware. SP Flash tool is a PC software that can restore all partitions in your Android device like recovery, boot, system and such. Another good thing about it is that you can you restore even a bricked (won't turn on at all) device. I will, however, give no guarantee as this is just based on my own experience. Before doing tutorial I would also like to tell you that I will not be responsible if anything bad happens to your Android device through this guide. :)
Firmware download links
Here are the download links for the firmware versions of Lenovo A369i. SP Flash Tool and the drivers comes with each of them but if you like to download them without the firmware, I have also provided a download link for both.
A369i_ROW_S201_140610 (You will need a NeedROM account)
A369i_ROW_Lite_S005_140823 (You will need a NeedROM account)
Alternative version for SP Flash Tool, you don't need this if the the flash tool bundled in the firmware is working fine.
Before we use SP Flash tool, we must first install the drivers for it to detect your device.
Installing drivers
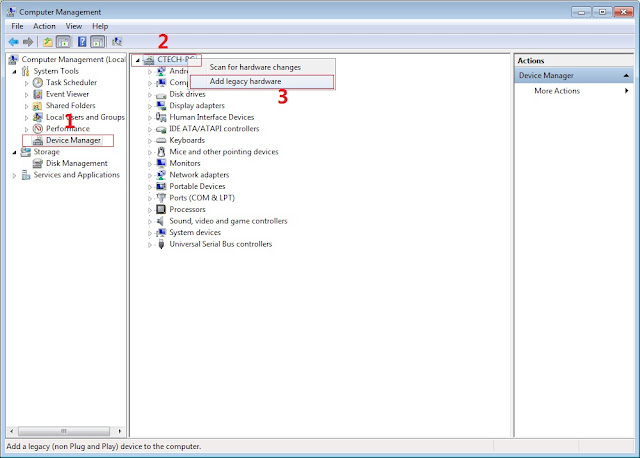
1. Launch Device Manager on your PC. You can do this by typing "device manager" on your PC's search textbox or in Control Panel→Hardware and Sound→Device and Printers then click Device Manager.
2. In Device Manager, add a legacy hardware. Do this by clicking Action then Add legacy hardware or right-clicking the -PC then click Add legacy hardware there. Add Hardware Wizard will pop up, click Next.
3. Choose "Install the hardware that I manually select from a list (Advanced)" then click Next. Wizard will ask you what the category of hardware you will install, make sure Show All Devices is selected then click Next.
4. Wizard will now ask you to select the manufacturer and model of your hardware device. Click Have Disk, then click Browse. Select usb2ser_Win764.inf from the files you have downloaded then click Open. Click OK, the select MediaTek DA USB VCOM Port.
5. Click Next, then Next again to start installing the drivers. Once finished, click Finish.
6. You know have to repeat steps 2 to 3 but you have install MediaTek PreLoader USB VCOM Port instead of MediaTek DA VCOM Port.
Flashing through SP Flash tool
1. Run Flash_tool.exe then in Download tab, click Scatter loading. Windows will ask you to select the scatter file. Select the MT6572_Android_scatter.txt which will be on the folder where files like boot.img and system.img are stored. Click open and wait for scatter file to finish loading (older versions of SP Flash tool do not load the scatter file).
2. Click Download and wait for the partitions to finish loading. Once their finished, turn off your device and remove battery. Connect the device to the PC and SP Flash tool should start installing. Wait for SP Flash tool to finish installing.
3. Once SP Flash tool is done flashing, a green circle or a green check mark should appear. If they come in a different color, you will have to repeat the flashing process. You can now disconnect your device and put the battery.
4. Turn on your device. First boot usually lasts 5 minutes or greater.
5. Once your device finishes booting, flashing process is successful. You can now use your device.
In case you run into any errors while using SP Flash Tool, please take note of the error message then refer to these forums for more information:
https://forum.hovatek.com/thread-439.html
http://bbs.elephone.hk/thread-2720-1-1.html#.Vvfs-nWcF0s
http://forum.gsmhosting.com/vbb/f781/sptool-flasher-problems-error-solution-all-one-place-1889647/

Labels: , , ,

Saturday, November 19, 2016

how to flash Cherry mobile flare lite stock rom v1 via custom recovery

Cherry mobile flare cosmos force


[Stock rom(download the backups.zip)##download##]

*Turn off your device.
*Press power botton + volume up (sabay)
Select
*wipe and format options
-factory reset
-wipe cache
-wipe dalvik/art cache
*Install zip from sd
Select and install...
After installing
Go back to
*wipe and format options
-wipe cache
-wipe dalvik/art cache
Then Reboot..

Labels: , , , , , , ,

Sunday, November 13, 2016

How to flash cherry mobile flare j1 mini stock rom via SPD


Cherry Mobile Flare J1 Picture
requirements:
1.[FLASH TOOL##download##]
2.[SPD DRIVER##download##]
3.[Stock rom ##download##]

password:GSM_mazzamok
INSTRUCTIONS: 1. DOWNLOAD MO LAHAT NG NASA LINKS. 2. INSTALL USB DRIVERS AYON SA VERSION NG PC MO. 3.EXTRACT MO YUNG PAC FILES, KAHIT SAAN YUNG MADALI MONG MAKITA. 4.OPEN FLASHTOOL, CLICK MO YUNG GEAR NA ICON. HANAPIN MO YUNG PAC FILE. 5. TANGALIN MUNA BATTERY THEN BALIK ULIT, CLICK VOLUME DOWN, INSERT USB CABLE. 6. TAPOS CLICK MO YUNG ARROW SA FLASHTOOL. 7. WAIT TO DOWNLOAD ALL FILES. 8.DONE FLASHING!!!

Labels: , , , , ,

Tuesday, October 4, 2016

[ROM] Yadda Zaka Mayarda Wayarka Gionee P2 Lollipop 5.0.1 Batare Da Computer Ba

[ROM] Yadda Zaka Mayarda Wayarka Gionee P2 Lollipop 5.0.1 Batare Da Computer Ba

picsart-08-09-07-25-36.jpg
picsart-08-09-07-28-06.jpg
picsart-08-09-07-29-43.jpg

Assalamu Alaikum Barkanmu Dan Wannan Lokaci Damuka Sake Haduwa Daku A Wannan Darasi Na Upgrading Waya Daga V4.2.1 Zuwa V5.0.1.


Wannan Dai Nasan Bawai Sabon Abu Bane Wanda Mutane Basusan Dashiba, To Amman Nasan, Dukda Haka Akwai Mutanen Da Basu-san Anayin Hakanba.


Kokuma Sunsan Anayin Hakan To Amman Basu-san Tayaya Zasuyiba To Yau Insha Allahu Zan Warware Bayani Anan Sala-Sala, Domin Kowa Ya Fahimci Yaya Zaiyiwa Wayarsha.


A Wannan Bayanin Zanyi Shine Kan Yarda Zaka Mayar Da GIONEE P2 4.2.1
Zuwa 5.0.1.

YADDA AKEYI


Kashiga Recovery Na Wayarka.


1. Wipe User Data/Factory Reset
2. Wipe Cache
3. Shiga Advance Options And Wipe Delvic Cache, Dakuma Battery Status.
4. Saika Koma Baya Kashiga Install Zip From SD Card
5. Shiga Install From SD Card Saika Zabi Wannan Rom Dakayi Download
6. Saika Jira Harsai Ta Gama, Saikayi Reboot Nawayar Taka, Amman Zata Dan Dauki Dogon Lokaci Kafin Ta Kama Loading...

Ga Link Din Custom Rom Din Anan.

Download Now

Labels:

Sunday, October 2, 2016

Download Latest Gionee P2M Flash File / Stock Rom

Download Latest Gionee P2M Flash File / Stock Rom


***Flashing Procedures:-
Your Android Phone Should Have at Least 50% Or 70% Percent of Battery To Start The Flashing Process.

Step 1: Download & Install USB Driver On Your Computer if in Case Driver is Already Installed on Your Computer Then Skip This Step.
Step 2: Download Stock Rom File For Your Android Device.
Step 3: Download & Extract Flash Tool on Your Computer. After Extracting You Will Be able To The Following.
Step 4: Now Open Flash Tool.
Step 5: Once Flash Tool Launched, Connect Your Android Device To The Computer Via USB Cable.
Step 6: Once Your Smartphone is Connected Successfully To The Computer & Click on Load Rom File Via Flash Tool.
Step 7: Click on The Start Downloading Button During The Flashing Process Your Device Will Restart Automatically.
Step 8: Once Flashing is Completed.

Gionee_P2M_T5189.zip (1.3G)

Download Now
Gionee_P2M_0202_T5274.zip (1.3G)

Download Now

(Thanks To Cybersadik).

Labels:

Download Latest Gionee M5 Lite Flash File / Stock Rom

Download Latest Gionee M5 Lite Flash File / Stock Rom


***Flashing Procedures:-
Your Android Phone Should Have at Least 50% Or 70% Percent of Battery To Start The Flashing Process.

Step 1: Download & Install USB Driver On Your Computer if in Case Driver is Already Installed on Your Computer Then Skip This Step.
Step 2: Download Stock Rom File For Your Android Device.
Step 3: Download & Extract Flash Tool on Your Computer. After Extracting You Will Be able To The Following.
Step 4: Now Open Flash Tool.
Step 5: Once Flash Tool Launched, Connect Your Android Device To The Computer Via USB Cable.
Step 6: Once Your Smartphone is Connected Successfully To The Computer & Click on Load Rom File Via Flash Tool.
Step 7: Click on The Start Downloading Button During The Flashing Process Your Device Will Restart Automatically.
Step 8: Once Flashing is Completed.

Gionee_M5_lite_T5184.zip (1.7G)Download Now
(Thanks To Cybersadik).

Labels:

Friday, September 30, 2016

How to fix bootloop in Cherry Mobile Cubix Cube 3 with Stock Rom flash via SPFT

How to fix bootloop in Cherry Mobile Cubix Cube 3 with Stock Rom flash via SPFT
This tutorial help you oh how to fix bootloop and hardbrick in Cubix Cube 3.

Cubix Cube 3 Stockrom


Requirements:
PC
USB Cable

Download Links:
Mediatek VCOM Drivers
Cubix Cube 3


 Instructions
1. Download all necessary files and Enable USB Debugging mode in your phone..
2. Install Drivers USB_VCOM_Driver.rar
In Device Manager Right click on PC name(Right Side) and then click on Add legacy hardware as shown in image below.

Driver Installation
Now in Add Hardware Wizard click on Next » Install the Hardware that i manually select from a list (Advanced) » Show All Devices » Next » Have a Disk, Now select the any inf file from where you extracted the downloaded VCOM driver package.

Driver Installtion 2

3.  Now Click on Next and select Install this driver software anyway and wait for finishing the process.

Driver Installation 3

4.  After installation is finished then Restart your computer, That's it.
5. Open flash_tool.exe, click on the Download Tab
 Extract the downloaded Cubix Cube 3 stock rom to the new folder you created.
Driver Installation 4

6. Click Scatter-loading and browse for the scatter file (MT6753_Android_scatter)
7. For Bootloop only
 Make sure flashing mode is set to "Download Only" and check mark all except Preloader.
Note: If deadboot/hardbrick set "Download+Format" and check Preloader.
8. Click Download.
SPFT Download

9. Turn off your phone, connect your phone to the PC and wait for the flashing to commence.
10. Green Circle image with check will show once flashing is completed. That's it!

SPFT Success

11. Disconnect your phone in USB cord then open if still bootloop then try to factory reset in recovery settings. To go in recovery mode reboot your phone hold and press power on and volume up simultaneously until recovery mode appeared.
Credits:
Cubix Cube 3 Official Group

Labels: , , ,

Thursday, September 29, 2016

How to fix bootloop in Cherry Mobile Flare S4 Max via SPFT

How to fix bootloop in Cherry Mobile Flare S4 Max included Stock Rom flash via SPFT
This tutorial is able to help you oh how to fix bootloop and hardbrick in Flare S4 Max.
In case you don't have backup and installed custom recovery you can proceed in this procedure.

ow to fix bootloop in Cherry Mobile Flare S4 Max


Requirements:
PC
USB Cable

Download Links:
Mediatek VCOM Drivers
Flare S4 Max Stock rom(v2.9 lollipop)


 Instructions
1. Download all necessary files and Enable USB Debugging mode in your phone..
2. Install Drivers USB_VCOM_Driver.rar
In Device Manager Right click on PC name(Right Side) and then click on Add legacy hardware as shown in image below.

Driver Installation
Now in Add Hardware Wizard click on Next » Install the Hardware that i manually select from a list (Advanced) » Show All Devices » Next » Have a Disk, Now select the any inf file from where you extracted the downloaded VCOM driver package.

Driver Installtion 2

3.  Now Click on Next and select Install this driver software anyway and wait for finishing the process.

Driver Installation 3

4.  After installation is finished then Restart your computer, That's it.
5. Open flash_tool.exe, click on the Download Tab
 Extract the downloaded Flare S4 Max stock rom to the new folder you created.
Driver Installation 4

6. Click Scatter-loading and browse for the scatter file (MT6753_Android_scatter)
7. For Bootloop only
 Make sure flashing mode is set to "Download Only" and check mark all except Preloader.
Note: If deadboot/hardbrick set "Download+Format" and check Preloader.
8. Click Download.
SPFT Download

9. Turn off your phone, connect your phone to the PC and wait for the flashing to commence.
10. Green Circle image with check will show once flashing is completed. That's it!

SPFT Success

11. Disconnect your phone in USB cord then open if still bootloop then try to factory reset in recovery settings. To go in recovery mode reboot your phone hold and press power on and volume up simultaneously until recovery mode appeared.
Credits:
Socrates of Needrom

Labels: , , , ,

Monday, July 25, 2016

Tutorial on How to Flash Stock Rom(Original Firmware) of Acer Liquid Z5 (Z150) via Sp Flash Tool

Tutorial on How to Flash Stock Rom(Original Firmware) of Acer Liquid Z5 (Z150) via Sp Flash Tool


Welcome Acer Liquid Z5 (Z150) Users! 
Is your phone bootloop and you can't fix it because you don't have any recoveries? Does your phone still experience  lag eventhough your done formating your device or even factory reset(hard reset) it?Facing Deadboot(Hardbrick)? Well, I think flashing it with original firmware is the best solution for your problem.


Acer Liquid Z5 (Z150) Screenshots


Requirements:
PC and USB Chord
Acer Liquid Z5 (Z150)

Download the following:

Drivers:
MT65xx-USB-Driver
MT6577 USB VCOM Drivers

Sp Flash Tool: 
Sp Flash Tool

Stock Rom(Original Firmware):
Acer_Liquid_Z5_Z150_Stock_ROM

Scatter File:
Scatter File


We are not responsible if anything happens to your phone.

Step by Step Tutorial Fo Flashing Stock Rom(Original Firmware) Using Sp Flash Tool:

*This can fix bootloop
*Phone lagness
*Making back the Original Rom

1. Ready your cable and phone. Must have atleast 70% charge. Phone must be turned off.
2. All of the files are in zip file, so you need to extract them all.Better if you will make one folder for your files then extract it.
3. Enable USB Debugging mode in your phone.
4. Install all MT65xx-USB-Driver
5.Install  USB VCOM Drivers
 In Device Manager Right click on PC name(Right Side) and then click on Add legacy hardware as shown in image below.

 USB VCOM Drivers Screenshots

Now in Add Hardware Wizard click on Next » Install the Hardware that i manually select from a list (Advanced) » Show All Devices » Next » Have a Disk, Now select the any inf file from where you extracted the downloaded VCOM driver package.

USB VCOM Drivers Screenshots

  Now Click on Next and select Install this driver software anyway and wait for finishing the process.


USB VCOM Drivers Screenshots

4.  After installation is finished then Restart your computer, That's it.
5. Open Flash tool click on the Download Tab
 Extract the downloaded Acer Liquid Z5 (Z150) stock rom to the new folder you created.
(NOTE: I'm using other screenshots of other phone since I don't have that device though the process is still the same so no worries).

Sp Flash Tool Screenshots

6. Click Scatter-loading and browse for the scatter file (MT6575_Android_scatter)
7. For Bootloop only
 Make sure flashing mode is set to "Download Only" and check mark all except Preloader.
Note: If deadboot/hardbrick set "Download+Format" and check Preloader.
8. Click Download.

Sp Flash Tool Screenshots


9. Turn off your phone, connect your phone to the PC and wait for the flashing to commence.
10. Green Circle image with check will show once flashing is completed. That's it!

Sp Flash Tool Screenshots

11. Disconnect your phone in USB cord then open if still bootloop then try to factory reset in recovery settings. To go in recovery mode reboot your phone hold and press power on and volume up simultaneously until recovery mode appeared.

Hope it helps! Thanks!

Labels: , ,

Thursday, September 17, 2015

[ROM] Cherry Mobile Flare X Stock Rom Flash Via SPFT

[ROM] Cherry Mobile Flare X Stock Rom Flash Via SPFT

Cherry Mobile Flare X Screenshots

Cherry Mobile Flare X
1.7GHz MediaTek 6752 64-bit octa-core processor
Mali T760 MP2 GPU
3GB of RAM
5.5-inch full HD IPS OGS display,
Gorilla Glass 3, 1920 x 1080 resolution
16GB of storage, with SDcard slot
13-megapixel rear camera, 
Sony IMX214 sensor, BSI
5-megapixel wide angle front camera
Dual sim (micro) dual 3G, LTE
WiFi, Bluetooth, GPS, NFC
USB-OTG capable
3000mAh removable battery
Android 4.4 KitKat with OTA for Lollipop 5.1


Download Link:
Flare_X_V2_20150811-082738.zip
Flash this Stock Rom via SPFT using PC follow this procedure [CLICKHERE]


Credits:
MARK BRIAN ABAD
ADAM GONTIER
CM FLARE X UNITED

Labels: , ,

Friday, December 20, 2013

Lexing 7 inch Android Tablet Official Firmware

Lexing 7 inch  Tablet Android Official Firmware

Flashing Tools, Tips and Tutorials 

Allwinner A13 Tablet Firmware


CPT_XW711V1.6-X708S_Android-4.0.4  Generic Rom
Board ID: XW711 V1.6.1

CPU : Allwinner A13 wikipedia

Flashing Tools :

Flashing Tool : Livesuit 
Flashing Tutorial : how to flash tablet with Livesuit
Additional Android Reset Tools : 

You can also use : Android Multi Tools

Technical Information Tablets

The following firmware / ROM file will be used   when your Android tablet facing various problems . In case of
1. Forgotten Pattern Lock , 
2.Too many pattern attampt / Reset user lock
3.Tablet stuck on Gmail account
4. Tablet stuck on Android logo
5.Tablet hang on start up 
you can use this Android Tablet firmware  ROM to make your Android China tablet working again . Make sure to charge battery . Power failuer during flashing may result dead or broken tablet.
Flashing stock firmware should be last option

Firmware Download :

Labels: , , , , ,

Monday, August 19, 2013

ONYO Winner Color Edition 7 Android Tablet Official Firmware.


ONYO WINNER 7 Color Edition
Allwinner A10 Android Tablet Firmware . 


software update

Download Firmware 

ONYO WINNER 7 COLOR EDITION.

ONYO Winner Team Edition 7

Download Firmware  


How to flash Allwinner tablet . 


Tablet Spec : 


Allwinner the A10 ARM Cortex A8 single core
1.6 GHz of speed (1.2 GHz and 400 MHz GPU)
4GB NAND FLASH 
Wi-Fi 802.11 b / g / n
 External USB 3G device 
 1.3 Megapixels frontal camera 


Labels: , , , , , ,